rodac RC197 Скачать руководство пользователя страница 8

Page 8 


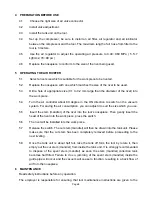
PREPARATION BEFORE USE 

4.1 

Choose the right size of air valve connector. 

4.2 

Install valve adjustment. 

4.3 

Install the tank unit on the tool. 

4.4 

Set up the compressor, be sure to install an air filter, air regulator and air lubricator 

between the compressor and the tool. The maximum length of air hose from filter to the 

tool is 3 meters. 

4.5 

Use the air regulator to adjust the operating air pressure to 0.49~0.69 MPa ( 5.5~7 

kgf/cm2, 78~99 psi ) 

4.6 

Replace the nosepiece to conform to the size of the rivet being used. 


OPERATING THE AIR RIVETER 

5.1 

Select a rivet size which is suitable for the work piece to be riveted. 

5.2 

Replace the nosepiece with one which matches the size of the rivet to be used. 

5.3 

Drill a hole of appropriate size (0.1 to 0.2 mm large than the diameter of the rivet) into 

the work piece. 

5.4 

Turn the air controller about 90 degree in the ON direction to switch on the vacuum 

system. For saving the air consumption, you can adjust it to suit the size which you use. 

5.5 

Insert the stem (mandrel) of the rivet into the tool’s nosepiece. Then gently insert the 

head of the rivet into the work piece, press the switch. 

5.6 

The rivet will be installed into the work piece. 

5.7 

Release the switch. The cut stem (mandrel) will then be drawn into the tank unit. Please 

make sure that the cut stem has been completely removed before proceeding to the 

next riveting. 

5.8 

Once the tank unit is about half full, take the tank off form the tool by rotate it, then 

empty out the cut stem (mandrel) from inside the tank unit. It is strongly recommended 

to dispose of the spent stem (mandrel) as soon the stem (mandrel) collection tank 

becomes half filled. Failure to do so, jamming of the spent stem (mandrel) inside the 

guide pipe will occur and the vacuum will cease to function, resulting in a back flow of 

air from the nosepiece. 

6 MAINTENANCE 

Read safety instructions before any operation. 

The employer is responsible for ensuring that tool maintenance instructions are given to the 

Содержание RC197

Страница 1: ...Page 1 Hydraulic Air Riveter Recommend for mass production line industrial area Operation Manual RC197 RC198...

Страница 2: ...ion before Use 5 Operating the Air Riveter 6 Maintenance 6 1 Daily maintenance 6 2 Weekly maintenance 6 3 Moly Lithium Grease EP 3735 Safety Data 6 4 Annually maintenance 6 5 Jaw maintenance 6 6 Clean...

Страница 3: ...contact RODAC with your training requirements 1 2 2 Check all the tool parts are free from damage before use Any damaged parts should be repaired before the tool is used 1 2 3 Make sure that the tool...

Страница 4: ...ive contact with hydraulic fluid oil should be avoided To minimize the possibility of rashes care should be taken to wash thoroughly 1 2 17 Never looking into the nosepiece of the tool and never point...

Страница 5: ...Page 5 2 TOOL SPECIFICATION 2 1 Nomenclature...

Страница 6: ...65 kgs 1 75 kgs Tool size cm 31 x 13 x 27 32 x 13 x 33 32 x 14 x 33 2 4 3 2 4 0 4 8mm 3 2 4 0 4 8 6 4mm 3 2 4 0 4 8 6 4mm Applicable rivets 3 32 1 8 5 32 3 16 1 8 5 32 3 16 1 4 1 8 5 32 3 16 1 4 Remar...

Страница 7: ...3 2 4 0 4 8 6 4 Fastener Name 1 8 3 32 3 16 1 4 Aluminum body Steel stem V V V V Steel body Steel stem V V V V Stainless body Steel stem V V V V Stainless body Stainless stem V V V V Structure rivets...

Страница 8: ...ch on the vacuum system For saving the air consumption you can adjust it to suit the size which you use 5 5 Insert the stem mandrel of the rivet into the tool s nosepiece Then gently insert the head o...

Страница 9: ...ore connecting the air hose to the tool If there is a fitter drain it 6 1 4 Check that the nose assembly is correct to the fastener to be placed 6 1 5 Check the stroke of the tool meets the minimum sp...

Страница 10: ...lowing the disassembly procedure in reverse NOTE z When re assembling be sure to apply a lubricant such as grease to all moving and sliding parts z Be careful not to leave out any parts and tighten al...

Страница 11: ...y procedure in reverse 6 8 Adding oil 6 8 1 Take off the air sourcing connection carefully The compressed air may cause the air hose to whip around and injury may result 6 8 2 Use hex key wrench to re...

Страница 12: ...first check the FAULT DIAGNOSIS items below and then make a note of the model number the usage conditions and the trouble symptoms in as much detail as possible If you can provide this kind of informa...

Страница 13: ...2 Air outlet hole muffler is blocked Replace the muffler Piston does not operate or returns very slowly or operation is not smooth 3 The inside of the cylinder is dirt so that the air piston cannot re...

Отзывы: