2
Wiring Procedure
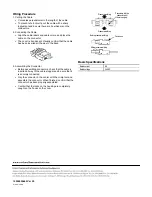
1. Cutting the Cable
S
Cut cables perpendicular to the length of the cable
S
To prevent short-circuits, cut the cable with a sharp
instrument and be sure there are no whiskers on the
conductors.
2. Connecting the Cable
S
Align the cable labels and cable colors, and place the
cable on the connector.
S
The cover is translucent. Visually confirm that the cable
has been inserted all the way to the back.
3. Assembling the Connector
S
Before assembling connectors, check that the cable is
inserted all way to the cable stopper and be sure that it
is securely connected.
S
Grip the connector in the center with the crimp tool and
assemble the connector. When finished, confirm that the
connector has been properly assembled.
S
Confirm that the locks on the housing are completely
caught on the hooks on the cover.
Pressure-welding
Pressure-weld the
connector until
there is no gap.
Pressure-welding
Before pressure-welding
After pressure-welding
Cover hook
Basic Specifications
Rated current
5 A
Rated voltage
25V DC
10000030663 Ver 00
Printed in USA


