3
Connecting the Vacuum Clamp Pods
If using with the Gast Vacuum Pump Kit (52881, sold separately)
or another vacuum pump that generates about 25"Hg of suction,
it is recommended that a maximum of four Vacuum Clamp Pods
be connected in a series. Additional Vacuum Clamp Pods may be
linked if a more powerful vacuum pump is used
.
1. Use scissors or a utility knife to carefully cut the included
clear rubber tube to sections of desired lengths.
2. One of the Vacuum Clamp Pods will have a brass barb fitting
on one side and a brass plug fitting on the other. Push the end
of one section of PVC tubing onto the brass barb fitting on
that Pod until it passes at least the third barb.
Fig. 1.
Do not use soap or any other lubricant on
the brass barb fitting to make the tubing slide on easier.
Lubricant could compromise the seal or be drawn into the
vacuum pump, potentially causing damage.
3. Press the other end of that section of tubing onto one of the
brass barb fittings on the other Vacuum Clamp Pod, again
until it passes at least the third barb.
4. Press one end of the remaining section of tubing onto the
other brass barb fitting on the second Vacuum Clamp Pod
as you did on the others
5. Press the connector fitting from the pump into the other end
of that section of tubing.
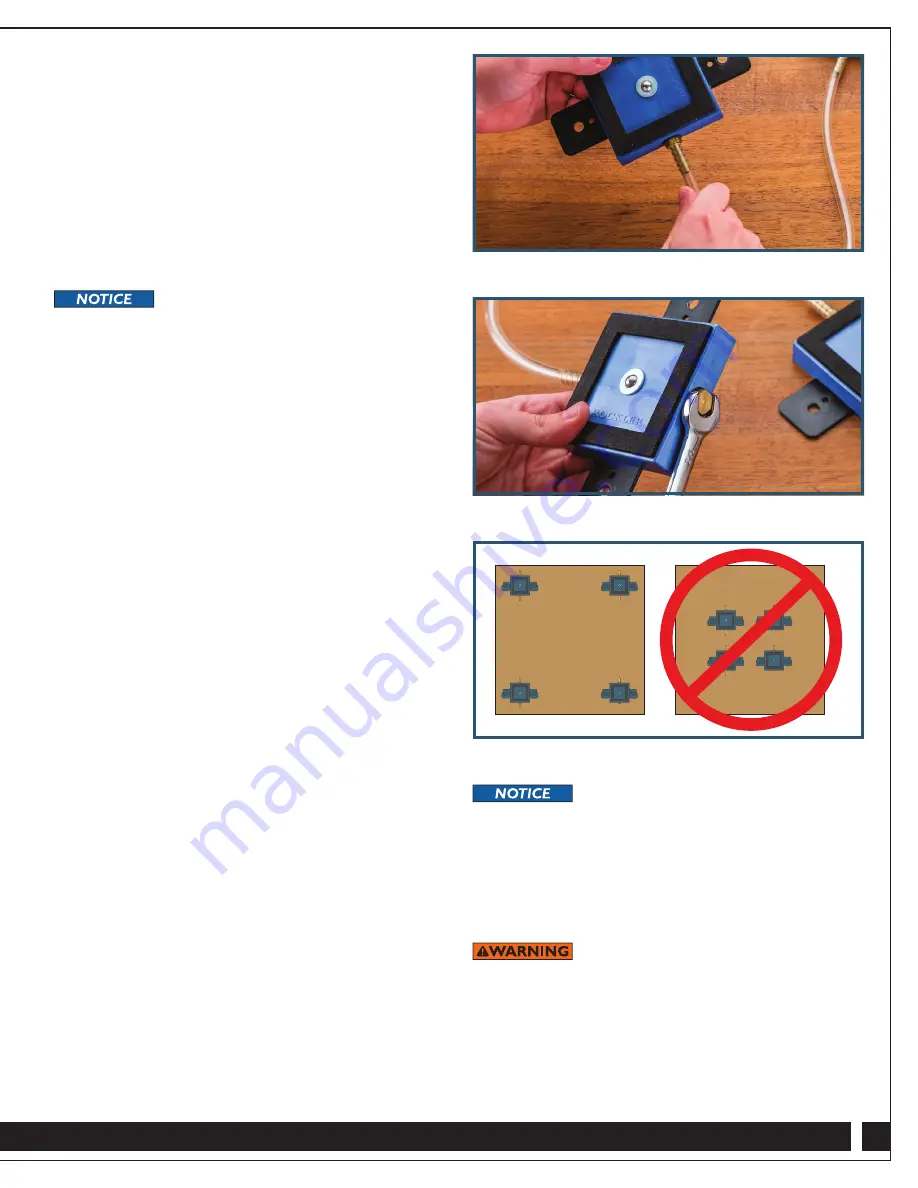
Connecting additional pods to the series: Use a 1/2"
wrench to unscrew and remove the brass plug fitting from the
last Vacuum Clamp Pod and replace with the included extra
brass barb fitting.
Fig. 2. Then connect to the additional
pods with tubing. Additional 8' sections of tubing are
available (58991, sold separately).
Removing tubing from the brass barb fittings: Carefully cut
the tubing away at the end of the fitting. Then cut the tubing that
remains on the fitting lengthwise along the fitting and
peel it away.
Securing Vacuum Pods to T-Tracks
1. Install the T-bolts in the larger holes in the metal tabs on the
Vacuum Clamp Pods and thread on the flip-down knobs
.
2. Slide the Vacuum Pods’ T-bolts into the T-track and position
as desired.
Fig. 3. Tighten the flip-down knobs to secure.
Securing Vacuum Pods to Another Surface
1. Position the Vacuum Pods as desired on the work surface
.
Fig. 3.
2. Drive panhead screws (not included) through the small holes
in the metal tabs to secure.
Using the Vacuum Clamp Pods
1. Turn on the vacuum pump.
2. Position the workpiece as desired and press it onto the
Vacuum Clamp Pods, checking to be sure that all pods
are engaged. Depending on the flatness of your material,
you might need to apply pressure at different points on
the workpiece.
Make sure that the workpiece covers the
entire top surface of all Vacuum Clamp Pods to create a
tight seal; otherwise, vacuum pressure cannot be achieved.
3. Once all Vacuum Clamp Pods are engaged, check the
pressure gauge on the vacuum pump to be sure that it’s
maintaining suction.
4. Push and pull on the workpiece to verify a strong hold.
Always test the strength of the suction hold
before machining the workpiece. A weak hold could allow
the workpiece to release, potentially causing serious injury.
5. To release the workpiece, turn off or unplug the vacuum pump
and wait a few seconds for the the suction to let go.
Check Rockler.com for updates. If you have further questions, please
contact our Technical Support Department at 1-800-260-9663
Fig. 1
Fig. 2
Fig. 3 - Pod positioning under workpiece


