background image


ACCESSORIES - INSTALLATION 

OVEN SHELVES – Installing and removing wire racks 
 

1.  Check the oven is cool and switched off. 
2.  Open the oven door. 
3. 


Remove all shelves for main oven. 

4.  Slightly squeeze the bottom two rows of the runner under the screw. 
5. Whilst squeezing the bottom two rows, pull the runner away from the side of the oven chamber. 
6. To fit the runners follow the steps in reverse order. 


TELESCOPIC STORAGE DRAWER  


Note:

 Above telescopic storage drawer’s maximum loading weight is 5kg. 


Содержание RHFS60WE

Страница 1: ...Installa on and Op ng Instruc ons Issue 1 Description Robinhood Freestanding Cooker 60cm White Model Number RHFS60WE Model pictured RHFS60WE ...

Страница 2: ...of its functions To avoid the ever present risks involved with using an electrical appliance i correctly and that you read the safety instructions carefully to avoid misuse and hazards It is important that you retain these instructions and your proof of purchase along with any other important documents about th product for future reference Due to continual product development Robinhood reserves th...

Страница 3: ...ated before any maintenance can be performed which includes changing a lamp 9 Electrical connection must be made as per local wiring rules and regulations Do not disconnect the appliance with wet hands or bare feet and do not disconnect the power cord with extreme force 10 For ovens the appliance needs sufficient air circulation while it is operating Carefully read the part of this manual where in...

Страница 4: ...r elements For this reason before using your oven run it empty at maximum temperature for 45 minutes At the same time you need to ventilate the environment in which the oven is installed 25 Do not leave the oven while cooking with solid or liquid oils There may be flaming up on conditions of extreme heating Never pour water onto the flames occurring from oil Immediately turn the oven off and cover...

Страница 5: ...7099 8450 W 598 894 88 43 15 593 ...

Страница 6: ...f this appliance can only be guaranteed if the oven is correctly and efficiently earthed The manufacturer declines all responsibility for damage resulting from a system which has not been earthed WARNING It is essential to use specific soft wire or specific groupware bought from the manufacturer or maintenance department to replace if the electrical soft wire has been broken Fitting a Power Supply...

Страница 7: ...by rotating anti clockwise Remove the lamp and replace with a lamp resistant to high temperatures 300 C with the following characteristics Voltage 220 240V Wattage 25W Type E14 Replace the glass cover and reconnect the appliance to the mains power NOTE Should you experience any difficulty please contact your nearest Authorised Service Centre ...

Страница 8: ...re The oven is designed to fit between kitchen cabinets spaced over 550mm apart The space either side of the oven needs only be sufficient to allow withdrawal of the oven for servicing It can be used with cabinets on one side or both sides as well as in a corner setting It can also be used free standing Installation Steps Determine the position for the oven and anti tilt plate Securely fix the ant...

Страница 9: ...urtains oil cloth etc Furniture surrounding the cooktop must be made of materials resistant to temperatures above 85 C The required changes to wall cabinets and exhaust fans rangehoods above a built in cooktop as well as minimum heights from the oven board are shown in the image below Accordingly the exhaust fan rangehood should be at a minimum height of 65 cm from the cooking surface of the cookt...

Страница 10: ...move all shelves for main oven 4 Slightly squeeze the bottom two rows of the runner under the screw 5 Whilst squeezing the bottom two rows pull the runner away from the side of the oven chamber 6 To fit the runners follow the steps in reverse order TELESCOPIC STORAGE DRAWER Note Above telescopic storage drawer s maximum loading weight is 5kg ...

Страница 11: ...2 Drawer panel 13 Anti slip Feet Control Panel 1 Light indicator for power on Left indicator will be on when oven function is selected Right indicator will be on when any cooktop zone is turned on 2 Mechanical Timer 3 Oven Function Switch Control Knob Sets oven function mode 4 Oven Temperature Control Knob Sets temperature for cooking 5 Cooktop Control Knobs 3 1 1 2 4 5 1 13 12 11 9 10 8 2 3 4 5 6...

Страница 12: ...OPERATING INSTRUCTIONS Setting the Time automatically shut down the oven after the set minutes and the timer will ring at the same time ...

Страница 13: ...ected Lamp This function turns the oven lamp on but n Lower Element This function turns the lower heating element on Grill This function turns the grill top element on for a more powerful grill function Conventional Cooking Bake This function turns on the upper lower heating elements for conventional cooking ...

Страница 14: ...foil on the hot ceramic hotplates Permanent damage will occur Choosing Cooking Pots Always use pots and pans with flat bottoms Uneven or thin bottoms will waste energy and cook slowly Always use pots and pans which are slightly larger than the hotplate Small pans waste energy Only put dry pots and pans on the hotplates Do not use pots and pans which are too large Pans which overhang the hotplate m...

Страница 15: ...a 110 1 100 Any 75 Patty cakes 190 2 180 Any 15 20 Sponge 180 2 170 Any 20 30 Plain butter cake 180 2 170 Any 25 40 Rich fruit cake 140 2 130 Any 180 Shortcrust cornish pasty 180 200 2 160 Any 40 45 Shortcrust custard tart 180 220 1 170 200 Any 20 30 Cream puffs 210 2 200 Any 25 30 Yeast bread 210 1 200 Any 25 30 Pizza 200 2 220 Any 15 25 Shelf position is counted from the bottom shelf up Bottom s...

Страница 16: ...s for cleaning the oven Cleaning the Oven You will obtain best results if you clean the oven interior while the oven is slightly warm Wipe the oven with a soft cloth that had been dampened in soapy water after each use then wipe it with a wet cloth once more and then dry it It may be required to use a liquid cleaning material from time to time and completely clean the oven Do not clean with dry an...

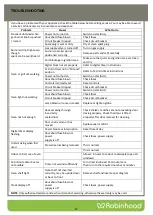
Страница 17: ...aker Oven light not working Power not turned on Switch on electricity Household fuse blown Check fuses Circuit breaker tripped Check circuit breaker Lamp blown or loose in socket Replace or tighten globe Oven not hot enough Heat escaping through incorrectly sealed door Check shelves or dishes are not preventing door closing properly Check that door is fitted properly after door removal for cleanin...

Страница 18: ...g products such as abrasive cream or powder cleansers furniture polish bleach mentholated spirits drain cleaners sugar soap metal pads and strongly alkaline or acidic cleaners Heat damage including from washing the product at high temperatures Impact or mishandling the product including the impact caused by objects scraped along thrown or dropped on the product surface or excessive weight being pl...

Страница 19: ...robinhood com au www robinhood com au Attention Customer Services Manager Warranty exclusions 1 The warranty does not apply where in Shriro s opinion The defect is caused by misuse wear and tear dirt fire or accidental damage The product has been repaired or serviced by an unauthorised person The product was not installed in accordance with our instructions The product was purchased overseas or wa...

Отзывы: