RoadScan Canada PBC10 Скачать руководство пользователя страница 9

3. Plug the USB cable directly into the computer 

4. Use the charging base with the 12 volt adaptor while in the vehicle 

IMPORTANT: if the camera is not used and charged on a consistent basis, the camera’s 
battery will lose the ability to hold a charge.  Batteries are not replaceable and not covered 
under warranty.  Please ensure to use and charge your camera often.


Figure 4


Page 7


Opening Files On the Computer 

1. Plug the camera into the computer via the USB cable. DO NOT FORCE THE USB INTO 

THE CAMERA - IT SHOULD FIT EASILY.  Forcing the USB into the camera may cause 
damage to the port.  Damage caused in this manner will not be covered under 
warranty. 
 

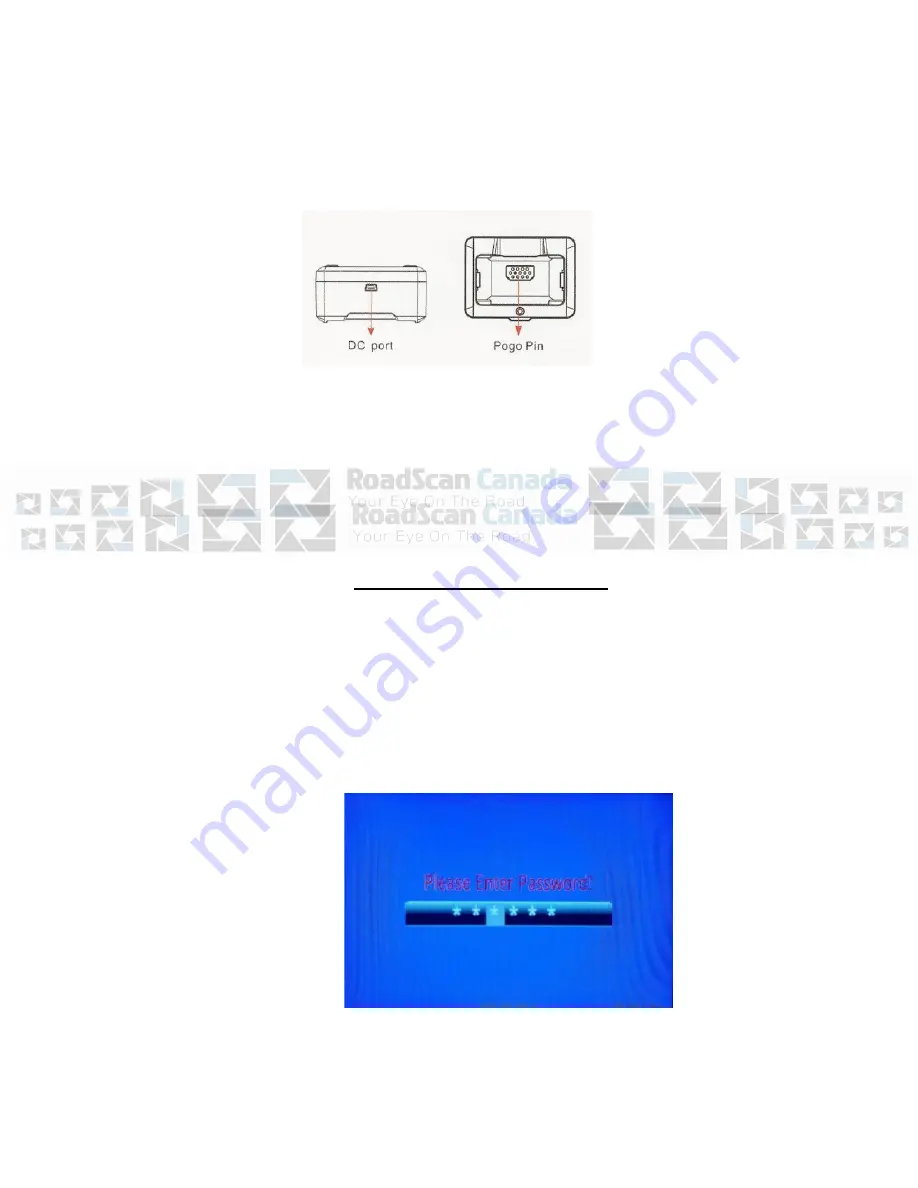
2. Once connected to the computer, the user will be prompted to enter their password 

(see Playback for instructions for password entry).  


Figure 5


3. After the password has been successfully entered, the camera screen will display a 

usb 

connecting 

message


Содержание PBC10

Страница 1: ...RoadScan Canada PBC10 User Instruction Manual...

Страница 2: ...n on IR for low light recording 11 USB port 12 LCD screen 13 One key play button and scroll up browser key 14 OK button similar to enter a short press ok b long press laser pointer 15 Menu access and...

Страница 3: ...turn the camera off use the power button Video To start a recording while the camera is on and not recording press the video record button on the right side of the camera from the screen The device wi...

Страница 4: ...n Star button 16 to highlight the audio file to be able to access the file faster and more easily once the audio has been downloaded onto a computer Statements are in WAV format Backing out of Screens...

Страница 5: ...p and Browse down buttons to scroll through other password entry options and press the OK button to select password entries Figure 1 If a mistake is made when entering a password hold the Browse up bu...

Страница 6: ...rowse up button to rewind videos Fast forward and rewind options can be sped up by tapping the browse buttons more than once Video mode has X2 X4 X8 X16 X32 X64 and X128 speed both forward and reverse...

Страница 7: ...0 seconds 3 6 30 Quality Normal Fine Super Fine 4 7 30 Pre record on off records 10 seconds prior to hitting video button 5 8 30 Post record on off continues recording 10 seconds after video turned of...

Страница 8: ...uld the camera be lost 29 30 Default Setting Allows the user to reset the device to the default settings 30 30 H22_20190302_v1 76 version of the device Page 6 Special Features Infrared Press the Infra...

Страница 9: ...camera often Figure 4 Page 7 Opening Files On the Computer 1 Plug the camera into the computer via the USB cable DO NOT FORCE THE USB INTO THE CAMERA IT SHOULD FIT EASILY Forcing the USB into the cam...

Страница 10: ...with this measure 5 Once located see figure 7 open the corresponding Drive If the computer does not recognize the camera unplug the USB cable and plug back in Page 8 Opening Files On the Computer Fig...

Страница 11: ...l demonstrate when the camera has been in operation If data is missing this file can be checked to ensure that the data files match the time and operation of use 7 Open DCIM then open 100MEDIA Figure...

Страница 12: ...compared to how much storage available Failure to delete files will result in the camera unable to record and important data may be missed Failure to delete files which results in missed data being re...

Страница 13: ...Y CAMERA PROPERLY FROM YOUR COMPUTER FAILURE TO DO SO COULD POTENTIALLY CORRUPT YOUR CAMERA AND OR COMPUTER THIS FAILURE WILL NOT CONSTITUTE A WARRANTY ISSUE Page 11 Camera Ports The PBC10 only featur...

Страница 14: ...ace the charging base onto the dashboard This will ensure that both pieces of Dual Lock are aligned properly Ensure that the PBC10 is aligned properly prior to pressing the Dual Lock onto the dashboar...

Страница 15: ...station The video button is a little harder to reach in this situation To stop recording hit the video button a second time AT NO TIME SHOULD YOU OPERATE THE PBC10 WHILE YOUR VEHICLE IS IN MOTION ANY...

Страница 16: ...reen Wifi indicator will be visible on the top of the rear screen Figure 15 3 Go to the Wifi Settings on the phone and locate MyDVR XXXXXX Figure 16 Page 14 Wifi App Settings 4 Enter the initial passw...

Страница 17: ...trol of recording and photographs will be functional Figure 17 a Video b Take a photo upper left corner c Adjust brightness upper left corner d Camera list if multiple cameras have been used by your p...

Страница 18: ...Figure 18 f Speedometer for dash camera functionality g Switch to hybrid GPS mode i Hybrid GPS view provides a video view date time and google maps location Figure 19 Page 16...

Страница 19: ...Quick settings provides the ability to adjust resolution sync your device format storage reset camera settings and more Figure 20 11 Images and videos can be edited with annotations change font colour...

Страница 20: ...Wifi App Settings 12 Files can be located in the file list for video and photos Figure 22 Figure 23 Page 18...

Страница 21: ...video while plugged into a computer this means that the camera is not charging or unable to view any data on the camera In this case unplug the camera and turn the camera off However the camera is un...

Страница 22: ...10 while operating a vehicle RoadScan Canada Inc shall not be held responsible for any traffic violations related to the positioning or improper use of the PBC10 Avoid mounting the camera outside of o...

Страница 23: ...all product safety and operating instructions Observe all warnings in the product operating instructions To reduce the risk of bodily injury electric shock fire and damage to the equipment observe the...

Страница 24: ...mployees unplugging of the unit resulting in loss of data or any condition other than what can be considered normal use Warranty Disclaimer RoadScan Canada Inc makes no other warranties express implie...

Страница 25: ...Page 22...

Отзывы: