RL TWEEDIE HALL Скачать руководство пользователя страница 6

Troubleshooting Image Issues 

If no image appears on the projection screen first check the cables are securely 
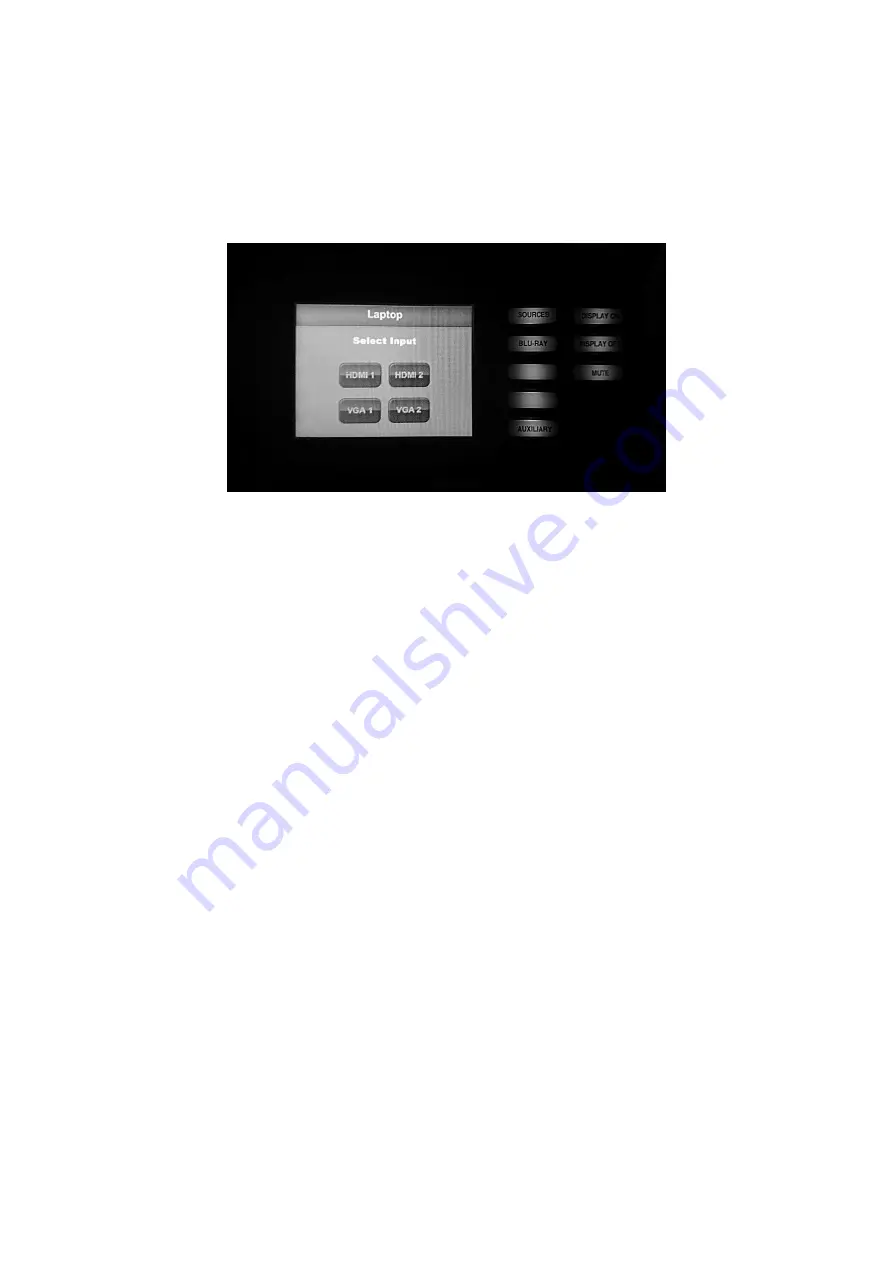
connected. Then check that the correct Sources option has been selected on the 
Extron Control Handset. Onscreen buttons 

VGA2

 or 

HDMI2

 should be selected (as 

appropriate) for cables connected to the ports shown previously 


If the above checks are carried out and there is still no image being projected onto 
the screen it is most likely that the laptop’s Display settings need adjusting. This 
option is accessed via the Control Panel screen on the laptop but it is not advisable 
for Operations staff to attempt this 

– in most cases the customer will be able to make 

the necessary adjustments themselves, but in extreme situations RL technical staff 
can be contacted for advice 

Dealing With Unusual Devices 

In some instances customers may arrive with laptops that do not have either VGA or 
HDMI connection ports. Apple devices such as Macs, Macbooks, etc., do not have 
these connection options, nor do Microsoft Notebooks. However, in most cases, 
customers using these devices will have their own adaptors that can connect to the 
cables we have available. As it is not possible for us to carry a stock of all current 
adaptors we are unable to help if the customer does not have the necessary 
equipment. 


Содержание TWEEDIE HALL

Страница 1: ...TWEEDIE HALL Basic operational instructions for Main Hall projection screen microphones and sound system...

Страница 2: ...N IS CLEAR OF ALL OBSTRUCTIONS Check that Extron Control Handset is correctly connected to system Blue cable indicated by arrow above Touch screen Press start on Extron Control Handset to begin set up...

Страница 3: ...d by pressing the onscreen button This will activate all three ceiling mounted speakers providing the widest possible sound coverage Option Large LR will only activate the outermost two speakers Optio...

Страница 4: ...he Laptop Most laptops can be connected to the ceiling mounted projector by VGA shown on left image below or HDMI shown on right image below cables The connection ports for both of these cable types c...

Страница 5: ...e Where possible a two way extension lead should be used as a minimum to give customers the option of plugging in extra devices ONCE IN POSITION ALL CABLES SHOULD BE SAFELY SECURED WITH GAFFA TAPE TO...

Страница 6: ...n the laptop but it is not advisable for Operations staff to attempt this in most cases the customer will be able to make the necessary adjustments themselves but in extreme situations RL technical st...

Страница 7: ...y to extend the audio cable by attaching it to the longer blue audio cable that is kept in the Technical Store By attaching this to the VGA cable s jack plug connection can be made wherever the headph...

Страница 8: ...the projection screen will automatically begin to raise the handset screen will then display the image shown below When the projection screen has raised fully it is safe to power down the system by s...

Страница 9: ...ng battery compartment Once opened carefully insert the batteries by pressing the negative end against the spring and pushing the positive end into position as shown below Battery compartment spring h...

Страница 10: ...hone power button L and display screen with full power battery icon R Once the microphone is powered up the receiver unit at the AV control system will illuminate yellow and display the same frequency...

Отзывы: