


16
Setup Mode
To configure the Rack Gizmo, you must first enter Setup Mode. Holding down selected buttons while powering the unit
on will bring up selected setup modes, as detailed in this section.
Selecting MIDI Channel and MIDI Options
Hold the Audio Loop 1 button while powering the Rack Gizmo on. Keep holding the button until the LEDs flash. The
Audio Loop buttons will then allow you to select the MIDI channel the Rack Gizmo responds to as well as set other MIDI
related options.
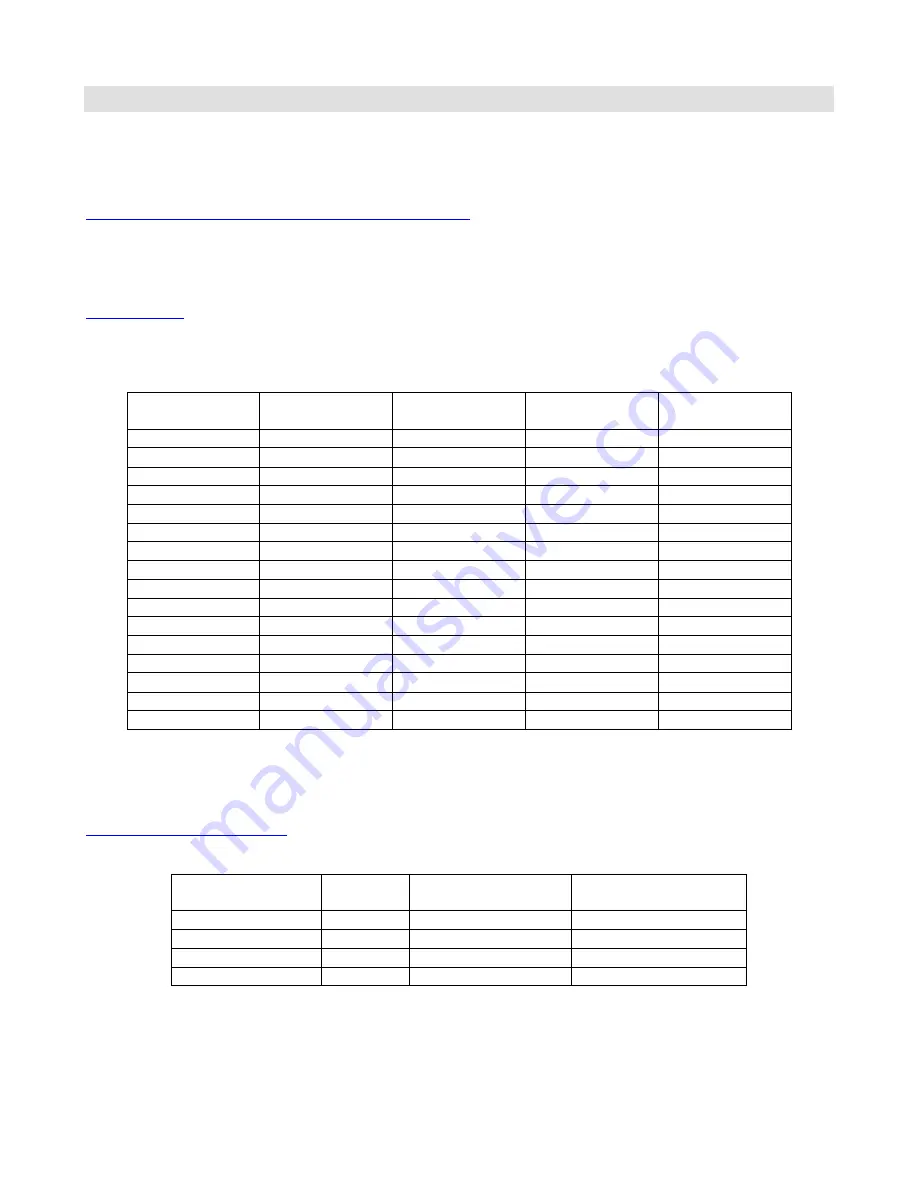
MIDI Channels
The Rack Gizmo is set by default to send and receive on MIDI Channel 1. To change the send/receive channel, use the
Audio Loop buttons to select the channel as shown below:
MIDI Channel
Audio Loop 1
LED
Audio Loop 2
LED
Audio Loop 3
LED
Audio Loop 4
LED
1
OFF
OFF
OFF
OFF
2
ON
OFF
OFF
OFF
3
OFF
ON
OFF
OFF
4
ON
ON
OFF
OFF
5
OFF
OFF
ON
OFF
6
ON
OFF
ON
OFF
7
OFF
ON
ON
OFF
8
ON
ON
ON
OFF
9
OFF
OFF
OFF
ON
10
ON
OFF
OFF
ON
11
OFF
ON
OFF
ON
12
ON
ON
OFF
ON
13
OFF
OFF
ON
ON
14
ON
OFF
ON
ON
15
OFF
ON
ON
ON
16
ON
ON
ON
ON
You can also set a few other MIDI-related options using the other Audio Loop buttons:
Continuous Controller Ranges
The Function Switch 1 and 2 buttons control the Continuous Controller range for all Audio Loops:
Audio Loop
CC Range
GCX
Number
Function Switch 1
LED
Function Switch 2
LED
80…87 (default)
1
OFF
OFF
88…95
2
ON
OFF
64…71
3
OFF
ON
56…63
4
ON
ON
Содержание Rack Gizmo
Страница 1: ...Rack Gizmo User s Manual RJM Music Technology Inc TM...
Страница 2: ......
Страница 7: ...2 Front Panel 1 2 3 4 6 5...


