


INSTALLATION
Curtain
Continued
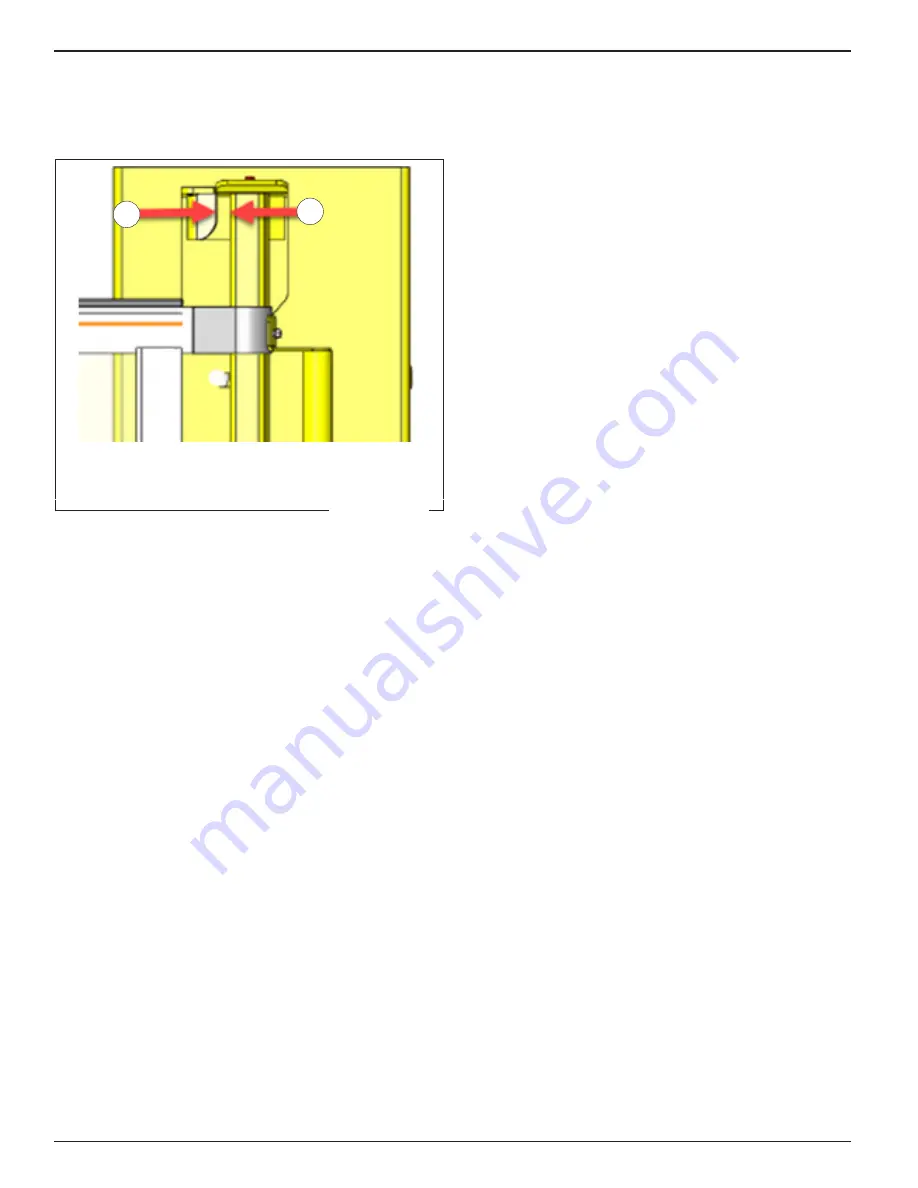
Latch Bracket Adjustment
A
B
NOTE:
Curtain may stretch with use Verify there is a maximum gap
of 1/2in [13mm] – 2in [51mm] at full curtain extension See
1 At the receiver post, ensure the innermost face of
the curtain lead bar (B) extends no more than 1/2in
[13mm] – 2in [51mm] beyond the outermost edge
of the cup (A) on the slotted latch bracket If not,
the slotted latch bracket offers lateral adjustment to
decrease this distance
2 After the desired distance is set, tighten the bolts on
the latch bracket
3 If the distance needs to be increased, the latch
bracket must be moved to the alternate set of holes
Tensioning
If the top of the curtain “sags” or seems to be loose:
1 Angle the curtain attachment on the roller so the top
of the curtain is pulled slightly tighter With the curtain
pulled out and engaged, unroll the rest of the curtain
until the touch and hold fastener is accessible
2 Lock the roller with a screwdriver, by inserting the
screwdriver through the hole in the top of the storage
support (A) and 1 of the slots (B) in the roller tube
concurrently
3 Remove the curtain from the roller and angle the
curtain so the top of the curtain is slightly tighter Hold
the roller while removing the screwdriver Let the
curtain roll up slowly
4 Disengage the curtain from the latch bracket and roll
the unit up 2 or 3 times Engage the unit to see if the
curtain is tighter
5 Repeat to add more angle, if necessary
Figure 7
Dok‑Guardian™ LD Safety Barrier
Installation/Service/Owner's Manual
Rite‑Hite
®
10 Publication:
AMEN00150 2019-11-13


