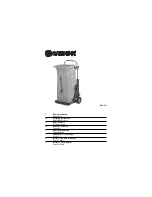
background image

Top view of 

WaterMatic 100 shown 

with Riser Tube 

underneath 

Models 100, 150, 150S, 300, & 1000 

WaterMatic Fountain Installation Instructions 

A.

Location  - 

Putting the fountain in a location that offers protection from the wind will enhance the

performance of the unit. Livestock will tend to gather in a protected area, enticing them to drink more. If possible,

the side that supply line enters the fountain should be opposite of prevailing wind for additional protection to the

supply line.

B.

Water Supply Line – 

The horizontal underground water line (#1) should be sized to account for pressure

drop, relating to distance, at least 3/4” in diameter and 1’ below normal frost depth. A 3/4” vertical supply pipe

(#2) is recommended. A shut-off valve (#3) may be installed under  the fountain for servicing. For optimum

serviceability a stop and waste valve can be installed below frost level to drain water back when the unit is not in

use. This can be obtained from your local plumber. Flush water supply line before connecting to fountain. Water

supplies with material such as sand, rust, etc. may require a filter to keep valve working properly.

C.

Riser Tube

  –  Install a riser tube (#4) around pipe to provide room for plumbing and to accommodate

optional shut-off valve. Ensure that the water supply line is centered in the riser tube. Do not add any insulation in

the riser tube, as it provides a path for frost. For optimum water line protection, use the 12” outside diameter

insulated Ritchie Thermal Tube. Use whatever combination of Thermal Tubes is required to reach at least 1'

below frost line. 

For the 100, 150, and 150S units, the riser tube must NOT extend above the

concrete platform, see drawing below.

Ritchie Thermal Tubes 

18158 

1’ top section 

16417 

2’ top section 

16612 

4’ top section 

16416 

2’ extension 

NOTE:


The supply line touching the riser tube is the most common cause of the supply line freezing. 

Do not surround the supply line with insulation, wood, or other foreign material. Any foreign material in 

the tube may cause frost to migrate to the supply line causing it to freeze.


WaterMatic Series Instruction Manual

1

August 13, 2022

Содержание WaterMatic 100

Страница 1: ...ring fountain on the market This unit is built to give you excellent service when properly installed and maintained Please follow instructions carefully Read and understand all instructions before ins...

Страница 2: ...umber Flush water supply line before connecting to fountain Water supplies with material such as sand rust etc may require a filter to keep valve working properly C Riser Tube Install a riser tube 4 a...

Страница 3: ...ing to the bottom of the unit along the outside edge of the fountain G Hold Downs The 100 150 150S and 300 fountains are provided with four built in hold downs and the 1000 fountain is provided with s...

Страница 4: ...s Wetting the plug can aid proper installation Tighten the wing nut to secure plug NOTE A third plug is supplied with the 1000 to allow for temporary shut off of the valve chamber L Install Valve Cove...

Страница 5: ...e may be electrical losses in the line due to long transmission distances A stainless steel heater stand is included and should be used with the Ritchie 500W heater to protect the fountain in the even...

Страница 6: ...ssure Low Water Flow a Check that valve inlet is not plugged or supply hose is not kinked b Check system pressure from supply hose by installing a tee and pressure gauge in front of the valve to check...

Страница 7: ...ie Label 12 1 pkg 1 pkg 4 16621 Access Panel 6 x14 1 12 18633 Plug 3 Water Channel 2 pkg 1 pkg 5 18147 Access Panel Hardware pkg 1 pkg NS 14866 Seal Foam 10 Roll 1 6 11515 Valve Bracket w screw pkg 1...

Страница 8: ...18653 Ritchie Label 12 1 pkg 1 pkg 4 16621 Access Panel 6 x14 1 12 18633 Plug 3 Water Channel 2 pkg 1 pkg 5 18147 Access Panel Hardware pkg 1 pkg NS 14866 Seal Foam 10 Roll 1 6 11515 Valve Bracket w...

Страница 9: ...abel 12 1 pkg 1 pkg 4 16621 Access Panel 6 x14 1 12 18633 Plug 3 Water Channel 2 pkg 1 pkg 5 18147 Access Panel Hardware pkg 1 pkg NS 14866 Seal Foam 10 Roll 2 6 11515 Valve Bracket w screw pkg 1 pkg...

Страница 10: ...4 16562 Access Panel 10 x20 1 12 18832 HP 3 4 Valve Assembly 1 5 18147 Access Panel Hardware pkg 1 pkg 13 18475 O Ring Valve Seal Pkg 4 pkg 1 6 18838 HP Bracket Assy Pkg 1 pkg NS 14866 Seal Foam 10 Ro...

Страница 11: ...4 16562 Access Panel 10 x20 1 12 18832 HP 3 4 Valve Assembly 1 5 18147 Access Panel Hardware pkg 1 pkg 13 18475 O Ring Valve Seal Pkg 4 pkg 1 6 18838 HP Bracket Assy Pkg 1 pkg NS 14866 Seal Foam 10 Ro...

Страница 12: ...nor to any product that is installed and or used contrary to Ritchie Industries installation instructions and instructions for use The limited warranty shall also not apply to any product whose exteri...

Отзывы: