background image

NOTE

Anytime you store to a REGISTRATION MEMORY button, all
settings previously stored in that button will be erased and
replaced by the new settings.

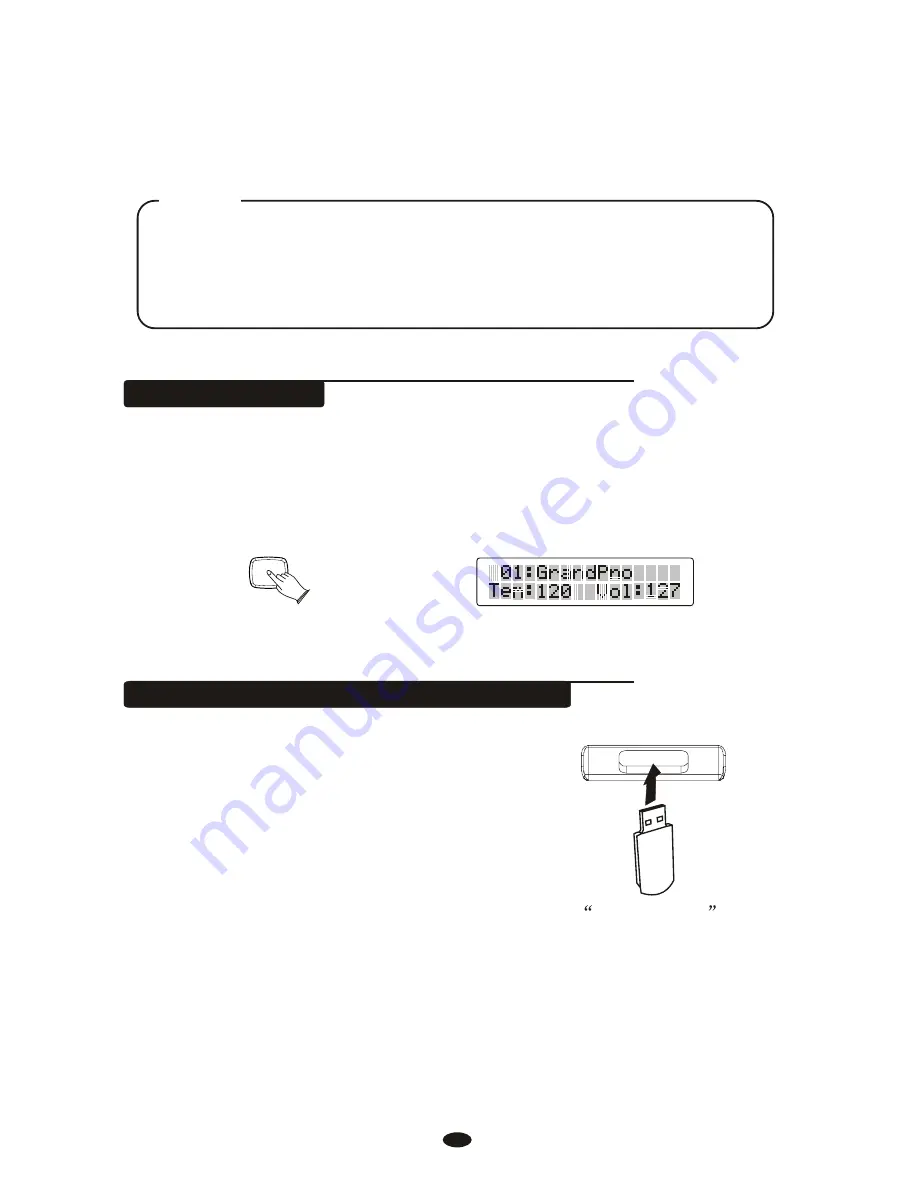
Saving the Registration Data to USB Disk

Insert the USB Disk into the USB terminal.

Press the [SAVE TO] button simultaneously, a message 

xxREGSTxxx

(xx indicates this file's sequence Num in UDisk. xxx indicates  registration file
number ) appears, indicating your Registration Memory Settings are saved to USB

Disk, with 8 Registrations stored to a single file.

Press the [FREEZE] button to turn ON/OFF the freeze function and its icon. 
When the freeze function is ON, the memory settings can be recalled with the
exception of any accompaniment settings. You can use the registration memory
function without affecting the accompaniment.

Freeze Function

FREEZE

62

Содержание TG8862

Страница 1: ......

Страница 2: ...er Figure 1 13 Unplug this apparatus during lightning storms or when unused for a long periods fo time 14 Refer all servicing to qualified service personnel Servicing is required when the apparatus has been dam aged in any way such as power supply cord or plug is damaged liquid has been spilled or objects have fallen into the apparatus the apparatus has been exposed to rain or moisture does not op...

Страница 3: ...tion technology This digital piano lets you record your performances and Registration settings to a USB Disk Each user song lets you record up to sixteen independent tracks In order to obtain maximum performance and enjoyment please read this manual thoroughly while trying out the various features described Thanks For Using Our Digital Piano ...

Страница 4: ...l Chorus Type Main voice Chorus Level Split voice Chorus Level 44 45 46 48 49 50 51 52 53 54 55 56 57 58 59 59 60 60 61 61 61 62 62 64 64 66 68 68 68 69 69 69 69 70 70 70 73 74 74 77 79 80 81 82 Start the Style Stop the Style Fade Adding Fill In Adjusting theAccompaniment Volume User rhythm recording Registration Memory Store Load Freeze Function Saving the Registration Data to USB Disk Song Recor...

Страница 5: ...DISCO USER STYLE USER STYLE M1 M2 M3 M4 M5 1 2 3 4 5 6 7 8 9 0 DUAL DUAL GRAND PIANO GRAND PIANO FREEZE FREEZE TOUCH TOUCH DEMO LEARN DEMO LEARN CHORD CHORD DICTIONARY DICTIONARY USER EDIT USER EDIT REVERB REVERB CHORUS CHORUS USB FILE USB FILE RECORD RECORD PLAY LOAD PLAY LOAD SAVE TO SAVE TO MULTI MULTI DELETE DELETE I I I I I I II I I I II I I I I I I I I I I I I I I I I I I I I I I I I I II I ...

Страница 6: ...tton 19 DATACONTROL Button 20 VOICE STYLE Button 21 VOICE and STYLE SELECT Number 0 9 Button 22 NUMBER Button 23 DUAL Button 24 GRAND PIANO Button 25 CHORD DICTIONARY Button 26 USER EDIT Button 27 REVERB Button 28 CHORUS Knob 29 STORE BANK Buttons M1 M5 Button FREEZE Button 30 TOUCH Buttons 31 DEMO LEARN Button 32 USB FILE Button RECORD Button PLAY LOAD Button SAVE TO Button 33 USB TO DEVICE Rear ...

Страница 7: ...NES 1 Plug the DC output cable from the provided power adapter into DC IN jack in the bottom panel of your instrument then plug the AC cable of your power adapter into the AC power socket Please confirm your country s Mains voltage is compatible with the supplied power adaptor Most of the world s electrical supply is 220v or 240v 50Hz Some countries such as the USA are on 110v 60Hz Using Foot Peda...

Страница 8: ... but all subsequently played notes will not be sustained SOSTENUTO It performs the same function as the damper pedal on an actual acoustic piano letting you sustain the sound of the voices even after releasing your fingers from the keys SUSTAIN 1 Damper Pedal Right 3 Soft Pedal Left The Soft Pedal controls the sound volume Press the pedal to decrease the output sound volume SOFT 4 ...

Страница 9: ...om the Midi In directly to other Midi devices Using Line IN OUT Jack The audio output from other sound system connected to the LINE IN jack on the bottom panel can be mixed with the sound of the unit This function is convenient when you want to play along with a favourite song The Line out jack can be used to deliver the output of the piano to a keyboard amplifier stereo sound system mixing consol...

Страница 10: ...ound bank just like normal but also sends MIDI simultaneously to the internal MIDI connection which hooks up inside the device to the Audio Interface It is theAudio Interface that controls the USB MIDI USB AUDIO interface is a digital audio interface By USB cable you can digitally transfer intact audio signals of PC to when you play this instrument likewise you can transfer intact audio signals of...

Страница 11: ...button to off mode and press the STANDBY ON button again to turn the power switch on Hold the first white key and first black key on the left side of the keyboard at the same time and then turn on the unit to deactivate the AUTO STANDBY function STANDBY ON ACC ACC VOLUME VOLUME BASS TREBLE TREBLE MASTER MASTER VOLUME I I I I I I I I I I I I I I I I I I I I I I I I I I I I I I I I I I I I I I I I I...

Страница 12: ...ou can select and play the demo songs 1 Listen to the Demo Song Press DEMO LEARN button to play the demo songs in sequence Use buttons or DATACONTROL knob to select the number of the song you want to play 2 Stop Playing Press DEMO LEARN button again to stop playing DEMO LEARN 8 ...

Страница 13: ...tons to select the sound You also can press the buttons until the desired voice appears on the display Selecting a Voice Your instrument has 479 voices include 128 01 128 GM standard voices buttons or DATACONTROL knob You can use the voice button on the panel use to select voice 1 Selecting Voice Directly When the VOICE STYLE button is unlighted means your piano is in Voice mode now you can use th...

Страница 14: ...ces may be played simultaneously each at selected volumes press DUAL button and the To adjust the volume of the Dual Voice please refer to D Volume in MIXER function P11 to exit indicator is flashing then press the voice button to select the second voice No operation in 4 seconds the display will be returned to the Main Voice mode Press DUAL button again DUAL In the Voice Mode clockwise or counter...

Страница 15: ...n Volume Range 00 127 Default 127 Press the MIXER button repeatedly to select S Volume indicator is flashing then use Data Control knob to set the main volume Range 00 127 Default 127 Press the MIXER button Repeatedly to select D Volume indicator is flashing then use Data Control knob to set the Main Volume Range 00 127 Default 127 Buttons or the Buttons or the Buttons or MIXER MIXER 1 M Volume 2 ...

Страница 16: ...t 100 Buttons or 5 USB Volume Press the MIXER button Repeatedly to select USB Volume then use Data Control knob to set the Main Volume Range 00 127 Default 100 Buttons or Playing Portable Grand Piano Press GRAND PIANO button This convenient function lets you instantly call up the Grand Piano voice MIXER MIXER MIXER MIXER MIXER GRAND PIANO 12 ...

Страница 17: ...and chords played in this section are automatically detected and used as a basis for fully automatic accompaniment with the selected style left 34 keys 2 Chord point Select Normal mode at first and then hold down the KEYMODE button until the display shows C Point then use the buttons or turn the data to set chord point Range 00 87 3 Pianist mode Press the KEYMODE button repeatedly to select keyboa...

Страница 18: ...de LCD will display S symbol in the upper right corner of the screen your keyboard will be split into sctions which means different voices can be played with the left and right hands at the sanme time 6 Split point Select harmony mode at first and then hold down the KEYMODE button until the display shows S Point then use the buttons or turn the data to set split point Range 00 87 KEYMODE KEYMODE K...

Страница 19: ...om C3 to C7 Left from A 1 to C3 Transpose The Transpose function allows you to change the pitch of the instrument in semitone steps up to a maximum setting of 12 semitones a maximum of one octave up or down Press Use buttons to transpose up or down as required The transposition range is from 12 down one octave through 0 normal pitch to 12 up one octave TRANS TUNE button KEYMODE TRANS TUNE 15 ...

Страница 20: ...on use buttons or DATACONTROL knob to decrease or increase the tempo metronome and styles Range 20 280 If you want to set the tempo before starting rhythm you have to tap the button 4 times automatic accompaniment of percussion can start automatically according to the speed of your keys Tap on the button 2 times while rhythm is playing the rhythm tempo are set as your desired speed TEMPO TAP TEMPO...

Страница 21: ...tons or the DATACONTROL knob to select your desired time signature Default To adjust the volume of the e please refer to Metro Vol in MIXER function P12 Touch The touch function provides three different types of keyboard touch sensitivity that can be selected to match different playing styles When turn on the piano the touch sensitivity default is open Press TOUCH button the button indicator is un...

Страница 22: ...Touch Setting This function is actually a convenient feature which automatically selects a suitable voice for you when you select a style Press O T S button repeatedly can turn on or turn off One Touch Setting In addition various panel settings such as voice effect Tempo etc that match the selected style can be recalled with just a single button O T S TOUCH O T S 18 ...

Страница 23: ...the filter range of the filter which may produce the overtone s variation of the sound Range 00 127 The default value is the median 64 without any effect Hint Similar to a treble knob on a Hi Fi system Resonance Sets the volume of the overtone on Cutoff Frequency Higher resonance value produces higher volume of the overtone near the Cutoff Frequency Range 00 127 The default value is the median 64 ...

Страница 24: ... is held down Release The release time is how long the sound continues after the note is let go Hint a Trumpet has a short release time meaning the sound produced stops immediately but a gong has a very long release After the strike of the gong the sound carries on for many seconds before fading away ate Sets the speed of the vibrato effect The higher values produce faster vibrato speeds Range 00 ...

Страница 25: ...s parameters Hold down so that you can save the edited voice to the desired User Voice Bank USER EDIT button the buttons indicator is lighted y USER EDIT button LCD will display Save Ok You can only save the VOICE data Envelope Vibrato and Filter settings to User Voice Banks Other functions such as Dual Voice Split Mode and so on are not sound edits and cannot be stored here NOTE 3 Load User Voice...

Страница 26: ...reverb is producedwhen you select Rev Off Default type Hall2 button or DATACONTROL 1 2 3 4 5 6 7 8 Hall1 Hall2 Room1 Room2 Room3 Stage1 Stage2 Plate Reference Reverb Type in function menu P37 NOTE The reverb types in the list below can be selected from the reverb display Shimmering broadening effect Press CHORUS button select chorus type Nochorus is produced when you select ChorsOff and the indica...

Страница 27: ...e selected from the chorus display 1 2 3 4 5 6 7 8 Chorus1 Chorus2 Chorus3 Chorus4 Feedback Flanger1 ShrtDelay ShrtDlFb 9 10 11 12 13 14 Flanger2 Flanger3 Celeste1 Celeste2 Celeste3 Celeste4 Reference Chorus Type in function menu P41 NOTE 23 ...

Страница 28: ...LCD display Range Default 64 63 00 00 00 00 00 00 Performance Main Pan Main Oct SpiltOct Dual Oct MIDI In Arpeggio SplitPan Dual Pan MIDI Out Local 64 63 64 63 2 2 2 2 2 2 01 02 OFF ON OFF ON OFF 01 16 OFF OFF ON ON ON Main Pan Main Oct SpiltOct Dual Oct MIDI In Arpeggio SplitPan Dual Pan MIDI Out Local 24 ...

Страница 29: ...Vol Pedal 1 Pedal 2 00 127 00 127 00 127 00 127 00 127 00 127 32 32 32 32 32 32 Pd1 Fill In1 Pd1 Fill In2 Pd1 Tap Pd1 MemoryUp Pd1 Play Pd1 Null Pd1 Soft Pd1 sost Pd1 StartStop Pd2 Fill In1 Pd2 Fill In2 Pd2 Tap Pd2 MemoryUp Pd2 Play Pd2 Null Pd1 Soft Pd2 sost Pd2 StartStop Pedal Assign Pd1 Soft Pd2 Null Hall2 Chorus3 Funtion type LCD display Range Default Rev Type D RevVol Chr Type M ChrVol D ChrV...

Страница 30: ...andom ON OFF Left Right SLEEPMODE 20Min 30Min 40Min 50Min 60Min OFF 01 02 03 100 Chain 30Min Learn Other Func Funtion type LCD display Range Default Right ON M RecTrk USBSpeed PlayMode Grading Auto Power Off LearnHand S RecTrk D RecTrk Press FUNCTION button If 5 seconds without any operation the piano will automatically exit the menu NOTE 26 ...

Страница 31: ...NTER button to confirm LCD will display Press ENTER button to confirm use buttons or to set the main voice pan value value 00 Main Pan the DATA CONTROL knob Press the FUNCTION button LCD will display Performance FUNCTION FUNCTION FUNCTION FUNCTION FUNCTION ENTER ENTER ENTER ENTER 27 ...

Страница 32: ...play se buttons or to select Press ENTER button to confirm use buttons or to set the split voice pan value value 00 Main Pan U the DATACONTROL knob SpiltPan the DATA CONTROL knob Press the FUNCTION button LCD will display Performance FUNCTION FUNCTION ENTER ENTER FUNCTION FUNCTION ENTER FUNCTION ENTER FUNCTION ENTER 28 ...

Страница 33: ...play se buttons or to select Press ENTER button to confirm use buttons or to set the dual voice pan value value 00 Main Pan U the DATACONTROL knob SpiltPan the DATA CONTROL knob Press the FUNCTION button LCD will display Performance FUNCTION FUNCTION ENTER ENTER FUNCTION FUNCTION ENTER FUNCTION ENTER FUNCTION ENTER 29 ...

Страница 34: ...play se buttons or to select Main Oct Press ENTER button to confirm use buttons or to set the main voice octave value value 00 Main Pan U the DATACONTROL knob the DATA CONTROL knob Press the FUNCTION button LCD will display Performance FUNCTION FUNCTION ENTER ENTER FUNCTION FUNCTION ENTER FUNCTION ENTER FUNCTION ENTER 30 ...

Страница 35: ...lay se buttons or to select Press ENTER button to confirm use buttons or to set the Split voice octave value value 00 Main Pan U the DATACONTROL knob Spilt Oct the DATA CONTROL knob Press the FUNCTION button LCD will display Performance FUNCTION FUNCTION ENTER ENTER FUNCTION FUNCTION ENTER FUNCTION ENTER FUNCTION ENTER 31 ...

Страница 36: ...play se buttons or to select Dual Press ENTER button to confirm use buttons or to set the dual voice octave value value 00 Main Pan U the DATACONTROL knob Oct the DATA CONTROL knob Press the FUNCTION button LCD will display Performance FUNCTION FUNCTION ENTER ENTER FUNCTION FUNCTION ENTER FUNCTION ENTER FUNCTION ENTER 32 ...

Страница 37: ...TROL knob OFF 01 02 Press the FUNCTION button LCD will display Performance FUNCTION FUNCTION ENTER ENTER FUNCTION FUNCTION ENTER FUNCTION ENTER FUNCTION ENTER 01 Press and hold down one key or a plurality of keys you will hear a continuous and from low to high 02 Press and hold down one key or a plurality of keys you will hear a continuous and from high to low OFF The Arpeggio is off 33 ...

Страница 38: ... select Midi In Press ENTER button to confirm use buttons or to select Main Pan U the DATACONTROL knob the DATA CONTROL knob ON OFF Press the FUNCTION button LCD will display Performance FUNCTION FUNCTION ENTER ENTER FUNCTION FUNCTION ENTER FUNCTION ENTER FUNCTION ENTER 34 ...

Страница 39: ...select Midi Out Press ENTER button to confirm use buttons or to select1 16 Main Pan U the DATACONTROL knob the DATA CONTROL knob OFF Press the FUNCTION button LCD will display Performance FUNCTION FUNCTION ENTER ENTER FUNCTION FUNCTION ENTER FUNCTION ENTER FUNCTION ENTER 35 ...

Страница 40: ... select Local Press ENTER button to confirm use buttons or to select ON Main Pan U the DATACONTROL knob the DATA CONTROL knob OFF Press the FUNCTION button LCD will display Performance FUNCTION FUNCTION ENTER ENTER FUNCTION FUNCTION ENTER FUNCTION ENTER FUNCTION ENTER 36 ...

Страница 41: ...ll display Rev Type Press ENTER button to confirm use buttons or to select 8 reverb type reverb type the DATACONTROL knob Hall1 Hall2 Room1 Room2 Room3 Stage1 Stage2 Plate Hall2 Press the FUNCTION button repeatedly LCD will display Effect FUNCTION FUNCTION ENTER ENTER FUNCTION FUNCTION ENTER FUNCTION ENTER 37 ...

Страница 42: ...M RevVol Press ENTER button to confirm use buttons or the DATACONTROL knob to set main voice reverb level value Press the and buttons simultaneously to restore the default value 32 Press the FUNCTION button repeatedly LCD will display Effect FUNCTION FUNCTION ENTER ENTER FUNCTION FUNCTION ENTER FUNCTION FUNCTION ENTER ENTER 38 ...

Страница 43: ...S RevVol Press ENTER button to confirm use buttons or the DATACONTROL knob to set split voice reverb level value Press the and buttons simultaneously to restore the default value 32 Press the FUNCTION button repeatedly LCD will display Effect FUNCTION FUNCTION ENTER ENTER FUNCTION FUNCTION ENTER FUNCTION FUNCTION ENTER ENTER 39 ...

Страница 44: ...D RevVol Press ENTER button to confirm use buttons or the DATACONTROL knob to set dual voice reverb level value Press the and buttons simultaneously to restore the default value 32 Press the FUNCTION button repeatedly LCD will display Effect FUNCTION FUNCTION ENTER ENTER FUNCTION FUNCTION ENTER FUNCTION FUNCTION ENTER ENTER 40 ...

Страница 45: ...pe Press ENTER button to confirm use buttons or the DATACONTROL knob to select 14 chorus types reverb type Chorus3 Press the and buttons simultaneously to restore the default Press the FUNCTION button repeatedly LCD will display Effect FUNCTION FUNCTION ENTER ENTER FUNCTION FUNCTION ENTER FUNCTION FUNCTION ENTER ENTER 41 ...

Страница 46: ...M ChrVol Press ENTER button to confirm use buttons or the DATACONTROL knob to set main voice reverb level value Press the and buttons simultaneously to restore the default value 32 Press the FUNCTION button repeatedly LCD will display Effect FUNCTION FUNCTION ENTER ENTER FUNCTION FUNCTION ENTER FUNCTION FUNCTION ENTER ENTER 42 ...

Страница 47: ...S ChrVol Press ENTER button to confirm use buttons or the DATACONTROL knob to set main voice reverb level value Press the and buttons simultaneously to restore the default value 32 Press the FUNCTION button repeatedly LCD will display Effect FUNCTION FUNCTION ENTER ENTER FUNCTION FUNCTION ENTER FUNCTION FUNCTION ENTER ENTER 43 ...

Страница 48: ...D ChrVol Press ENTER button to confirm use buttons or the DATACONTROL knob to set dual voice reverb level value Press the and buttons simultaneously to restore the default value 32 Press the FUNCTION button repeatedly LCD will display Effect FUNCTION FUNCTION ENTER ENTER FUNCTION FUNCTION ENTER FUNCTION FUNCTION ENTER ENTER 44 ...

Страница 49: ...on repeatedly LCD will display Pedal Assign FUNCTION FUNCTION ENTER ENTER FUNCTION FUNCTION ENTER FUNCTION ENTER Pd1 Null The switch will not control any function Pd1 Soft Pd1 Sos If you play a note or chord on the keyboard and press the sostenuto pedal while the notes are held those notes will be sustained as long as the pedal is held but all subsequently played notes will not be sustained Pd1 St...

Страница 50: ...N button on the panel Let you add dynamic variations and breaks in the rhythm of the accompaniment Pd1 Play USB MIDI Play Pd1 MemoryUp Anytime you store to a REGISTRATION MEMORYbutton all settings previously stored in that button will be erased and replaced by the new settings Pd1 Tap Pedal2 Control Press ENTER button to confirm LCD will display Pedal 2 Press the FUNCTION button repeatedly LCD wil...

Страница 51: ...sustained Pd1 StrtStop This function correspond to the START button on the panel Switches the rhythm on off whenever you press the Left Foot switch Pd1 Fil1l This function correspond to the FILL IN button on the panel Let you add dynamic variations and breaks in the rhythm of the accompaniment Pd1 Fil12 This function correspond to the FILL IN button on the panel Let you add dynamic variations and ...

Страница 52: ...firm use buttons or the DATACONTROL knob to select main voice track 01 16 and Off Press the and buttons simultaneously to restore the default main voice track 01 Press the FUNCTION button repeatedly LCD will display Usb Function FUNCTION FUNCTION ENTER ENTER FUNCTION FUNCTION ENTER FUNCTION ENTER 48 ...

Страница 53: ...utton to confirm use buttons or the DATACONTROL knob to select split voice track 01 16 and Off Press the and buttons simultaneously to restore the default main voice track 02 Press the FUNCTION button repeatedly LCD will display Usb Function FUNCTION FUNCTION ENTER ENTER FUNCTION FUNCTION FUNCTION FUNCTION ENTER ENTER ENTER FUNCTION ENTER 49 ...

Страница 54: ...utton to confirm use buttons or the DATACONTROL knob to select dual voice track 01 16 and Off Press the and buttons simultaneously to restore the default main voice track 03 Press the FUNCTION button repeatedly LCD will display Usb Function FUNCTION FUNCTION ENTER ENTER FUNCTION FUNCTION ENTER FUNCTION ENTER FUNCTION FUNCTION ENTER ENTER 50 ...

Страница 55: ...ress ENTER button to confirm use buttons or the DATACONTROL knob to select USB speed Press the and buttons simultaneously to restore the default value 100 Press the FUNCTION button repeatedly LCD will display Usb Function FUNCTION FUNCTION ENTER ENTER FUNCTION FUNCTION ENTER FUNCTION FUNCTION FUNCTION ENTER ENTER ENTER 51 ...

Страница 56: ...ton to confirm use buttons or the DATACONTROL knob to select the play mode Press the and buttons simultaneously to restore the default playmode Single Chain Random Chain Press the FUNCTION button repeatedly LCD will display Usb Function FUNCTION FUNCTION ENTER ENTER FUNCTION FUNCTION ENTER FUNCTION FUNCTION FUNCTION ENTER ENTER ENTER 52 ...

Страница 57: ... button to confirm LCD will display Use buttons or the DATACONTROL knob to select Left Right Left Left Hand Right Right Hand LearnHand Press the FUNCTION button repeatedly LCD will display Learn FUNCTION FUNCTION ENTER ENTER FUNCTION FUNCTION ENTER FUNCTION FUNCTION ENTER ENTER 53 ...

Страница 58: ...ATACONTROL knob to select sleep mode Press the and buttons simultaneously to restore the default value 30Min Auto Power Off 20Min 30Min 40Min 50Min 60Min and OFF Press the FUNCTION button repeatedly LCD will display Other Func FUNCTION FUNCTION ENTER ENTER FUNCTION FUNCTION ENTER FUNCTION FUNCTION ENTER ENTER 54 ...

Страница 59: ...onsists of all keys to its left Auto Accompaniment Normal Left hand fingering specifies the auto accompaniment chords The right hand plays normally Auto Accompaniment 2 Use Number Button and Buttons Press the NUMBER button the indicator light color is red Now you can use number 0 9 or Buttons to select style Selecting a Style Press VOICE STYLE button the buttons or DATACONTROL knob indicator is li...

Страница 60: ... buttons to select the sound You also can press the buttons until the desired voice appears on the display NOTE When VOICE STYLE button is unlighted it meams the current selection in VOICE mode When VOICE STYLE button is lighted it meams the current selection in STYLE mode When NUMBER button is unlighted it meams the current selection in direct VOICE or STYLE mode When NUMBER button is lighted it ...

Страница 61: ...f the keyboard becomes the Auto Accompaniment section and chords played in this section are automatically detected and used as a basis of for fully automatic accompaniment with the selected style Press the SYNCHRO button to enter the sync start waiting mode then the accompaniment will start when you play the first chord on the Auto Accompaniment section of the keyboard START STOP 3 Using Synchro S...

Страница 62: ...style stops after the ending section is finished Any of your instrument accompaniment patterns can be started with an appropriate introduction by pressing the INTRO ENDING button directly If you press the SYNCHRO button and then press the INTRO ENDING button the accompaniment will start from the introduction as soon as a chord is detected in the Auto Accompaniment section of the keyboard 4 Startin...

Страница 63: ...1 or button when the style is playing the selected FILL pattern repeats continuously until button is released Press the FILL IN 1 button at any time while the accompaniment is playing to add a one measurefill in When the accompaniment is playing press FILL 2 VARIATION button fill in accompaniment will immediately start playing continuing with the FILL 2 VARIATION Section FILL 2 VARIATION Fade Pres...

Страница 64: ...cator is light there is 2 section rhythm cycle performance At the same time start the rhythm can be arbitrarily added percussion Press START STOP button to stop the recording Press the START STOP button to play the recording At this time press and hold down the USER STYLE button to save the recorded user style the LCD will display Save Ok Load User Style Press the USER STYLE button indicator is li...

Страница 65: ...b H STORE BANK button repeatedly to select 1MmryBank 6MmryBank old down the STORE BANK button and then Press the M1 M5 button the current panel settings are stored in the memory Store Load a Press b STORE BANK button repeatedly to select 1MmryBank 6MmryBank Press the M1 M6 buttons can recall the information you have stored The LCD displays the panel position number settings as well as memory STORE...

Страница 66: ... indicates this file s sequence Num in UDisk xxx indicates registration file number appears indicating your Registration Memory Settings are saved to USB Disk with 8 Registrationsstored to a singlefile Press the FREEZE button to turn ON OFF the freeze function and its icon When the freeze function is ON the memory settings can be recalled with the exception of any accompaniment settings You can us...

Страница 67: ...elete the file Press button to cancel Use Registration Data from USB Insert the USB Disk into the USB terminal Use to select REG file then press PLAY LOAD button display shows Load OK button or DATACONTORL knob 30 Registrations will be loaded to the memory store on the panel You can recall the information you have loaded by pressing M1 M5 USB FILE USB FILE RECORD RECORD MULTI MULTI PLAY LOAD PLAY ...

Страница 68: ...lso the auto accompaniment parts It provides two different ways to record Quick Recording and Multi Track Recording All the recording data will be saved automatically as MIDI Format 0 File to your USB Disk Quick Recording 1 Insert the USB Disk into the USB Terminal 2 Start Recording Press the RECORD button to start recording The first one measures are tempo prompt only It cannot record any data US...

Страница 69: ...cally makes track assignments as below Track 1 Main Voice Track 2 Split Voice Track 3 Dual Voice You also can use accompaniment styles to record The accompaniment style will be recorded on track9 track16 The quick recording method is different from the multi recording method In quick recording mode track4 track8 are not allowed to record but for multi recording the recorded data is recorded on tra...

Страница 70: ... is the song s name d Hold down USB FILE button then press RECORD button Recording f to start When the recording is finished the recording file will be saved as a new file named 002 SONG_001 Use the same operation as Step d to record more tracks The name of the new file will be saved in sequence Multi track recording provides two ways to record Use Auto Track Assignment Select Tracks by Yourself 1...

Страница 71: ...on use or button to select then press ENTER button use or button to select Tracks 01 16 Off Default 01R RecTrk to select the Main Voice track 01 16 OFF 02L RecTrk to select the Split Voice track 01 16 OFF 03D RecTrk to select the Dual Voice track 01 16 OFF 25M RecTr NOTE If you want to record new files based on the pre recorded multi track file the new recording will begin with the first track All...

Страница 72: ...hen the recording is finished the recording file will be saved as a new file named 002 SONG_001 f Use the same operation as Step d and Step e to record more tracks The name of the new file will be saved in sequence USB Volume Reference USB Volume in function menu P16 USB FILE RECORD MULTI PLAY LOAD SAVE TO DELETE Use this button you can switch to USB mode immediately even the keyboard is in any of...

Страница 73: ...look up This needs to be in the Chord Root section C3 B3 of the keyboard For examle After pressing the Chord Root select the Chord Type you want to look up in the Chord Type section C4 B5 of the keyboard The Chord Type includes Major Triad Minor Triad and Seventh Chord Then the LCD will display the Chord Type and key position you currently want to look up If you press the correct key as the notes ...

Страница 74: ...e After the song use the button to select other songs that you want Range 01 55 The defult song learning is Right Reference Left right Hand in function menu P53 the Left Right Hand 3 Steps of Learning Feature Learn 1 Hold down the DEMO LEARN button the LCD will display ress the DEMO LEARN button the LCD will display DEMO LEARN button and hen you press any one key on the keyboard contineously the t...

Страница 75: ...ong 01 P repeatedly Learn2 01 press the PLAY LOAD button the PLAY LOAD button indicator is flashing Now t the Press the PLAY LOAD button again to stop the learning song mode or use buttonto select other learning song Range 01 80 Learn 3 Hold down the DEMO LEARN button the LCD will display ress the DEMO LEARN button the LCD will display DEMO LEARN button and ou can play the song with the instrument...

Страница 76: ...AY LOAD button again to stop the learning song mode or use buttonto select other learning song Range 01 80 Press and hold down the DEMO LEARN button to exit the Teaching Function DEMO LEARN DEMO LEARN DEMO LEARN 72 ...

Страница 77: ...73 Factory Set 1 Turn off the power 2 Hold down and buttons then turn the power on it can restore all internal settings to factory set STANDBY ON STANDBY ON ...

Страница 78: ...1 Electric piano 2 ElecPiano3 ElecPiano4 ElecPiano5 ElecPiano6 DetunedEP1 DetunedEP2 Harpsichord Harpsichord2 Harpsichord3 Harpsichord4 CoupledHarpsichord Clavi1 Clavinet2 Clavinet3 Clavinet4 NO VOICE NAME BANK PROGRAMCHANGE PROGRAMCHANGE NO VOICE NAME BANK PROGRAMCHANGE PROGRAMCHANGE NO VOICE NAME BANK PROGRAMCHANGE PROGRAMCHANGE ...

Страница 79: ...ynthBass 4 SynthBass 5 SynthBass 6 SynthBass 7 SynthBass 8 Violin1 Violin2 Violin3 SlowViolin Viola Cello 1 Cello 2 Cello 3 Contrabass 1 ContraBass_MT Tremolo Strings DoctorSolo Pizzicato Strings1 Pizzicato 2 Orchestral Harp 1 Harp 1 Harp 2 Timpani 1 Timpani 2 Strings Ensemble 1 Strings Ensemble 2 OrchestralPad StringSection1 StringSection2 StringSection3 Synth Strings 1 Synth Strings 2 SynthStrin...

Страница 80: ...s Lead Pad 1 New Age Pad 3 Warm Pad 4 Polysynth Pad 5 Choir Pad 6 Bowed Pad7 Metallic Pad 9 Halo Pad 10 Sweep Fx 1 Rain IceRain_MT Fx 2 Soundrack Fx 3 Crystal Fx 4 Atmosphere Fx6 Brightness Fx 7 Goblins Fx 8 Echoes EchoPan Fantasy1 Fantasy2 Sitar Sitar_MT Banjo Shamisen Koto1 Koto2 Koto_MT Kalimba Bagpipe Fiddle Shanai BreathPipe Tinkle Bell EchoBell WindBell WaterBell JungleTune BellSinger WarmBe...

Страница 81: ...P Swing Ulligull Soul DtrtPop Rhtmblus 68soul Twist RockRollP BgieWgie 68Blues 34Gospel GsplShuf Germwalz Gospel Gypsi Rocknrol Rockrol2 TwistPop R B Ctry8Bt CtryPop CtrySwng Ctry2Bt2 CtryBld Bluegras CtryWlzP Cntryrok Cntrywlz Country1 Country2 Country3 Merengue Bosanova PopBossa MamboPop SalsaPop Beguine1 Beguine2 Reggae SwngRega Baroque Bigband Boogie1 Boogie2 Latin Macarena Mambo Sacrific Sals...

Страница 82: ...n1 Mus58 Oriental Pasodobl Schlager Sirtaki1 SwngWltz JazzWltz Waltz FrnchWlz MordnWlz Slwaltz Trawltz1 Trawltz2 Vienwltz Pno8bt1 Pno8bt2 Pnobald Pnowalz1 Pnowalz2 Yaozu Zangzu Xiaoqu Xinjiang Errenzan Jiangsu1 Jiangsu2 Minzu Shanbei JingJu1 JingJu2 Waltz Piano Sino NO STYLE NAME NO STYLE NAME NO STYLE NAME ...

Страница 83: ... Analog Tom 6 Analog Cowbell Analog Conga H Analog Conga M Analog Conga L Analog Maracas Analog Claves Scratch Push Scratch Pull Electronic 24 Rever se Cymbal Hi Q Snare L BD Rock BD Rock 2 SD Elec M SD Elec H E Tom 1 E Tom 2 E Tom 3 E Tom 4 E Tom 5 E Tom 6 Scratch Push Scratch Pull Power 16 SD Elec M BD Rock SD Rock SD Rock Rim RockTom1 RockTom2 RockTom3 RockTom4 RockTom5 RockTom6 Jazz 32 Snare J...

Страница 84: ...el Changed Mode Default Messages Altered Note Number True voice Velocity Note ON Note OFF Affter Key s Pitch Bender Control Change 0 32 1 5 6 7 10 11 64 65 66 67 80 81 91 93 100 101 120 121 122 Programe Change True System Exclusive System Song Position Song Select Common Tune Aux Local on off All Notes Off Messages Active Sense Reset 1 1 Mode 3 X 0 127 O 9nH v 1 127 O 9nH v 0 or 8nh X X O X X O O ...

Страница 85: ...81 Specifications ...

Страница 86: ...d support so that it is not touching the floor Once the piano is in place you can adjust it so it is in firm contact with the floor again Turn the adjustable Pedal Board support until it is in firm contact with the floor C TG8862 C C E E B B E D G G F A A d 4 E X6 X4 X6 X6 X4 M6X25 M6X16 M4X16 ST3 9X20 D C A B G X6 F M6X55 X6 ...

Страница 87: ... interference in a residential installation This equipment generates uses and can radiate radio frequency energy and if not installed and used in accordance with the instructions may cause harmful interference to radio communications However there is no guarantee that interference will not occur in a particular installation If this equipment does cause harmful interference to radio or television r...

Страница 88: ......

Отзывы: