background image

Ricoma Quick Start Guide

14

4.2 Basic operation

4.2.1 Turn on machine

4.2.1.1 Check whether the power is in the OFF position.
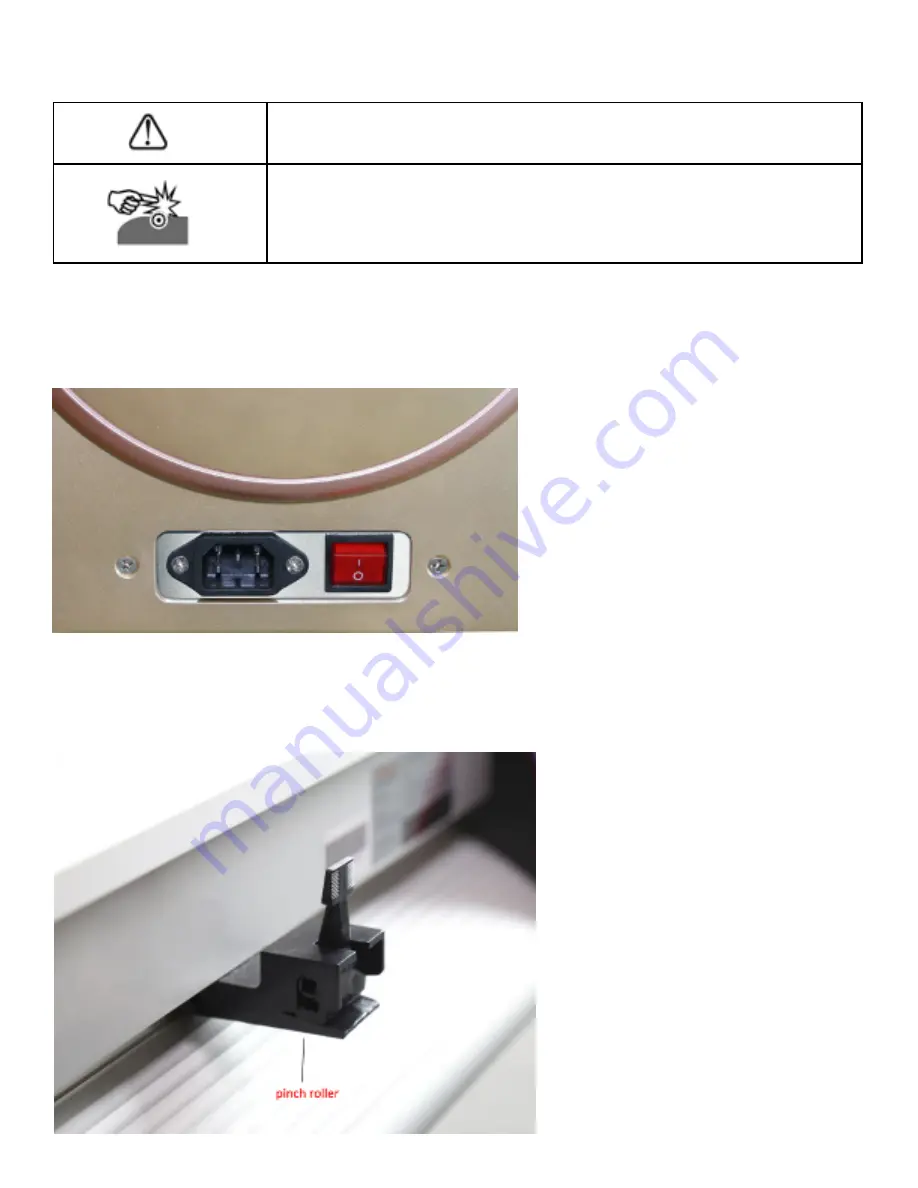
4.2.1.2 Plug  the  cable  into  the power  source  and press  the  power  switch.

4.2.2 Installation of cutting media
This machine is suitable not only for single-sheet media, but also a roll of media.
4.2.2.1 Press down the handle of pinch roller behind the machine to raise the handle.

CAUTION

When switching on the power, make sure your hands and other objects are not 
in the way of the main shaft or slider to prevent injury.

Содержание RCP-6301

Страница 1: ...R QUICK START GUIDE RICOMA INTERNATIONAL CORPORATION 11555 NW 124th St Miami FL 33178 Telephone 305 418 4421 Toll Free 1 888 292 6282 Fax 305 418 5036 Email info ricoma com ricoma com Copyright 2021 Ricoma All rights reserved ...

Страница 2: ...to avoid damage to the machine Make sure your machine is grounded otherwise you may experience an electric shock or a mechanical failure Do not detach repair or reconstruct the machine otherwise fire electric shock or other life hazards may result Do not leak any liquid or drop metal into the machine such things may result in fire Do not touch the top of the knife with your finger to prevent injur...

Страница 3: ...may fall and get damaged To unplug the power cable from the outlet please grab the plug instead of the cable Pulling the cable with too much force may result in an electrical shock or fire Any operation is forbidden in case of storms or lightning to prevent damage of the machine Do not pull the cartridge by hand to avoid damage to the mainboard when the plotter is powered on ...

Страница 4: ...Ricoma Quick Start Guide 4 STANDARD ACCESSORIES Item Part Quantity 1 Power cord 1 2 USB Cable 1 3 Blade holder In machine 1 4 Blade 1pc in machine 3 5 Pen and pen holder 1 6 Signmaster 1 7 User Manual 1 ...

Страница 5: ...t the cutter port Option 3 Step 4 Basic cut Design your work and cut in Signmaster Refer to File 1 3 Contour cut Design your work and contour cut in Signmaster Refer to File 1 4 Contour cut from U disc Refer to File 1 5 Note 1 Signmaster online download address http fcws6 com downloads signmaster craft SignMaster_UniverCraft exe 2 Please DO NOT lose the Signmaster PSN code If you need to change co...

Страница 6: ...o to CD ROM drive on your computer locate the folder drive open the folder double click USB Driver Setup After your computer should display the following window After driver installation windows will close automatically Computer will display the following window Click Next Click Finish USB DRIVER INSTALLATION ...

Страница 7: ...pop up shortcut menu then click Properties The dialog box pop up should be as follows Click Device Manager and select USB Serial Port COM3 as follows Click Advanced To change the port number click on the COM Port Number drop down box to select the correct port number ...

Страница 8: ...void damage to the machine Place the machine on a stable surface otherwise the machine may fall and get damaged CAUTION Don t touch the top of the blade with your finger to prevent injury 3 1 Machine Installation and connections 3 2 Installation cutting tool 3 1 1 Place the cutter in a flat and spacious area 3 1 2 Connect the cutting plotter to computer by USB cable or put a U disc directly in the...

Страница 9: ... There are two options to install cutting software one is Signmaster the other is CorelDRAW plugin or dongle 3 3A Signmaster software installation Recommended 1 Open the Signmaster package and insert the CD into your computer Install and fill in the PSN code to activate 2 Change language if needed and then choose the cutting plotter model that corresponds to your cutter in the Signmaster software ...

Страница 10: ...rs of your choosing then click the Blade Tool and start cutting You can set the offset and overcut setting under the Properties Cut option or through your connection Connection can be through Windows port file Direct COM part when linked with any computer with a Windows system ...

Страница 11: ...ks http iifuture org vmtuts getVMTut php key smc_full_ultramarks r 0 5 Working with templates http iifuture org vmtuts getVMTut php key smc_full_templates r 0 3 3B Computer installation If working with CorelDRAW Note Due to customers using different versions of CorelDRAW including cracked versions the dongle might not match so it s best to use Signmaster Note Adjust the blade offset overcut settin...

Страница 12: ...Ricoma Quick Start Guide 12 CUTTING PLOTTER INSTRUCTIONS 4 1 Name and function of parts 4 1 1 Front view Side 1 ...

Страница 13: ...Pinch roller wheels 3 Carriage belt 4 Upper cover 5 Grit roller 6 Carriage 7 Blade holder 1 Go back 2 Forward 3 Go left 4 Go right 5 Online 6 Menu 7 Pause 8 Reset 9 Original 10 LCD 8 LCD display 9 Keypad 10 Network port 11 USB port 12 U disc port 13 Power supply port 14 Switch ...

Страница 14: ... and press the power switch 4 2 2 Installation of cutting media This machine is suitable not only for single sheet media but also a roll of media 4 2 2 1 Press down the handle of pinch roller behind the machine to raise the handle CAUTION When switching on the power make sure your hands and other objects are not in the way of the main shaft or slider to prevent injury ...

Страница 15: ...cutter 4 2 2 4 Raise the pinch roller to make the paperweight wheel press down on the paper 4 2 3 To test your cutting blade adjust the blade press and knife position 4 3 Cutter operation instruction and parameter setting When the cutter is open the cutter will go to the original position and you will see the display below on your cutter The quality of the knife is directly correlated to the cutti...

Страница 16: ...tter will then show the files inside the U disc Press the button first to scan the files then press Up or Down to review the file Find the right plt format file Then press to confirm it Then set the number of repeats and the distance between the pieces you are cutting Press again and the camera will scan the marks and start to cut Press Left and Right to change the value of X to make the carriage ...

Страница 17: ...below 3 Press Menu again and you will see the screen below The cutter will remember the last job sent from the computer to the cutter To re cut the previous design press to execute the previous cutting Press Up to increase the speed Press Down to decrease the speed Press Left to increase the force Press Right to reduce the force ...

Страница 18: ...en below 4 1 Press and you will see the screen below 4 2 Press Menu again and you will see the screen below Press Left and Right to select the numbers Press Up and Down to change the numbers Check the computer s IP address first and then make sure the plotter s IP address is different If they are the same then change the last number of the plotter s IP address Signmaster s IP address should be the...

Страница 19: ... need to change any of the above settings Only an authorized technician should adjust these settings 4 3 3 Press and you will see the screen below 4 3 4 Press the Reset button and the cutter will go back to its original position You will see the screen below after you press the reset button ...

Страница 20: ...you need to reset the offset in your cutting software which should look like the figure below please follow the manual provided with your software 4 5 2 During cutting if you don t see right angles please adjust the sharp angled compensation in the cutting software ATTENTION The offset value can be over or under so follow the image below to properly set the compensation in your software No offset ...

Страница 21: ... and down 2 Check the Signmaster software to see if some of the letters have any issues 3 Check if there are some problems on the files 5 3 Question Why does zigzagging happen to the cutter Answer Because the cutter motor features high power and speed the cutting speed should be adjusted according to the size of the character you are trying to cut Generally to cut small glossy characters with high...

Страница 22: ...he knife tip is too long please adjust it as required 2 The knife is dull replace it 5 8 Question Why does the plotter first cut a line before plotting Answer Because the machine did not properly finish the previous job and there is still knife dropping instructions in the plotter s memory To resolve power off the machine and turn it back on 5 9 Question Why is there no LCD display Why is there a ...

Страница 23: ...ress to the appropriate level 2 Check whether the knife is dull or whether the top of the knife is broken For new knives the cut is thin in the instant glue while for old ones the cut is thick 5 16 Question What should I do when cutting big characters Answer 1 When cutting big characters the system can automatically be set to use several pages but the width setting will conform to the width of the...

Страница 24: ...knife may have been vibrating for too long or it may have been used for a long period of time so you should discontinue use If it seems to be overheating please unplug it as a dielectric displacement of the servo driving board may have occurred If this is the case contact a local agent or customer maintenance center ...

Страница 25: ... Start Guide 25 Table screws and instructions H KM 5 16 8pcs J PM 5 35 10pcs L PM 5 40 8pcs M PM 5 45 8pcs FLOOR STAND ASSEMBLING INSTRUCTION KM 5 16 PM 5 16 PM 5 35 PM 5 40 PM 5 45 KM 5 16 PM 5 35 PM 5 40 PM 5 45 ...

Страница 26: ...Vinyl Spooler choose Windows Port in connection and choose File in port 2 Save the plt file and put it in the U Disk 3 Insert the U Disc into the plotter Press U Disc then choose the right plt file to cut Cutting via network cable 1 Connect the plotter and router or computer with network cable 2 Import design to Signmaster choose Windows Port in connection and choose TCP in port 3 Click Configure ...

Страница 27: ...n USA Ricoma International Corporation 11555 NW 124 Street Miami FL 33178 USA TEL 305 418 4421 FAX 305 418 5036 Toll Free 1 888 292 6282 Website www ricoma com Email info ricoma com Ricoma Factory in China Ricoma Shenzhen Co Ltd Baochangli Industrial Park Jinlong Road 3 Shenzhen P R China Post 518118 TEL 400 900 2939 0755 25857772 8630 FAX 86 755 2585 7773 Website www ricoma com cn Email rcm ricom...

Отзывы:

Похожие инструкции для RCP-6301