background image

8

Connecting to devices using the WPA2-PSK or 

Mix Mode WPA2/WPA authentication

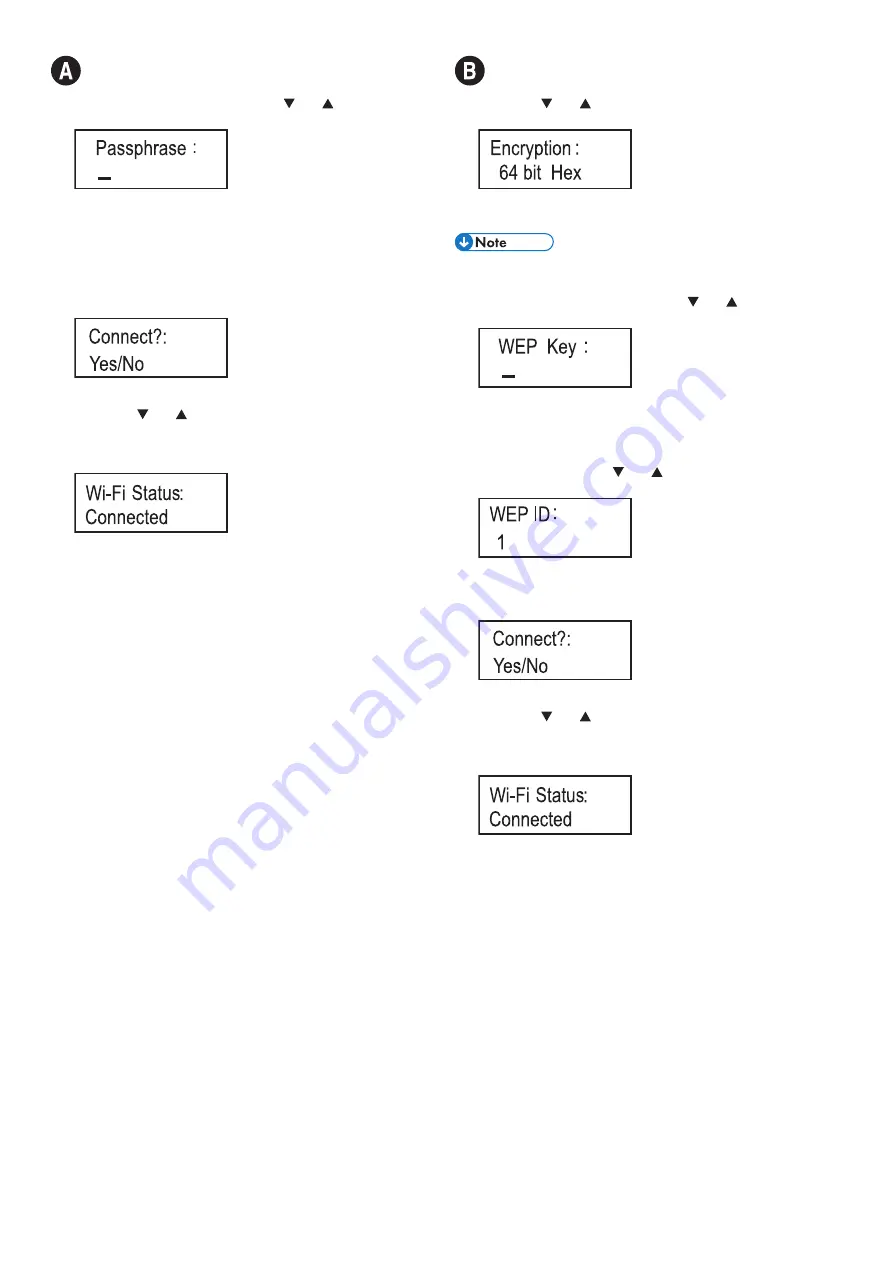
17.  Enter the encryption key using the [ ] or [ ] key, and then 

press the [OK] key.

As the passphrase, you can enter either 8 to 63 ASCII 

characters (0x20-0x7e) or 64 hexadecimal digits (0-9, A-F, a-f).


To go to the next characters, press the [OK] key.


Press the [Escape] key to clear all characters.

For details about checking the encryption key, see "Checking the 

SSID and Encryption key".

18.  Press the [OK] key.

After connecting to the network, the Wi-Fi screen is displayed.

19.  Press the [ ] or [ ] key to select [Wi-Fi Status], and then 

press the [OK] key.

When "Connected" is displayed, the connection has been 

established.


When "Connecting" is displayed, the connection is being established.


When "Disconnected" is displayed, the connection has not been 

established. Start again from the beginning.

Connecting to the devices using the Open 

System or Shared Key authentication

17.  Press the [ ] or [ ] key to select the encryption method, 

and then press the [OK] key.

The maximum number of characters that can be entered in the 

encryption key field depends on the encryption method settings.

Do not select [None] except in special cirmunstances. If 

selected, the security system will not work.

18.  Enter the encryption key using the [ ] or [ ] key, and then 

press the [OK] key.


To go to the next characters, press the [OK] key.


Press the [Back] key to clear all characters.

For details about checking the encryption key, see "Checking the 

SSID and Encryption key".

19.  Enter the ID using the [ ] or [ ] key, and then press the 

[OK] key.

The ID is used for identifying the encryption key. You can 

register four encryption keys (ID 1 to 4).

20.  Press the [OK] key.

After connecting to the network, the Wi-Fi screen is displayed.

21.  Press the [ ] or [ ] key to select [Wi-Fi Status], and then 

press the [OK] key..

When "Connected" is displayed, the connection has been 

established. 


When "Connecting" is displayed, the connection is being established.


When "Disconnected" is displayed, the connection has not been 

established. Start again from the beginning.

Содержание SP C260DNw

Страница 1: ...Setup Guide 1 Setting Up the Machine 2 Installing the Software Control Panel Sheet 2 1 ...

Страница 2: ......

Страница 3: ...UE051 33 cm 13 inches 70 cm 27 6 inches 10 cm 4 0 inches 20 cm 7 9 inches 20 cm 7 9 inches DAC502 120 127 V 60 Hz 11 A 220 240 V 50 60 Hz 6 A Power Source DUE053 DUE054 DUE055 2 1 DUE056 2 2 1 1 DUE057 DUE058 DUE059 DUE060 DUE061 DUE013 DUE014 DUE015 ...

Страница 4: ...2 DUE062 DUE064 DUD080 DUE066 DUE021 DUE022 DUE023 DUE024 DUE067 DUE074 1 2 DUE068 DUE069 DUE070 DUE071 DUE072 1 2 ...

Страница 5: ...3 DUE073 Install the software to use the machine Go to page 4 2 Installing the Software For OS X see User s Guide in the provided CD ROM or our website ...

Страница 6: ...Wi Fi Direct compliant device is recognized as a router access point and direct communication among Wi Fi Direct compliant devices becomes possible When communicating using the Wi Fi Direct function you cannot connect to the Internet at the same time Use the machine from a smart device Android iOS How to use the machine from a smart device From a smart device application you can use the following ...

Страница 7: ...mputer 2 Insert the provided CD ROM into the CD ROM drive of the computer If your computer does not have a CD ROM drive download a setup file from our website or 3 Click Quick Install 4 The software license agreement appears in the Software License Agreement dialog box After reading the agreement click Yes 5 Select USB Connection or Network Connection according to communication environment or your...

Страница 8: ...computer does not have a CD ROM drive download a setup file from our website or 3 Click Quick Install 4 The software license agreement appears in the Software License Agreement dialog box After reading the agreement click Yes 5 Select Wireless Connection 6 Select Manually configure the printer network when installing this machine Connect your computer and this machine by using the USB cable Select...

Страница 9: ...ey to select Host Interface and then press the OK key 4 Press the or key to select Network Setting and then press the OK key 5 Press the or key to select Wi Fi Config and then press the OK key 6 Press the or key to select Wi Fi and then press the OK key 7 Press the or key to select Active and then press the OK key 8 Press the Menu key to return to the Initial screen 9 Turn off the machine and then...

Страница 10: ...ication 17 Press the or key to select the encryption method and then press the OK key The maximum number of characters that can be entered in the encryption key field depends on the encryption method settings Do not select None except in special cirmunstances If selected the security system will not work 18 Enter the encryption key using the or key and then press the OK key To go to the next chara...

Страница 11: ...the Menu key to return to the Initial screen 9 Turn off the machine and then turn it back on 10 Press the Menu key DUE129 11 Press the or key to select Host Interface and then press the OK key 12 Press the or key to select Network Setting and then press the OK key 13 Press the or key to select Wi Fi Config and then press the OK key 14 Press the or key to select WPS and then press the OK key 15 Pre...

Страница 12: ...he OK key 5 Press the or key to select Network Setting and then press the OK key 6 Press the or key to select Wi Fi Config and then press the OK key 7 Press the or key to select Wi Fi and then press the OK key 8 Press the or key to select Active and then press the OK key 9 Press the Menu key to return to the Initial screen 10 Turn off the machine and then turn it back on 11 Press the Menu key DUE1...

Страница 13: ...16 Check the configuration for the router access point then try the connection again 21 Configuring the Wi Fi settings is complete Control Panel Sheet DUE130 1 2 3 4 5 6 7 8 10 11 9 12 1 Wi Fi Direct key 7 Back key 2 Stop Start key 8 NFC tag 3 Job Reset key 9 Power key 4 Menu key 10 Data In Indicator 5 Display 11 Alert Indicator 6 Scroll Keys 12 OK key For safe and correct use please be sure to re...

Страница 14: ...s Windows Server and Windows Vista are either registered trademarks or trademarks of Microsoft Corporation in the United States and or other countries regions Red Hat and Red Hat Enterprise Linux are trademarks of Red Hat Inc registered in the United States and other countries SUSE is a registered trademark of SUSE Linux AG SUSE and openSUSE are registered trademarks of Novell Inc Ubuntu and Canon...

Страница 15: ...M0AS 8603A AU EN US EN GB EN ...

Отзывы: