2
Installation Procedure
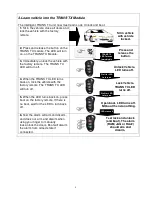
1.Install Alarm (RAM, JAG, RAv2)
Install the alarm unit as per manual with the following notes in mind:
•
Do not connect lock/unlock on the JAG or RAv2 alarm. The lock/unlock should be
connected on the RAM to allow lock/unlock via sms.
•
Some vehicles require “Door Ajar Warning’ to be turned off (10 beeps on arm)
•
Read the following two steps first, to understand the requirements for installation of the
TRANS TX Module.
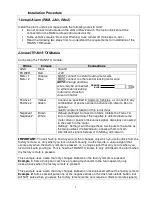
2.Install TRANS TX Module
Connecting the TRANS TX module:
Wires
Colours
Connections
GND
Black
Ground
POWER
Red
+12V
Motor 1
Motor 2
Orange
Blue
MUST connect to central locking motor wire
MUST connect to other central locking motor wire
Positive 1
Positive 2
Yellow
Green
Connect as specified in Common Vehicles,
or
, connect to any
combination of positive wires to activate arm/disarm. Boot is
optional.
See Example installation if this is not clear.
Negative 1
Negative 2
Brown
White
Default, Setting2:
Connect to inhibits. Inhibits the Trans TX
from arming/disarming if the negative is detected before the
motor drive or positive lock/unlock signal. Generally connected
to the switch in the motor.
Setting1
: Setting 1 will change these two inputs to the same as
the two positives (Yellow/Green), allowing them to learn
Arm/Disarm signals instead of ‘inhibiting’ arm/disarm.
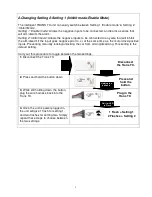
IMPORTANT
:
You will have to find any wire(s) that changes only when you lock/unlock from the
factory remote, or, only when you lock unlock manually, in other words, a unique signal that
occurs only when the factory remote is pressed, or, a unique signal that only occurs when you
lock/unlock with you finger. This is how the TRANS TX knows to only arm/disarm the alarm when
the factory remote is pressed.
This example uses a wire that only changes state when the factory remote is pressed
Example 1:
Some European cars have a locking mechanism in the fuel cap which only
locks/unlocks when the factory remote is pressed.
This example uses a wire that only changes state when lock/unlocked without the factory remote
Example 2:
Some cars will pulse one of the negative wires on the dash lock/unlock button, but
will NOT pulse when you press the factory remote (some cars require a diode to isolate signals).
ORANGE
BLUE
NOTE:
Orange and blue
wires may be connected
to either central locking
motor wire. Direction
does not matter.
Содержание Trans TX
Страница 8: ...19 www rhino com au...


