background image

F3788-7-04

Maintenance Section 5-3

CAUTION: To avoid possible injury, observe

the following safety rules when servicing

backhoe.

Do not oil, grease or adjust backhoe while it is

in motion.

Do not change any backhoe relief valve

settings. Relief valve settings are factory set for

best backhoe performance and safety.

Escaping fluid under pressure can have

sufficient force to penetrate the skin and cause

serious injury. Be sure to relieve all pressure

before disconnecting lines. Be sure all

connections are tight and that lines, pipes and

hoses are not damaged before applying

pressure to the system.

Fluid escaping from a very small hole can be

almost invisible. Use a piece of cardboard or

wood - not your hands - to search for suspected

leaks.

See a doctor at once if injured by escaping fluid.

Serious infection or reaction can develop if

proper medical treatment is not administered

immediately.

Protect your eyes - wear safety glasses. Guard

against injury when driving connecting pins or

performing any repair in which particles can

chip from work piece or striking tool.

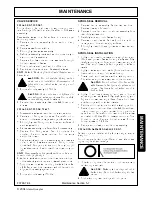
BEGINNING OF SEASON
Remove all protective covering. Remove excessive

grease from cylinder rods if unit has been in long term

storage.
Check hydraulic hoses for deterioration and replace if

necessary. Caution hydraulic hoses may be under

pressure. Make sure pressure has been relieved before

removing hoses.
Lubricate all grease fittings and oil handle linkage.
Clean and inspect all safety and operation decals.

Replace missing or damaged decals.
Replace oil filter.
Fill hydraulic fluid to proper level.
Tighten all loose bolts, nuts and set screws (See torque

chart page 5-10).
Sharpen or replace worn bucket teeth.
Operate backhoe slowly for a short time before placing

unit under full load.
Fully cycle backhoe through all movements several times

to purge air from the system.

HYDRAULIC HOSES

WARNING: Escaping hydraulic fluid under

pressure can penetrate skin causing serious

injury.

DO NOT use your hand to check for leaks. Use

a piece of cardboard or paper to search for

leaks.

Stop engine and relieve pressure before

connecting or disconnecting lines.

Tighten all connections before starting engine or

pressurizing lines.

Oil leaks on the suction side will draw air into

the system, causing oil in reservoir to appear

foamy.

When tightening connections always use two

wrenches.

IMPORTANT: Do not over tighten fittings. Make them just

tight enough to eliminate leaks.
NOTE: Apply sealant only to all tapered threads unless

coupled with swivel adapters. When using teflon tape,

wrap tape clockwise (as viewed from end) and wrap tape

only twice. Keep sealant away from first two threads of

tapered end to prevent contamination of hydraulic fluid.

Do not use sealant on o-ring or flare adapter threads.
Hoses on backhoe are very severely worked and will fail in

time. Examine them regularly and replace any that show

signs of failure. Pay careful attention to routing of hoses

so they can move freely, without kinking and cannot be

pinched or cut by any part of backhoe.
AUXILIARY PTO PUMP HYDRAULIC SYSTEM
Maintain reservoir fluid level at 2 inchs below tank top

when bucket is extended to full reach, bucket rolled back

for loading and resting on the ground, and stabilizers fully

raised. If reservoir is over filled, fluid may be forced out of

breather cap.
Fill reservoir with 10W or 20W hydraulic oil with SAE

J183-M2C33F classification. Dextron 2 ATF fluid and

10W engine oil with API “SD” classification are also

acceptable.
Change oil and filter every 200 hours or more often if

necessary.

MAINTENANCE

MAINTENANCE

© 2004

Alamo Group Inc.

Содержание 95HD

Страница 1: ...e and must be maintained with the unit at all times and the Safety and Operation Instructions contained in this manual before operating the equipment READ UNDERSTAND FOLLOW nnnnnnnnn mmmmmnnnnnn This...

Страница 2: ...of the Machine is recorded on the Warranty Card and on the Warranty Form that you retain The use of will fit parts will void your warranty and can cause catastrophic failure with possible injury or d...

Страница 3: ...4 1 Pre Operation Check List Operating Directions Engine Speed 4 2 Controls Boom Swing Dipperstick Bucket 4 2 Operating Backhoe 4 3 Seat Adjustment Mounting and Dismounting Buckets 4 4 Placing the Sta...

Страница 4: ...Safety Section 1 1 SAFETY SECTION 2004 Alamo Group Inc...

Страница 5: ...backhoe Never allow a person to work under a raised bucket Never lift a person with backhoe Do not use bucket as a battering ram Always lower bucket to ground when not digging Never leave tractor una...

Страница 6: ...n transporting the Equipment use the Power Unit flashing warning lights and follow all local traffic regulations Operate this Equipment only with a Tractor equipped with an approved roll over protecti...

Страница 7: ...rt personnel should wear hard hats safety shoes safety glasses and proper hearing protection at all times for protection from injury including injury from items thrown by the equipment PROLONGED EXPOS...

Страница 8: ...ent at a slow speed in turns Increase the speed through the turn only after you determine that it is safe to operate at a higher speed Use extreme care and reduce your speed when turning sharply to pr...

Страница 9: ...ately before or while operating the Power Unit and Implement Drugs and alcohol will affect an operator s alertness and coordination and therefore affect the operator s ability to operate the equipment...

Страница 10: ...e of the equipment and result in injury Always shut the Power Unit completely down place the transmission in park and set the parking brake before you or anyone else attempts to connect or disconnect...

Страница 11: ...F3788 7 04 Safety Section 1 8 SAFETY SAFETY 2004 Alamo Group Inc...

Страница 12: ...6 44897 2 DANGER Crushing Hazard 7 44898 1 OPERATION Boom Operation 8 44899 1 OPERATION Dipperstick Bucket Operation 9 44900 1 OPERATION Left Side Stabilizer Position 10 44901 1 OPERATION Right Side...

Страница 13: ...egible Replacement decals are available from your dealer 5 44896 2 45970 4 44895 6 44897 3 44907 14 48280 SAFETY 45491 Do not attach backhoe to tractors which have 3 PT Quick Attaching Coupler Backhoe...

Страница 14: ...F3788 7 04 Safety Section 1 11 SAFETY 10 44901 9 44900 12 44909 11 44908 1 50850 16 35674 5 13 50851 15 49696 7 44898 8 44899 SAFETY 49696 2004 Alamo Group Inc...

Страница 15: ...l equipment with which the employee is or will be involved Employer Responsibilities To ensure employee safety during Tractor and Implement operation it is the employer s responsibility to 1 Train the...

Страница 16: ...INTRODUCTION SECTION Introduction Section 2 1 2004 Alamo Group Inc...

Страница 17: ...safety alert symbol identifies important safety messages in this manual Observe and follow all safety messages to prevent personal injury Reference to left hand and right hand used in this manual ref...

Страница 18: ...Spread down position 117 K Stabilizer Spread up position 67 Shipping Weight less bucket 1818 lbs Bucket Digging Force 5872 lbs Dipperstick Digging Force 3800 lbs Operating Pressure 2500 PSI NOTE See I...

Страница 19: ...F3788 7 04 Introduction Section 2 4 SPECIFICATIONS INTRODUCTION INTRODUCT ION 2004 Alamo Group Inc...

Страница 20: ...Assembly Section 3 1 ASSEMBLY SECTION 2004 Alamo Group Inc...

Страница 21: ...2 1 2 nipple 19 3 4 x 3 4 elbow 18 and 3 4 x 2 nipple 20 to right tank port Point 3 4 x 3 4 elbow fitting 18 up 4 Install filter body without filter element to 3 4 nipple 20 Be sure oil flow arrow on...

Страница 22: ...connecting backhoe hydraulics to tractor so stabilizers can be activated Position backhoe to achieve 90 and 15 18 inch height as described in figures 3A 3B 5 Join support braces 1 2 front center link...

Страница 23: ...h pin from tractor If required insert bushing 8 9 or 22 into center front link 5 to match tractor clevis pin diameter CAUTION Upper connecting point where backhoe fastens to tractor is under high load...

Страница 24: ...Operation Section 4 1 OPERATION SECTION 2004 Alamo Group Inc...

Страница 25: ...d at which backhoe operates is dependent on tractor PTO RPM Use a moderate engine speed to start and increase it as your experience permits CONTROLS The backhoe has two major control levers Boom Swing...

Страница 26: ...g bucket toward operator with down pressure on it As dipperstick approaches operator the dipperstick and bucket controls can be operated together to close bucket and trap material At end of stroke lif...

Страница 27: ...des for the widest stabilizer stance and lowest center of gravity Raising the wheels off the ground will not only reduce stability and digging depth but impair performance and impose unnecessary stres...

Страница 28: ...bracket located on bucket cylinder when transporting backhoe During backhoe operation position SMV sign on bracket located on tractor REMOVAL FROM TRACTOR STORAGE Backhoe is self assisting during ins...

Страница 29: ...MAINTENANCE SECTION Maintenance Section 5 1 2004 Alamo Group Inc...

Страница 30: ...for wear or damage and replace if necessary CYLINDER ASSEMBLY NOTE Be careful not to damage seals and o rings on edges or holes in cylinder tube Inspect and remove burrs and sharp edges if necessary b...

Страница 31: ...slowly for a short time before placing unit under full load Fully cycle backhoe through all movements several times to purge air from the system HYDRAULIC HOSES WARNING Escaping hydraulic fluid under...

Страница 32: ...ittings thoroughly before using grease gun Lubricate all 27 grease fittings at least twice daily See chart for locations once at the beginning of operation and again approximately half way through the...

Страница 33: ...n center position 18 19 21 25 POSSIBLE CAUSE CORRECTIVE ACTION 1 Low oil level in reservoir Fill reservoir to proper level 2 No oil supply to machine Coupler not fully engaged 3 Air in system Purge al...

Страница 34: ...cylinder ports are plugged Check restrictors for debris and clean See Fig 11 item 3 31 Hoses plumbed incor rectly Check hose plumbing See Fig 11 32 Excessive hydraulic pressure due to tractor mechani...

Страница 35: ...th rubber mallot to align sections evenly against rods 8 Torque stud nuts evenly 15ft Lbs SPOOL SEAL REMOVAL 1 Remove handle assembly Center two sections Remove clevis pin from spool 2 Remove bonnet a...

Страница 36: ...RINGS EXHAUST O RING LOAD CHECK EXHAUST O RING 6B ROD END DIPPERSTICK CYLINDER 6A BASE END DIPPERSTICK CYLINDER 5B ROD END BUCKET CYLINDER 5A BASE END BUCKET CYLINDER 4B BASE END RIGHT STABILIZER CYL...

Страница 37: ...MAINTENANCE MAINTENANCE F3788 7 04 Maintenance Section 5 9 2004 Alamo Group Inc...

Страница 38: ...2 1066 1181 1444 1224 1496 1658 2027 5 8 11 126 139 171 188 168 185 228 251 NOTE These values apply to fasteners as received from the supplier dry or when lubricated with normal engine oil They do not...

Страница 39: ...able amount as determined by Manufacturer and for returning the goods to the Dealer whether or not the claim is approved Purchaser is responsible for the transportation cost for the goods or part s fr...

Страница 40: ...o abuse or mis use and have been properly maintained as noted NOTE properly maintained specifically includes but is not limited to A Regular lubrication B Using proper amounts of correct hydraulic flu...

Страница 41: ...nfine the employee to the protected area provided by the ROPS REQUIRED OF THE OPERATOR 1 Securely fasten seatbelt if the tractor has a ROPS 2 Where possible avoid operating the tractor near ditches em...

Страница 42: ...95HD SOM 7 04 Printed U S A P N F 3788...

Отзывы: