background image


SAFETY PRECAUTIONS


 

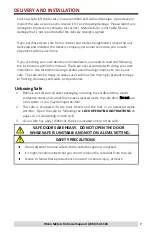
Do not attempt to move the safe with the safe door open or unlocked.


 

Your safe can be very heavy.  Always use extreme caution when moving your 
safe to prevent damage to flooring, doorways and walls.


 

Practice using personal protective equipment whenever operating power tools 
to prevent dust and debris entering your eyes, nose or mouth.


 

Failure to follow this precaution can result in serious injury or death.


ANCHORING YOUR SAFE


Your safe is predrilled from the factory for anchoring with 2 or 4 holes through the 
floor of your safe.  Your safe must have the shipping feet removed (see pages 13

-

14 

to remove shipping feet) before being anchored to the floor.


Anchor bolts and washers are not included with your safe.  

You will need to 

purchase anchor bolts suited for your floor type.  We recommend using a minimum 
of 

3” 

long wedge anchor bolts for concrete floors that are 

3/8” 

in diameter.  For 

wood floors, we suggest a minimum of 2 

1/2” 

long lag bolts that are at least 

3/8” 

in 

diameter.  Always research your floor type to make sure standard anchor bolts or 
lag bolts are adequate.  You will also need to purchase 

3/8” 

flat washers. 


Please contact a local contractor for the appropriate drilling method and tools 
needed to securely and safely anchor your safe to your floor type.


1.


With the safe door closed, place the safe in the exact location desired.


2.


Open the safe door and remove the black caps in the safe floor to reveal the 
anchor holes.


3.


Mark the center of the locations of the holes.


4.


Close and lock the safe door.  Move the safe far enough to have space to drill 
the anchor holes.  Be sure to follow your local contractor

s instructions for 

drilling the anchor holes in your floor type.


5.


Reposition the safe over the anchor holes.


6.


Open the safe door and install the anchor bolts.  Be sure to follow the bolt 
manufacturer

s installation instructions.


7.


Replace the black caps in the safe floor.


SAFETY PRECAUTIONS


 

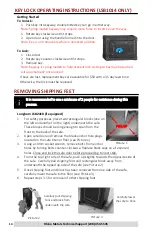
For your safety, we highly recommend using a professional mover to remove 
shipping feet of the safe.


 

Only remove one shipping foot at a time.


 

Failure to follow these precautions can result in serious injury or death.


Removing Shipping Feet(cont

d)


Rhino Metals Technical Support (208) 454

-

5545


15


Содержание Longhorn LSB1014

Страница 1: ......

Страница 2: ...2...

Страница 3: ...CTIONS AND PRECAUTIONS COULD RESULT IN SERIOUS INJURY OR DEATH IT IS HIGHLY ADVISABLE THAT YOU DO NOT STORE YOUR COMBINATION PROOF OF PURCHASE OR OWNER S MANUAL INSIDE YOUR SAFE Model No Serial No Pur...

Страница 4: ...ronic Locks 13 Key Lock Operating Instructions LSB1014 Only 14 Removing Shipping Feet 14 Anchoring Your Safe 15 Care and Maintenance 16 Troubleshooting 17 Warranty Claims and Repairs 18 Insurance Cove...

Страница 5: ...to Registration Department Rhino Metals Inc 607 Garber Street Caldwell Idaho 83605 Name Address City Country State Prov Zip Postal Phone Email Date of Purchase Where did you purchase product from Chec...

Страница 6: ...e economy financial instability Very Influential Somewhat Influential Little to No Impact C Securing firearms Very Influential Somewhat Influential Little to No Impact D Fire protection Very Influenti...

Страница 7: ...e can be heavy so always use caution when moving to prevent damage to flooring doorways and walls and personnel 1 Remove and discard all outer packaging including the cardboard box plastic protective...

Страница 8: ...nce only Actual model and design may vary Safe Body Safe Door Lock Securam Keypad shown Safe Handle Hand Wheel Shown Model and Serial No Label Not Shown attached to side of safe The Clutch Located wit...

Страница 9: ...swing open and closed External hinges allow 180 opening for greater access to contents inside the safe and helps provide the best fire and theft protection possible The Clutch Factory installed on al...

Страница 10: ...Heat Expandable Fire Seal Adjustable Shelving Dead Locking Bolts not show other side of door Door Adjustment Tabs Inside door jamb SAFE INTERIOR Please note that safe shown is for reference only Actua...

Страница 11: ...with adjustment tabs Heat Expandable Fire Seal Factory installed around inside of frame of safe body to provide additional fire protection Seal will expand up to seven times its flat size when exposed...

Страница 12: ...press is confirmed with an audio and visual LED flash signal 2 The lock will indicate a valid code entry with a double signal Within 4 seconds turn handwheel clockwise to retract the lock tang 3 To l...

Страница 13: ...e is locked out Store your safe s model serial number owner s manual and combination in a secure location outside your safe When a code is changed always check to make sure the previous code will no l...

Страница 14: ...uipped 1 For safety purposes place two rectangular blocks one on the left and another on the right underneath the safe These blocks should be long enough to span from the front to the back of the safe...

Страница 15: ...ch your floor type to make sure standard anchor bolts or lag bolts are adequate You will also need to purchase 3 8 flat washers Please contact a local contractor for the appropriate drilling method an...

Страница 16: ...rs in the future Heat Expandable Door Seal Seal does not require any maintenance nor should it be removed Internal Locking Mechanism The internal locking mechanism requires no maintenance Opening the...

Страница 17: ...andomly flashing you may be in a delay period Do not attempt to enter any combination for a period of 15 minutes If you attempt to enter a combination while in a delay period the delay will be extende...

Страница 18: ...Metals INSURANCE COVERAGE We highly recommended that you purchase an additional insurance coverage to the total value of the contents of your safe The Limited Warranty does not insure any of the cont...

Страница 19: ...invoice in order that this warranty may be honored 7 This warranty is not an insurance policy The Company is not responsible for damage or theft of the Purchaser s Safe or its contents 8 Any implied w...

Страница 20: ...eir expense The Warranty does not cover any costs for removal or installation of the safe or its contents Personal property in the safe is not covered by the Warranty The obligation of Rhino Metals In...

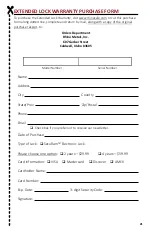
Страница 21: ...d Number Exp Date 3 digit Security Code Signature EXTENDED LOCK WARRANTY PURCHASE FORM To purchase the Extended Lock Warranty visit www rhinosafe com or cut this purchase form along dotted line comple...

Страница 22: ...NOTES Rhino Metals Technical Support 208 454 5545 22...

Страница 23: ...23...

Страница 24: ...Version 19A...

Отзывы: