background image

O P E R A T I O N S

Understanding Auto Sync

350-7951

Quadra User’s Guide

37

. .

 . 

.

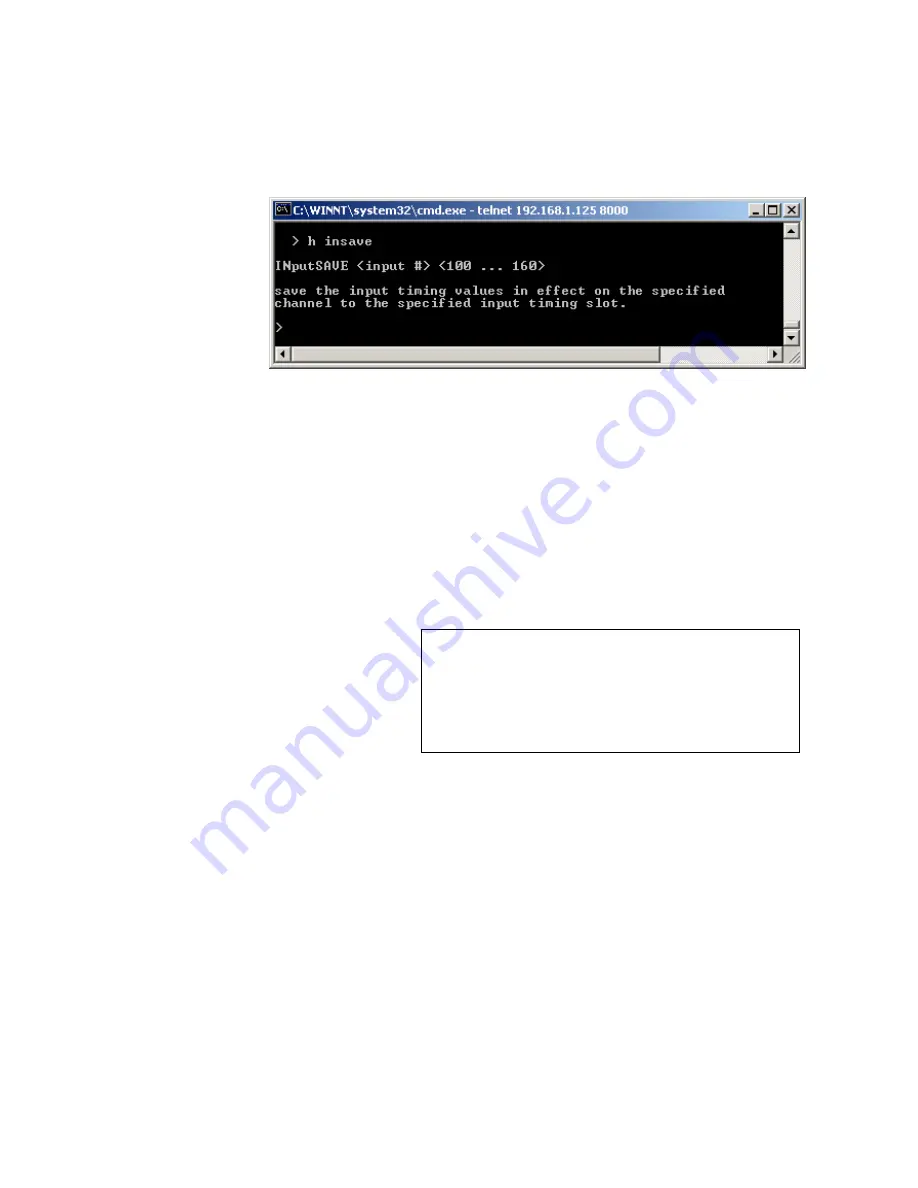
H INSAVE 

Enter

Figure 3-10.  

Help Text — Input Save Command

5. 

To save the specified RGB input in a “user” register, type:

INSAVE <input #> <100...160> 

Enter

S

Example:  To name RGB input 3 in register 101, type:

INSAVE 3 101 

Enter

6. 

Confirm the name and the storage register by viewing the timing list.  
Type:

TMLIST 

Enter

Scroll through the list as required to confirm the name and register.

Tip

When Auto sync is enabled, Quadra searches through the 
user portion of the timing list first, starting at register 100.  
If the system locates two “similar” sets of parameters, it 
loads the first one that it finds.  If you want to ensure that a 
particular register is loaded, place it earlier in the timing 
list.

Содержание Quadra

Страница 1: ...Quadra User s Guide ...

Страница 2: ... ...

Страница 3: ... to any machine readable form without prior written approval from RGB Spectrum Inc NOTICE RGB Spectrum reserves the right to make any modification to this guide or the information contained herein at any time without notice All features functions and specifications are subject to change without notice or obligation COMPANY ADDRESS RGB Spectrum 950 Marina Village Pkwy Alameda CA 94501 Telephone 510...

Страница 4: ...l have no obligations under this warranty with respect to any defect unless it receives notice and a description of such defect no later than five 5 business days following the expiration of the warranty period THE WARRANTIES STATED HEREIN ARE IN LIEU OF ALL OTHER WARRANTIES EXPRESS OR IMPLIED INCLUDING BUT NOT LIMITED TO ANY IMPLIED WARRANTIES OF MERCHANTABILITY OR FITNESS FOR A PARTICULAR PURPOS...

Страница 5: ... In This Chapter 8 Standard Supplied Components 8 Optional Items 9 Rack Mounting 9 Front Panel 10 Rear Panel 11 Installation 14 System Control Setup 16 Methods of Communications 16 RS 232 Serial Control Setup 16 Ethernet Control Setup 18 System Timing 19 Introduction to Timing 19 Output Timing 20 Advanced Output Timing 22 Input Timing 24 Chapter 3 Operations 27 In This Chapter 27 Introduction to O...

Страница 6: ...Hue and Saturation 47 Adjusting Sharpness 48 Creating a Background 49 Creating a 2x2 Monitor Wall 50 Chapter 4 Command Line Interface 52 Control Overview 52 Command Format 53 Command Line Usage 53 Command Help 54 Predefined Parameter Values 54 Query the Current Setting 54 Parameter Ranges 54 Addressable Commands 54 Optional Parameters 55 Command Set List 56 Command Summary 57 Input Commands 58 Inp...

Страница 7: ...ses 93 IP Address Setup via Serial Port 93 IP Address Setup via Ethernet 94 Appendix C Connector Types 97 In This Appendix 97 Connector Summary 97 Composite Video Connector 98 S Video Connector 99 Connector Type and Pinouts 99 S Video Cable Length 99 High Resolution Analog Connector 100 Connector Type and Pinouts 100 High Resolution Analog Cable Length 101 DVI I Connector 102 Connector Type and Pi...

Страница 8: ...1 How to Contact RGB Spectrum 114 Appendix E Technical Specifications 115 In This Appendix 115 General Specifications 115 System Characteristics 116 Digital Input Specifications 116 Analog Input specifications 117 Composite Video Input Specifications 117 S Video Input Specifications 118 Graphic Output Specifications 118 Image Control Specifications 119 Control Specifications 119 Power and Physical...

Страница 9: ...Quadra offers a completely digital path from signal source to display Typically Quadra is used as an advanced image gearbox with the ability to convert each input to a different user defined output format Figure 1 1 Four channel conversion application All output signal parameters are user selectable including line rate frame rate interlacing blanking and sync type Additionally Quadra s pan and zoo...

Страница 10: ...ge Concepts discusses the basics of image size position and aspect ration along with the important concepts of source and destination rectangles Appendix B Communications Setup provides information about specific communications setup procedures such as IP addresses Appendix C Connector Types provides technical information about Quadra s signal and control connectors Appendix D Firmware Upgrades an...

Страница 11: ...are supported A WORD ABOUT INPUTS Each Quadra input channel accepts any one of the component composite RGB and optionally digital inputs Using control commands users can dynamically switch between any one of the input sources but the limit of one source per channel remains in effect For example you could connect RGB from a PC S Video from a camera and Composite video from a VHS tape deck all to in...

Страница 12: ...ed output resolution adjustable up to 1600 pixels by 1200 lines with horizontal scan rates ranging from 12 to 125 kHz A WORD ABOUT SCAN RATES Quadra specifications state that a channel s output resolution is adjustable up to 1600 pixels by 1200 lines and horizontal scan rates are adjustable from 15 to 125 kHz However users should be aware that there are several important constraints to system reso...

Страница 13: ...er line or the of lines per frame For example A 1600 x 1200 output 85 Hz refresh rate requires a pixel clock of 229 5 MHz which is greater than the maximum pixel clock of 162 MHz A 1280 x 960 output 85 Hz refresh rate requires a pixel clock of 148 5 MHz which is less than the Quadra maximum pixel clock of 162 MHz When configuring your system the important factor to remember is the interrelation be...

Страница 14: ...natives FEATURE SUM MARY Following is a concise summary of Quadra features System Converts four RGB video inputs simultaneously each to its own output channel Each output channel can be set to a different resolution Full 24 bit color processing is used throughout System control is a command line interface provided via serial RS 232 or 10 100 BASE T Ethernet Compact 1RU package Inputs Supports a wi...

Страница 15: ...600 x 1200 75Hz DVI output up to 1600 x 1200 60Hz Adjustable output gamma to optimize performance with a variety of display technologies Special features High quality filtering Pan zoom and freeze each input Colored and shaded backgrounds Export import system settings Support for EDID Wall mode ...

Страница 16: ...ndard Supplied Components Optional Items Rack Mounting Front Panel Rear Panel Installation System Control Setup System Timing STANDARD SUPPLIED COMPONENTS The following equipment is included in the Quadra shipping carton Table 2 1 Standard Supplied Components Item Part Number Quadra Quadra User Manual on CD ROM 350 7951 Power cord 110 or 220 volt 520 1188 or 520 0271 1 DVI VGA Adapter 520 7885 ...

Страница 17: ...ric or otherwise depending upon the rack type 3 For additional stability at the rear of the chassis Quadra is provided with a rear rack bracket and extension arm Attach the rear brackets to the rack adapter at the rear of your chassis 4 Slide an extension arm through the slot on the rack adapter and attach the arm to the chassis 5 Attach the arm to the rear bracket by means of the fasteners locate...

Страница 18: ...ere is a valid Ethernet connection between Quadra and another Ethernet device Note that if an RS 232 connection only is used this LED will be off 4 Reset Button Press the Reset Button to perform a hard reset Use an unfolded paper clip to press the button which is located inside the small access hole When pressed systems parameters are unchanged this is equivalent to cycling the power 5 Comms Defau...

Страница 19: ...s illustrated and described below This input supports composite RGB component S Video and optionally DVI signals Figure 2 3 Input Channel Connectors RS 232 10 100 BaseT Output 1 Holes Holes Holes DVI 2 DVI 3 DVI 4 Composite 2 RGB 2 S Video 2 Composite 3 RGB 3 S Video 3 Composite 4 RGB 4 S Video 4 Holes Composite 1 RGB 1 S Video 1 DVI 1 Output 2 Output 3 Output 4 6 2 3 4 5 7 8 9 10 11 1 1 AC Power ...

Страница 20: ... This input supports 3 4 or 5 wire connections and is typically used to connect the output of a computer to Quadra Digital One DVI I connector is used for the optional digital input typically used to connect an external computer graphics output to the Quadra 3 Input Channel 2 Four connectors are provided for Input Channel 2 The complement of input signal types is identical to Input Channel 1 See t...

Страница 21: ...n female D Sub connector is provided for local RS 232 control from an external device Please note Use this connector when the controlling device is physically close to Quadra and control across a network is not required Connection to a PC external controller or serial terminal can be made using this connector 11 Ethernet Port One 10 100 Base T Ethernet RJ 45 connector is provided for control over ...

Страница 22: ...o BNC adapter or a mini DIN to phono adapter cable Connect the composite video signal to the Y channel RGB YPbPr input use a standard VGA cable with a 15 pin male D sub connector This connector supports 3 4 or 5 wire connections In Appendix C refer to the High Resolution Analog Connector section for pinouts Digital input optional use a standard DVI cable In Appendix C refer to the DVI I Connector ...

Страница 23: ...minal emulation program such as Hyperterminal or Procomm connect the COM port of your computer or other terminal control device to Quadra s RS 232 serial port A straight through cable typically 9 pin male to female with one to one wiring will be required In Appendix C refer to the RS 232 Connector section for information on RS 232 connection parameters Please continue with the System Control Setup...

Страница 24: ...or instructions Once the communications have been established using one of the above methods you will be able to adjust all Quadra system parameters Refer to Chapter 4 Command Line Interface for a complete description of all Quadra commands RS 232 SERIAL CONTROL SETUP The RS 232 serial control method uses an ASCII terminal or a PC running a terminal emulation program such as HyperTerminal or Proco...

Страница 25: ...2 4 Hyperterminal Window Sample Please note If a prompt is displayed in the window as shown above your PC is successfully connected to Quadra If you do not see a prompt or any characters there is a connection problem Refer to Appendix D Firmware Upgrades and Troubleshooting for troubleshooting steps 7 If a prompt is displayed you can test out the system Type HELP and press Enter If communications ...

Страница 26: ...our LAN Ethernet hub or Ethernet switch using a standard Ethernet cable 2 On your PC launch a command window by clicking Start Run In the Run Dialog type cmd and click OK 3 In the command window type telnet ipaddress 8000 where ipaddress represents the current IP address of your Quadra and 8000 represents the communications port If you are connecting peer to peer and you have not changed Quadra s ...

Страница 27: ... terminal Refer to Chapter 4 Command Line Interface for a complete command list 5 Please continue with the System Timing section SYSTEM TIMING The following topics are outlined in this section Introduction to Timing Output Timing Advanced Output Timing Input Timing INTRODUCTION TO TIMING For the best visual results with Quadra the timing parameters of a signal must match the display device Please ...

Страница 28: ...hose parameters If Quadra does not find a match in the user entry section it searches through all factory defined entries and loads the closest match If you want to manually enter your own parameter to more closely match those of the selected display monitor the Output Timing and Advanced Output Timing procedure enable you to do so and store those settings in a memory register OUTPUT TIMING The Ou...

Страница 29: ...on interlaced but interlaced signals are used in some special applications Note the required interlace setting interlace or non interlace for your display 3 In Chapter 4 review the list of output parameters in the Factory Timing List and find the set of parameters that most closely match those of the display device as you noted in step 2 Make a note of the Reference ID for this set of parameters c...

Страница 30: ...re test pattern is completely visible In some special applications you may choose to change Quadra s output parameters rather than adjust the display device In this case use Quadra s Output Timing Interactive procedure to match the display settings Refer to the Advanced Output Timing section for details 12 Turn off the test pattern Type TP output OFF Enter 13 With the display adjusted you can now ...

Страница 31: ...sition the upper left corner for maximum image visibility or for multi display device configurations to position the corner to precisely match the position of the image on adjacent display 5 With the upper left corner properly adjusted use the keyboard controls listed below to position the bottom right corner of the box at the bottom right corner of the display monitor I move up J move left M move...

Страница 32: ...registers 11 Turn off the test pattern Type TP output OFF Enter 12 This completes the advanced output timing procedure for the selected output channel Repeat from step 1 for the remaining output channels as required When all output channels have been timed interactively please continue with the Input Timing procedure outlined below INPUT TIMING When you connect a graphics signal to a Quadra input ...

Страница 33: ...utSouRCe command Type INSRC input RGB DVI YUV COMPOSITE1 COMPOSITE2 SVIDEO Enter Please note the following points regarding the command s arguments When using an RGB graphic input connected to the RGB connector select the RGB argument When using a digital video input connected to the optional DVI connector select the DVI argument S Example If a digital DVI source is connected to input 2 type INSRC...

Страница 34: ...ers 10 Use the Input Name function to name the input source up to 23 alphanumeric characters in length Spaces are not allowed in the name but underscores and upper lower case characters are OK Type INN input name Enter S Example To name input 1 PowerPoint_1 type INN 1 PowerPoint_1 11 Use the Input Save function to store the selected input s parameters in one of 61 slots in the Input List These set...

Страница 35: ...t Format Testing Outputs Selecting an Input Source Enabling and Disabling Outputs Understanding Auto Sync Loading Input Timing Values Performing Interactive Input Timing Naming and Saving Input Timing Values Cropping an Image Zooming an Image Panning an Image Sizing the Output Image Using Position Adjusting Brightness and Contrast Adjusting Hue and Saturation Adjusting Sharpness Creating a Backgro...

Страница 36: ...s Quadra s features enable you to pan zoom and selectively extract any portion of an input signal for cropping or aspect ratio adjustment You can also easily convert an input source to a lower line rate format In the individual channel conversion mode each input can be converted to a different output format as illustrated below Figure 3 1 Four channel conversion configuration At your facility this...

Страница 37: ...also recommends that you query the current state of the command prior to entering new parameters These are good Quadra habits to develop For reference each procedure includes a hyperlink to the command s description in Chapter 4 Note that the short forms of all commands are used in this chapter as displayed by the Capital Letters in each command name For example instead of typing OutPutENable simp...

Страница 38: ... parameters using values that are stored in the system s Factory Timing List MANUALLY LOADING OUTPUT PARAMETERS Use the following steps if you want to manually enter your own output parameters 1 Ensure that the display s that you want to set up are connected to selected Quadra outputs 2 Obtain a copy of the display device s operations manual or technical guide and make a note of the following para...

Страница 39: ...a selected output channel you can enable a variety of internal test patterns and quickly check your Quadra s outputs Use the following steps to test each output 1 Ensure that the display s that you want to test are connected to Quadra outputs and that their output formats have been set as outlined in the Setting Output Format section 2 Request help text for the command Type H TP Enter This action ...

Страница 40: ...t supports up to four sources composite RGB component S Video and optionally DVI Use the following steps to select input sources 1 Ensure that a variety of input sources are connected to Quadra s input channels A sample connection is shown below for a single channel Figure 3 5 Full array of input connections 2 Request help text for the command Type H INSRC Enter This action displays the command s ...

Страница 41: ...r using the OutPutENable command With this command you can enable or disable one or all Quadra outputs In addition using the optional duration parameter you can fade an output to or from black with fade durations up to 128 seconds Use the following steps to enable or disable outputs 1 Request help text for the command Type H OPEN Enter This action displays the command s parameters and variables Fi...

Страница 42: ...ction When OFF the autosync circuitry is disabled and the WSR settings are retained even with a loss of the input signal With Auto Sync enabled Quadra automatically syncs to the RGB signals connected to the various inputs The Auto Sync function has no effect on Composite or S Video input sources as those format definitions are well known and easy to auto detect However because there are many diffe...

Страница 43: ...Auto_1 appears this indicates the active register for automatic settings when Auto Sync is enabled There are four Auto_1 registers one for each Quadra input 2 Request help text for the INputLOAD command Type H INLOAD Enter This action displays the command s parameters and variables Figure 3 8 Help Text Input Load Command 3 Show the timing list Type TMLIST Enter 4 Review the Factory Timing List in ...

Страница 44: ...ave loaded a custom set of timing parameters or performed the Interactive timing adjustment it is highly recommended that you name and store the settings in the user section of the Factory Timing List In this way the next time Quadra is turned on and RGB inputs are used when the Auto Sync search through the list is performed your saved settings will be loaded Use the following steps to name your c...

Страница 45: ...3 101 Enter 6 Confirm the name and the storage register by viewing the timing list Type TMLIST Enter Scroll through the list as required to confirm the name and register Tip When Auto sync is enabled Quadra searches through the user portion of the timing list first starting at register 100 If the system locates two similar sets of parameters it loads the first one that it finds If you want to ensu...

Страница 46: ...ther instantly or transition the image between settings with a duration of up to 128 seconds Use the following steps to crop a source image 1 Request help text for the WindowSourceRectangle command Type H WSR Enter Figure 3 11 Help Text Window Source Rectangle Command 2 Query the input timing to verify the actual dimensions of the source This gives you a basis for further scaling Type INTM input E...

Страница 47: ...ype wsr 4 100 100 1080 824 Enter S Example From input 1 s current position zoom in to the upper left quadrant in 5 seconds Type wsr 1 0 0 400 300 5 Enter S Example From input 1 s current position zoom out to full screen in 8 2 seconds assuming 800 x 600 Type wsr 1 0 0 800 600 8 2 Enter Please note Remember that the horizontal and vertical sizes can be adjusted independently For example if you simp...

Страница 48: ...ut Enter Use the following controls to zoom Type i to zoom in o to zoom out 3 When you are finished zooming type q to exit the mode Please note The zoom function zooms straight in or out using the image s current WSR values You can also zoom in or out by a fixed amount of repetitions S Example Zoom out by 10 units Type ZM input o 10 Note that 10 units is equivalent to a vertical zoom factor of 10 ...

Страница 49: ...ter Figure 3 13 Help Text Pan Command 2 Ensure that the image has been zoomed or cropped before proceeding A full size source image can not be panned 3 Activate the interactive pan function Type PAN input Enter Use the following controls to pan Type i to pan up m to pan down j to pan left l to pan right 4 When you are finished panning type q to exit the mode Please note You can also pan by a fixed...

Страница 50: ...R values are limited to the output resolution of the selected Quadra output channel full screen display Use the following steps to size the output image 1 Request help text for the WindowDestinationRectangle command Type H WDR Enter Figure 3 14 Help Text Window Destination Rectangle Command 2 Query the output timing to verify the output display s actual dimensions This gives you a basis for settin...

Страница 51: ... output 1 rectangle transition the rectangle in 5 seconds to approximately center screen in an 800 x 600 window Type wdr 1 230 200 800 600 5 Enter S Example Assuming an output resolution of 1280 x 1024 and a full screen image slide the image off screen to the left in 2 5 seconds Type wdr 1 1280 0 1280 1024 2 5 Enter Please note In Appendix A refer to the Image Rectangles section for addition detai...

Страница 52: ...jumps while 10 10 causes larger incremental jumps in the position of the selected output rectangle The POSition command is the actual mode that enables you to move an output rectangle left right up or down Use the following steps to interactively position the output image 1 Request help text for the SETRATE command Type H SETRATE Enter Figure 3 15 Help Text Setrate Command 2 Query the current SETR...

Страница 53: ... 5 Change the Position interactively as desired Type POS output Enter Use the following controls to position the rectangle Type i to move the rectangle up m to move the rectangle down j to move the rectangle left l to move the rectangle right Note that the rectangle jumps at the designated SETRATE increment 6 When you are finished positioning type q to exit the mode ...

Страница 54: ...Ightness command Type H BRI Enter Figure 3 17 Help Text Brightness Command 2 Query the source s current brightness Type BRI input Enter 3 Adjust the brightness as desired from 500 to 500 Type BRI input brightness value Enter 4 Request help text for the CONTrast command Type H CONT Enter Figure 3 18 Help Text Contrast Command 5 Query the source s current contrast Type CONT input Enter 6 Adjust the ...

Страница 55: ...19 Help Text Hue Command 2 Query the source s current hue Type HUE input Enter 3 Adjust the hue as desired from 180 to 180 degrees Type HUE input hue value Enter 4 Request help text for the SATuration command Type H SAT Enter Figure 3 20 Help Text Saturation Command 5 Query the source s current color saturation Type SAT input Enter 6 Adjust the color saturation as desired from 0 to 200 Type SAT in...

Страница 56: ...harpness using the SHARPness command 1 Request help text for the SHARPness command Type H SHARP Enter Figure 3 21 Help Text Sharpness Command 2 Query the source s current sharpness Type SHARP input Enter 3 Adjust the sharpness as desired from 5 soft to 5 sharp Type SHARP input sharpness value Enter Note that a value of 0 zero turns sharpness off ...

Страница 57: ...nt background color Type BGSRC input Enter 3 Change the source s background as desired Type BGSRC input background selection Enter S Example Set the background to solid blue for input 1 Type BGSRC 1 BLUE Enter S Example Set the background to a red vertical ramp for input 3 Type BGSRC 3 REDRAMP Enter S Example Set the background to a green horizontal ramp for input 1 Type BGSRC 1 HGREENRAMP Enter S...

Страница 58: ...e that each input s timing is properly and identically set Refer to the Loading Input Timing Values for instructions 4 Ensure that each output s timing is properly and identically set Refer to the Setting Output Format for instructions 5 Connect Quadra s outputs to your monitor wall as follows Connect output 1 to the top left monitor Connect output 2 to the top right monitor Connect output 3 to th...

Страница 59: ... to the exact lower left quadrant of the source image Input 4 is cropped to the exact lower right quadrant of the source image The net result on your 2x2 monitor wall is a perfectly expanded source image 8 To switch back to full size inputs on each output channel use the UDC command Type UDC Enter ...

Страница 60: ...dra may be controlled externally via RS 232 or via the unit s Ethernet 10 100BASE T port as shown below Figure 4 1 Quadra Control Methods Quadra s Command Set provides full system control and with few exceptions all commands can be issued using either the serial port or the Ethernet port using a Telnet session Exceptions are noted in the command descriptions Remember that control via Ethernet requ...

Страница 61: ...lue2 followed by Enter Parameter values are shown in angle brackets In the above example value1 value2 etc are required parameters specific to the stated command S Example Set Quadra s baud rate to 9600 bps BAUDRATE 9600 The majority of commands have both long and short forms The long form version is an easily understood word or the concatenation of two or more words The short form version is a br...

Страница 62: ...1 value2 value3 S Example The choices for BAUDrate are 9600 19200 38400 57600 115200 QUERY THE CURRENT SETTING When a command is entered without any parameters Quadra reports back the current settings of the selected parameter S Example What is the current baud rate setting BAUDrate would return 9600 PARAMETER RANGES Parameter values may be a range of values or a defined set of choices as describe...

Страница 63: ... then be indicated in the following form parameter ALL The ALL modifier is useful for setting all inputs to the same value S Example Set the brightness value of all inputs to 0 BRIght ALL 0 OPTIONAL PARAMETERS Some commands have optional parameter values that are not required in a command These discretionary values are indicated by square brackets COMMAND value value2 VideoAspect is a command with...

Страница 64: ...ed according to categories Command Summary Input Commands Output Commands Display Commands Image Control Commands Serial Port Commands Network Commands Miscellaneous Commands Note It is recommended that you take the time to review each of these command lists trying as many commands as possible with your Quadra In that way you will quickly become familiar with the machine s full capabilities in add...

Страница 65: ...ble SYStemReSeT ECHO OutPutREFerence TestPattern FReeZe OutPutTiMing TiMingDELete GAMma OutPutTiMing INTeractive TiMingLIST HANDShaking OutPutTiMingLOAD TiMingLISTCLEAR Help OutPutTiMingNAME TiMingLISTLOAD HUE OutPutTiMingSAVE UDC ID OVerScan UNderScan INputAutoSync PAN UpdateFirmWare INputFormat POSition VERsion INputINTeractive RECALLCONFIGuration VideoAspectRatio INputLOAD ResetSourceRectangle ...

Страница 66: ... INputINTeractive Enters input interactive mode to visually adjust an input s timing parameters INputLOAD Loads the indicated entry from the Input List to the specified input channel INputNAME Names the specified input INputPHASE Adjusts the phase of the Analog Digital Converter to optimize picture quality INputSAVE Saves the specified input to the selected entry in the Input List INputSouRCe Sele...

Страница 67: ... parameters Default ON INputFormat input Checks the video format of the current video input selection The command is only valid when INputSouRCe is set to Composite or S Video The response to the command will be NTSC or PAL INputINTeractive input Enters input interactive mode to visually adjust specified input s timing parameters A white box appears over the full screen input Starting with the upp...

Страница 68: ... Quadra INputSouRCe input RGB DVI YUV COMPOSITE1 COMPOSITE2 SVIDEO Selects the analog or digital graphics source for the specified input Default RGB INputTiMing input hfp hs hbp hact vfp vs vbp vact HFP HS HBP HACT VFP VS VBP VACT value Defines the active area of the input signal and the selected input s timing Using this command the user can set all timing parameters as query or set the value of ...

Страница 69: ... hact vfp vs vbp vact hfreq sync hpol vpol il Enables users to completely define an input signal This does not require an input signal to be present to do so TimingListLoad could be used to enter the list entries one by one The first argument 100 160 indicates the Timing List entry number in which to store the timing string The second argument name gives a customized name to the signal The next ei...

Страница 70: ...ry Command Description OutPutENable Switch or fade the output to or from black OutPutREFerence Selects the output s timing reference OutPutTiMing For the selected output channel sets the output timing by parameter OutPutTiMing INTeractive Enters the interactive output timing adjustment mode for the selected output channel OutPutTiMingLOAD For the selected output channel sets output display paramet...

Страница 71: ...efault INT OutPutTiMing output hfp hs hbp hact vfp vs vbp vact hfreq sync hpol vpol il HFP HS HBP HACT VFP VS VBP VACT HFREQ SYNC HPOL VPOL IL value This advanced mode sets the output timing by output channel and by parameter The command supports the ability to set all parameters at once or the ability to set or query the status of individual parameters Refer to the Timing Parameters section for d...

Страница 72: ...fined Refer to the Factory Timing List for details on all entries and timings OutPutTiMingNAME output name For the selected output channel assigns a user defined name to the Factory Timing List entry currently in use The name text string can be up to 23 alphanumeric characters with no spaces use underscore in place of a space OutPutTiMingSAVE output 100 160 For the selected output channel saves th...

Страница 73: ... move an input window around the output display ResetSourceRectangle Resets source rectangle to default values SETRATE Determines the number of pixels an output rectangle moves with the POSition command SIZE Activates size utility to resize the specified input UDC Configures Quadra to route full size images to each output UNderScan For the specified input turns the Underscan feature on and off Vid...

Страница 74: ...nned Controls are listed below i pan up j pan left m pan down l pan right q quit POSition output direction repetition Activates the position utility allowing you to move the specified input window around the specified output Controls are listed below i move up m move down j move left l move right q quit The direction and repetition arguments allow you to repeat a movement in one direction without ...

Страница 75: ... 78 1 WideScreen3 1 85 1 WideScreen4 2 35 1 Default NORMAL VideoInterlaceFiLteR input NORMAL TEMPORAL ADAPTIVE Selects the type of de interlace filter for the specified input Applies to composite or S Video inputs only WALL none Configures Quadra to operate as a simple 2x2 splitter for wall applications As a prerequisite the source must be split into four sources externally using a distribution am...

Страница 76: ...he destination rectangle width range is 1 1920 height range is 1 1440 The rectangle can be positioned and sized so that part of it is positioned off screen WDR is limited to the output resolution of the Quadra full screen display Example With an output host resolution of 1024 x 768 set output 4 to full screen WDR 4 0 0 1024 768 Example Place a 100 pixel by 100 line video window at column 300 line ...

Страница 77: ...e To display only the bottom right quadrant WSR values are wsr input 400 300 400 300 Example The full default source rectangle for this 800x600 input is wsr input 0 0 800 600 Example Zoom in to the upper left quadrant in 5 seconds wsr input 0 0 400 300 5 Note that since the horizontal and vertical size can be adjusted independently this command can be used to stretch or squeeze an image WSR resets...

Страница 78: ... the Image Control Commands Descriptions section for a complete description of all image control commands Table 4 8 Image Control Commands Summary Command Description BRIghtness Sets the brightness value of the selected input CONTrast Sets the contrast value of the selected input FReeZe Turns freeze status of the selected input on or off GAMma Sets a gamma value for the selected Quadra output chan...

Страница 79: ... will not be applied until after the Freeze is turned off Note Any change to the output timing resets the freeze status to off Default OFF GAMma output 0 5 2 0 Sets a gamma value for the specified Quadra output channel The translation between electrical input and light output of display devices varies by the type of device This command is used to match the specified Quadra channel to the connected...

Страница 80: ...erial port baud rate ECHO Turns the serial echo On Off HANDShaking Sets the flow control mode Table 4 11 Serial Port Commands Descriptions Command Arguments Description BAUDrate 9600 19200 38400 57600 115200 Sets the serial port baud rate The value is automatically saved in NVRAM Default 9600 ECHO ON OFF Turns the serial echo On Off The value is saved in the NVRAM The echo is only present on comma...

Страница 81: ...dra s IP default gateway MACADDRess Displays the Quadra Ethernet MAC address Table 4 13 Network Commands Descriptions Command Arguments Description IPADDRess ddd ddd ddd ddd Sets the IP address for the Quadra To determine the current IP address enter the command without an IP address Note New IP address settings will not be applied until after a system reset See also IPGateWay and IPSubNET Default...

Страница 82: ...plays the entire serial command set or provides help on specific commands ID Displays system information including firmware version numbers RestoreFactoryDefaults Restores all user settings to their factory default values RECALLCONFIGuration Recalls configuration parameters that were saved manually SAVECONFIGguration Manual save of the system s NVRAM SETTINGSEXPORT Exports an ASCII file of system ...

Страница 83: ... without an argument displays the entire serial command set Help with a command as an argument displays detailed information about that command ID none Quadra responds to this command with a list of system information The list consists of firmware and hardware version numbers and other system information such as the IP address RestoreFactoryDefaults none Restores all user settings to their factory...

Страница 84: ...ishes this Alternatively you can save just the individual TIMING WINDOW or SYSTEM parameters To save only the user defined timing values use the TIMING argument If you wish to save only the window preset parameters for each active window preset use the WINDOW argument If you wish to save only the system parameters for the current system settings use the SYSTEM argument Note that this does not incl...

Страница 85: ...Telnet or serial port issue the command SETTINGSIMPORT filename Note that if you use the default filename export txt you do not need to specify the filename See also SETTINGSEXPORT STATus none Returns details about the current graphics input signals that are applied to each Quadra graphics input SYStemReSeT none Causes the Quadra system to reset TestPattern output ALL SNOW RANDOM DVI1 RAMPS GRID H...

Страница 86: ...ontal front porch 0 to 640 pixels The beginning of the horizontal blanking interval HS Horizontal sync 16 to 640 pixels The width of the horizontal synchronizing pulse HBP Horizontal back porch 0 to 640 pixels The end of the horizontal blanking interval The total horizontal blanking HFP HS HBP HACT Horizontal active 16 to 1920 pixels The active picture interval non blanked portion of the image The...

Страница 87: ... polarity and the value 0 represents negative sync polarity Typically the horizontal and vertical sync have the same polarity Note that three wire sync is always negative polarity VPOL Vertical sync polarity 1 or 0 The value 1 represents positive sync polarity and the value 0 represents negative sync polarity Note that three wire sync is always negative polarity IL Interlaced Noninterlaced 1 or 0 ...

Страница 88: ...ction If desired print this list and keep a record of any user defined settings that you configure Table 4 17 Factory Timing List ID TYPE HFP HS HBP HACT HFRQ VFP VS VBP VACT SYNC HPOL VPOL IL 1 VESA 640 x 350 85Hz 32 64 96 640 37 861 32 3 60 350 5 1 0 0 2 VESA 640 x 400 85Hz 32 64 96 640 37 861 1 3 41 400 5 0 1 0 3 VESA 720 x 400 85Hz 36 72 108 720 37 927 1 3 42 400 5 0 1 0 4 VESA 640 x 480 60Hz ...

Страница 89: ...5 734 3 3 14 242 3 0 0 1 30 720 x 576 25i 12 66 66 720 15 625 2 5 2 5 20 287 3 0 0 1 31 960 x 480 29 97i 23 69 92 960 15 734 3 3 14 242 3 0 0 1 32 960 x 576 25i 23 69 100 960 15 625 2 5 2 5 20 287 3 0 0 1 33 1280 x 720 24 70 40 260 1280 18 000 5 5 20 720 3 0 0 0 34 1280 x 720 30 70 40 260 1280 22 500 5 5 20 720 3 0 0 0 35 1280 x 720 60 70 40 260 1280 45 000 5 5 20 720 3 0 0 0 36 1920 x 1080 24i 59...

Страница 90: ...th the concepts of source and destination rectangles In addition to the ability to size and position an input users can assign different input sources and manipulate them in various creative ways These and other topics are discussed in this chapter Image Rectangles Source Rectangle Destination Rectangle Aspect Ratio Positioning and Clipping ...

Страница 91: ...age as displayed on the output Each type of rectangle is described below A source rectangle selects a rectangular portion of a full size input image Typically the source rectangle contains the entire image but it can also contain a cropped portion or subset of the entire picture This portion fills the destination rectangle as described below on the display device Quadra automatically changes an in...

Страница 92: ...age By convention the upper left corner starts at pixel coordinate 0 0 The bottom right corner ends at coordinate 639 479 When using Quadra the Window Source Rectangle WSR command uses the following convention to define an input s source rectangle x y width height The x and y parameters define the coordinates of the first pixel located at the top left of the image The width and height parameters t...

Страница 93: ...ge has been defined Figure A 2 Portion of Full Size Image The cropped image is 450 pixels wide by 300 lines high The upper left corner starts at pixel coordinate 100 50 The bottom right corner ends at coordinate 549 349 Thus to define and use the cropped size picture from Figure A 2 as your source the WSR would be defined as 100 50 450 300 ...

Страница 94: ...ntal width of 600 pixels and a vertical height of 250 lines Figure A 3 Full Size Source mapped to Destination The Window Destination Rectangle WDR command defines the size and position of the destination rectangle for the image displayed on the output channel Thus to map the full size picture from Figure A 1 WSR 0 0 639 479 to a destination rectangle the WDR would be defined as 300 500 600 250 Not...

Страница 95: ... 450 300 in the above example to 1280 x 1024 we could expand this cropped image to fill the display device In this case the WDR value would be defined as 0 0 1280 1024 ASPECT RATIO As you learned in the previous sections the source rectangle parameter selects any desired rectangular portion of an input image This image can then be displayed mapped in a destination rectangle in an identical or diff...

Страница 96: ...yed image larger or smaller As long as its proportions correspond to those of the source rectangle the output image resembles the input image If you independently vary the shape of either the source or destination rectangle so that their aspect ratios are no longer the same the displayed picture will appear stretched or squeezed as compared to the original image POSITIONING AND CLIPPING An image c...

Страница 97: ...User s Guide 89 In the second example the same source rectangle is mapped to a destination rectangle starting at 200 200 By specifying screen coordinates with negative values the left and top edges of the source image can be clipped Figure A 6 Clipped Image Screen Left ...

Страница 98: ...ocedures that are referenced in Chapter 2 Installation and Setup The following topics are discussed Launching a Hyperterminal Window IP Address Setup LAUNCHING A HYPERTERMINAL WINDOW Use the following steps to launch a Hyperterminal window on your PC 1 On your PC click Start Programs Accessories Commu nications Hyperterminal Figure B 1 Hyperterminal Path ...

Страница 99: ...ich is shown below Figure B 2 Connection Description Dialog Sample 2 In the dialog Enter a name Choose an icon Click OK to display the Connect To Dialog Figure B 3 Connect To Dialog Sample 3 In the Connect To Dialog ignore the Country Area Code and Phone Number fields In the Connect Using field select your PC s COM port to which the serial cable from Quadra is connected ...

Страница 100: ...pre configured factory settings as follows Bits per second baud 9600 Data bits 8 Parity None Stop bits 1 Flow control XOn XOff Quadra can be configured to operate at baud rates from 9600 baud to 115 kbaud In Chapter 4 refer to the Serial Port Commands section for details about changing baud rates 6 Click OK to display the Hyperterminal window 7 In Chapter 2 please continue with step 5 in the RS 23...

Страница 101: ...address before putting it on the network This can be accomplished in one of two ways Use the serial port to change the unit s IP address Refer to the IP Address Setup via Serial Port section below Connect Quadra directly to a PC using Quadra s Ethernet port Refer to the IP Address Setup via Ethernet section for details IP ADDRESS SETUP VIA SERIAL PORT Use the following steps to change Quadra s IP ...

Страница 102: ...r This procedure is not required if you have already set the IP address using the method described above in the IP Address Setup via Serial Port section Use the following procedure to set up the IP address with a Telnet session 1 Use an Ethernet crossover cable to connect directly between the Quadra s Ethernet port the network port of your PC 2 Open a web browser window on your PC Internet Explore...

Страница 103: ...h the following message The system must be restarted for your changes to take effect Do you want to restart the system y n Type y to accept the new address or n to retain the current address 7 If you pressed y in the step above Quadra restarts and the Telnet connection is lost Repeat steps 2 through 4 to establish a new Telnet session except in step 4 type the new IP address 8 Confirm the new sett...

Страница 104: ...O N S S E T U P IP Address Setup 350 7951 Quadra User s Guide 96 Window Refer to Chapter 4 Command Line Interface for a complete command list Note To close a Telnet session type EXIT or use the keystroke sequence Control D ...

Страница 105: ...or DVI I Connector Ethernet Connector RS 232 Connector CONNECTOR SUMMARY The table below summarizes the types of connectors used in the Quadra chassis Table C 1 Quadra Connector Types Connector Physical Type Gender Composite Video Connector BNC Female S Video Connector 4 pin mini DIN Female High Resolution Analog Connector 15 pin HD D Sub Female DVI I Connector DVI I Female RS 232 Connector 9 pin ...

Страница 106: ... high frequency signals over moderate distances Please note Coaxial cable is commonly available with a characteristic impedance of either 50 or 75 Ω 75 Ω cables and connectors are used exclusively for Video signals For best signal quality it is important to use a high quality 75 Ω coaxial cable The use of 50 Ω cables will cause a signal mismatch and this may result in visible artifacts on video im...

Страница 107: ...onnector allowing the use of standard commercially available cables The pinout for the standard S Video connector is shown in the figure below Figure C 2 S Video connector viewed from rear of chassis The 4 pin mini DIN connector has the following signals S VIDEO CABLE LENGTH S Video cables tend to have higher loss than the standard coaxial cables that are used for composite video Therefore for bes...

Страница 108: ...nected using a sub miniature 15 pin D type HD 15 as shown below This connector is often referred to as a VGA or VESA connector and it supports the VGA SVGA XGA SXGA and UXGA signals Figure C 3 RGB Analog Connector viewed from rear of chassis The table below lists signals for the 15 pin D type HD 15 connector including the pinout for the RGB analog input and the correct connections for YUV inputs N...

Страница 109: ... RGB or YUV signals have very high signal bandwidths Cable lengths should be kept as short as possible as longer cable lengths attenuate the signal more severely at higher bandwidths 13 CS HS Composite Sync or Horizontal Sync 14 VS Vertical Sync 15 NC ID3 not used Table C 3 RGB Analog Video Connector Pinouts Continued Pin Signal Description ...

Страница 110: ...I output channels and for each channel s optional digital DVI input Figure C 4 DVI I Digital Analog Connector viewed from rear of chassis The 29 pin DVI I connector has the following signals Table C 4 DVI I Connector Pinouts Pin Signal Description 1 TMDS Data 2 2 TMDS Data 2 3 TMDS Data 2 4 shield 4 NC Defined for Dual Link only 5 NC Defined for Dual Link only 6 DDC Clock 7 DDC Data 8 Analog Verti...

Страница 111: ...both digital and analog outputs Purpose built cables are available commercially to provide connections for digital or analog interfaces Quadra is provided with a DVI 15 pin adapter for use with analog devices Alternatively an analog only output cable can be purchased that provides a break out capability to separate RGB connectors or sub miniature 15 pin D connector 17 TMDS Data 0 18 TMDS Data 0 19...

Страница 112: ...ctly from a PC to the Quadra a crossover cable must be used see the following section for details CROSSOVER CABLES To connect directly from a PC or laptop to Quadra without connecting to the network an Ethernet crossover cable must be used Crossover cables are available commercially In a crossover cable one end of the cable is wired using the pin assignments shown in Table C 5 At the other end the...

Страница 113: ...n 9 is in the lower left corner Figure C 6 9 pin D Sub RS 232 Female Connector The 9 pin D Sub connector has the following signals NULL MODEM You may need to connect Quadra s serial port to a computer configured as Data Communications Equipment DCE This is accomplished using a null modem The net effect of a null modem is to reverse the Transmitted Data and Received Data connections within the cabl...

Страница 114: ...7951 Quadra User s Guide 106 D FIRMWARE UPGRADES AND TROUBLESHOOTING IN THIS APPENDIX The following topics are discussed in this appendix Firmware Upgrades System Troubleshooting How to Contact RGB Spectrum ...

Страница 115: ...ing steps to download firmware from the RGB website 1 Before you begin use the VER command to identify your current firmware version Make a note of the version number 2 On your PC launch a standard web browser and log on to the RGB website http www rgb com 3 Click the Support link to display the main support page 4 Scroll down to the Product Support section and click the link for your specific pro...

Страница 116: ... 1 Connect Quadra to the PC using the Ethernet port either directly or via a network Remember that a crossover cable is required for direct connections 2 On your PC open up the folder into which you downloaded the firmware Keep this folder open on your desktop 3 Launch your web browser In the browser s Address Bar type ftp ip address and press Enter Note that ip address represents the IP address o...

Страница 117: ...er Keep this folder open on your desktop for reference 3 To open a command window click Start Run In the Run Dialog type CMD and press Enter 4 In the command window type FTP and press Enter This action opens an FTP terminal 5 At the FTP prompt type open ipaddress and press Enter Note that ip address represents the IP address of the Quadra that you want to upgrade Once the connection is successful ...

Страница 118: ...t In Chapter 2 refer to the RS 232 Serial Control Setup section for instructions 2 Using the command line interface type ufw and press Enter 3 Quadra will ask for confirmation that you wish to proceed Press y to continue or n to halt the process After typing y Quadra loads the files When the loading process has completed the following message appears You may now restart the system 4 On Quadra s fr...

Страница 119: ...to troubleshoot the Quadra If problems persist refer to the How to Contact RGB Spectrum section for technical support instructions Important Quadra s hardware should only be modified or repaired by RGB Spectrum s technicians Table D 1 Troubleshooting Guide Symptom Recommendations No power or lights Check that the Quadra is plugged in and powered on No signal or a poor signal on the display Check t...

Страница 120: ...e and destination rectangles are delivering the entire video image Poor quality video Check the video source for proper operation Check that cables are in good condition and connected correctly Ensure that video sources are not double terminated Double termination can occur when one video source is split into two using a T connector instead of a distribution amplifier If you are using a VCR check ...

Страница 121: ...uited to your network configuration If you believe the IP address and Subnet mask are correct but you still cannot connect check that this is not a duplicate IP address Use the IP ping command from the Windows command window and see if there is a response If there is a response turn off Quadra and ping the IP address again If there is still a response a duplicate address exists Unable to connect t...

Страница 122: ...ide 114 HOW TO CONTACT RGB SPECTRUM RGB Spectrum can be reached via phone fax mail and e mail as listed below RGB Spectrum 950 Marina Village Parkway Alameda CA 94501 Phone 510 814 7000 Fax 510 814 7026 E Mail technical support support rgb com E Mail sales and product information sales rgb com Website http www rgb com ...

Страница 123: ...uadra and how they may be stored and retrieved GENERAL SPECIFICATIONS The following section provides detailed tables of functional and performance specifications System Characteristics Digital Input Specifications Analog Input specifications Composite Video Input Specifications S Video Input Specifications Graphic Output Specifications Image Control Specifications Control Specifications Power and ...

Страница 124: ...Input types The user may select between the following types for each input channel RGB YPbPr component HDTV Composite video S Video DVI optional of outputs per channel Each output connector is dedicated to a specific input channel Each output connector supports 1 x analog or 1 x DVI output Horizontal scan rate 12 kHz to 125 kHz non interlaced Frame rate Refresh rate Up to 200 Hz Resolution 640 x 3...

Страница 125: ...Up to 162 Msamples sec Sync type Available sync types 3 wire Sync On Green 4 wire Separate Composite Sync 5 wire Separate H and V Sync Sync level 0 3V p p 3 wire 5V p p 4 and 5 wire sync Analog HD video Video level 1V p p sync and video Sync Tri level Sync level 0 6V p p Connector type Sub miniature D connector type HD 15 Table E 4 Composite Video Input Specifications Parameter Specification Forma...

Страница 126: ...osite video inputs Composite2 Input sampling All inputs sampled as 3 2 pixels CCIR 601 sampling Video levels 0 5 to 2 0V peak to peak 1 0V peak to peak nominal Sync levels 0 3 to 0 6V peak to peak Connector type 4 pin mini DIN Table E 6 Graphic Output Specifications Parameter Specification Analog Analog output level Nominal 0 7V pk to pk excluding sync Output impedance 75 ohms Sample rate Up to 16...

Страница 127: ...ge Other Functions Video source select freeze frame brightness and contrast hue and saturation Table E 8 Control Specifications Parameter Specification Control Protocol Quadra control is accomplished by use of the Quadra ASCII based command set This command set may be used with any of the control ports listed below Ethernet 10 100 BASE T ethernet port Supports control of the full set of Quadra com...

Страница 128: ...de 120 POWER AND PHYSICAL SPECIFICATIONS The table below lists Quadra power and physical specifications Table E 9 Power and Physical Specifications Parameter Specification Input Voltage 90 264 VAC Frequency 47Hz 400 Hz Power Consumption 65VA Size 19 W x 15 3 x D x 1 75 H Weight 14 pounds 6 4 kg ...

Страница 129: ...ontrols from non volatile memory This enables Quadra to function in the same way as before power was turned off This information known as the System Configuration is stored automatically in non volatile memory USER CONFIGURATION Quadra enables you to save your own set of default settings This allows you to override the current settings and set up the unit in a way that you have previously defined ...

Страница 130: ... to contain the complete set of parameters consisting of the System Timing and Window settings SYSTEM STATE VALUES There are several categories of system values parameters that are saved as outlined below Input Timing Values The following timing values for each graphics input are saved Timing preset name and number Horizontal front porch sync width back porch and active area in pixels Vertical fro...

Страница 131: ...ored for each Quadra output Gamma Output sync source Background pattern type Background Red Green and Blue color values Output timing values The following timing values are stored for each Quadra output Timing preset name and number Horizontal front porch sync width back porch and active area in pixels Vertical front porch sync height back porch and active area in lines Horizontal and vertical fre...

Страница 132: ...of timing parameters as listed in the Timing Preset list below Output timing Timing presets may be created by saving output timing settings using the OutPutTiMingSAVE command Direct loading Timing presets may be created by directly loading them using the TiMingLISTLOAD command Timing presets contain the following parameters Timing preset name Horizontal front porch sync width back porch and active...

Отзывы: