Operation
7
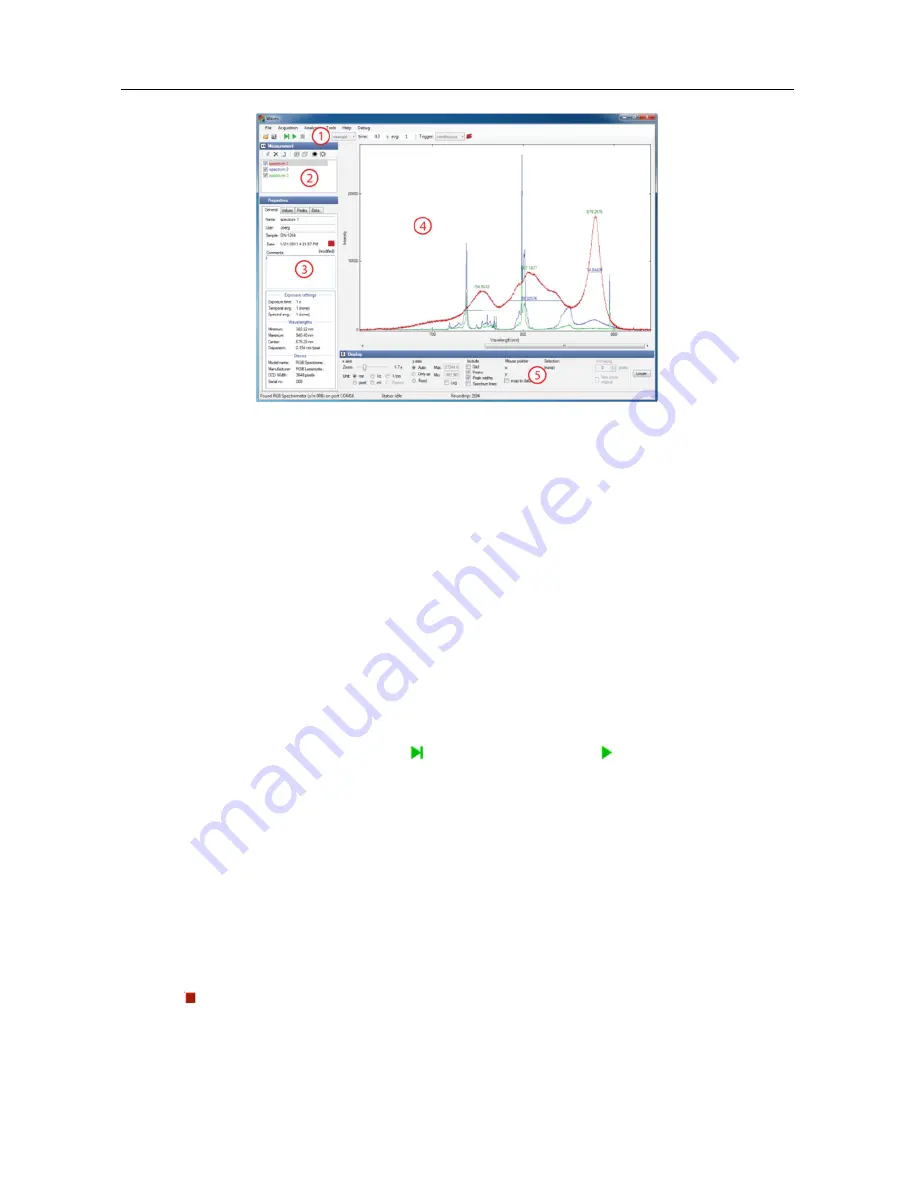
The main window consists of several panels:
1.
The Exposure Toolbar, where you can start and stop taking spectra and set the
acquisition parameters.
2.
The Spectrum List shows all spectra that are currently in memory.
3.
The Properties Panel consists of four tab pages and displays many parameters and
values of the spectrum currently selected in the Spectrum List.
4.
The Main Diagram Panel shows all spectra marked with a check mark in the list.
5.
The Display Parameters Panel determines how the spectra are displayed.
In order to get more screen space for the main diagram, the other panels can be
minimized by clicking on the buttons with two triangles next to the panel title.
3.3
Taking Spectra
In order to take a spectrum, just choose an exposure time or select auto exposure and
click on one of the green buttons ([ ] for a single shot or [ ] to start a continuous
measurement). You can increase the exposure time in order to decrease the noise level. If
the amount of light detected during the exposure is too large for the CCD detector inside
the spectrometer, the spectrum appears saturated and a red ‘‘OVERLOAD’’ warning
appears at the top of the diagram. In this case, you need to decrease the exposure time.
You can further increase the sensitivity by averaging across multiple exposures with the
‘‘Temporal Averaging’’ setting.
If a spectrum acquisition takes longer than one second, you can monitor the progress in
the status bar at the bottom of the window. The acquisition may finish before the
progress indication reaches the end position, because the spectrometer is triggering on
the end of the exposure. You can stop the data acquisition by clicking on the red stop
button [ ].
If you choose auto exposure, the exposure time for each new spectrum is set
automatically based on the intensity of the previous spectrum. It may take a few spectra
before the auto exposure control has reached its optimum. In auto exposure mode, you
Содержание q stick
Страница 1: ...User Manual ...
Страница 4: ......


