


DEM Page 33 of 43 FEBRUARY 07
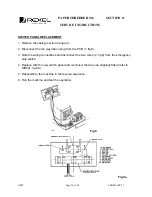
PRINTED CIRCUIT BOARD REPLACEMENT – REED SWITCH
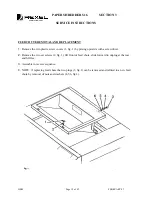
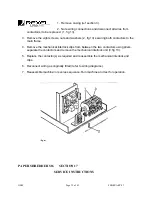
1. Remove casing (ref section 3)
2. Note wiring connections and disconnect the two wires from the terminal block on the
PCB (1, fig 12).
3. Disconnect the 8-way plug (2, fig 12) and the 10-way ribbon plug (3, fig 12) from the
PCB.
4. Remove the PCB from its support and replace with the new board.
5. Reconnect wires and plugs as originally fitted (refer to wiring diagram).
6. Reassemble machine in reverse sequence. Carry out PAT test, run machine and test
operation.
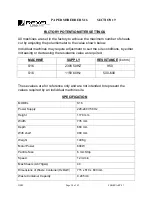
PAPER SHREDDER S16 SECTION 15
SERVICE INSTRUCTIONS
Содержание S16
Страница 9: ...DEM Page 9 of 43 FEBRUARY 07 ISSUE 2 PAPER SHREDDER S16 SECTION 3 ILLUSTRATED PARTS LIST CUTTING HEAD ...
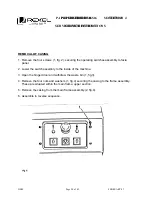
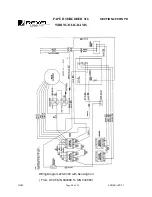
Страница 13: ...DEM Page 13 of 43 FEBRUARY 07 ISSUE 2 PAPER SHREDDER S16 SECTION 5 ILLUSTRATED PARTS LIST ELECTRICS ...
Страница 15: ...DEM Page 15 of 43 FEBRUARY 07 ISSUE 2 PAPER SHREDDER S16 SECTION 5 ILLUSTRATED PARTS LIST ELECTRICS ...
Страница 21: ...DEM Page 21 of 43 FEBRUARY 07 ...
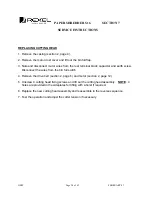
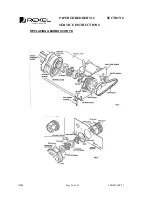
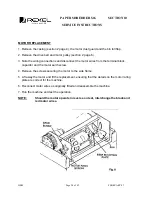
Страница 26: ...DEM Page 26 of 43 FEBRUARY 07 REPLACING GEARBOX CONT D PAPER SHREDDER S16 SECTION 8 SERVICE INSTRUCTIONS ...
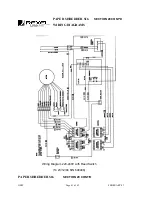
Страница 42: ...DEM Page 42 of 43 FEBRUARY 07 SERVICE INSTRUCTIONS WIRING DIAGRAMS Wiring Diagram 220 240V From S N 930900 ...


