7
INSTALLATION, CONT’D.: CASTER ADJUSTMENT / LOCK / UNLOCK / CASE REMOVAL FROM SKID
3. Caster Height: Raising and Lowering
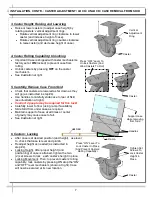
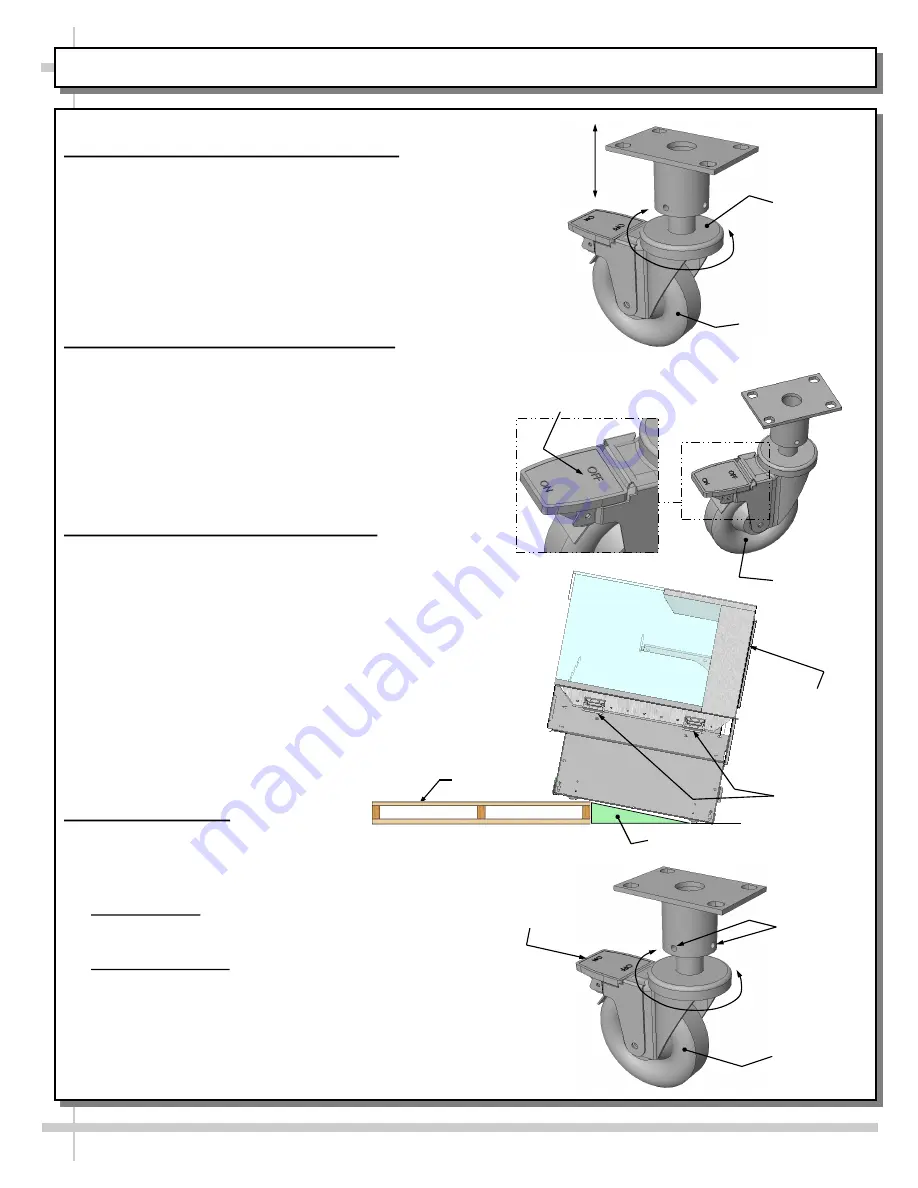
Raise or lower casters (to adjust case height) by
rotating casters’ vertical adjustment rings.
Rotate vertical adjustment ring clockwise to lower
caster (and increase height of case).
Rotate vertical adjustment ring counter-clockwise
to raise caster (and decrease height of case).
4. Caster Rolling Capability: Unlocking
Important! Case is shipped with caster mechanisms
factory set at
ON
(locked) to prevent case from
rolling.
Unlock casters by pressing
OFF
on the caster
mechanism.
See illustration at right.
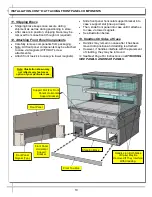
5. Carefully Remove Case From Skid
Check that casters are lowered as far down as they
will go (as instructed in step #4).
Use handles to carefully slide case to rear of Skid
(see illustration at right).
Caution! 4 people may be required for this task!
Carefully lower to floor (using ramp if available).
Slide Skid from under case as required.
Maintain support of case at all times or center
of gravity may cause case to fall.
See illustration at right.
6. Casters: Locking
After case is at desired position (and height), use level
to check that case is level and plumb.
Readjust height as needed (as instructed in
step #4).
Locking Height: After proper height (and
positioning) of case is attained, tighten the two
(2) set screws to lock each caster’s height in place.
Locking Movement: Then, to prevent casters’ rolling
capability, lock casters by pressing ON atop the “ON”
and “OFF” lever mechanism (shown at right). Case
will now be secured at its new location.
Vertical
Adjustment
Ring
Caster
Caster
Tighten Set
Screws To
Lock Caster
Height In
Place
Press “ON” Lever To
Lock Caster In Place
(And Prevent Casters’
Rolling Capability)
Skid
Support case
while removing
from Skid
Press “OFF” Lever To
Unlock Casters (And
Allow Casters To Roll)
Caster
Handles
Ramp

