background image

2

Customer Service: 

800-626-1126 | rev-a-shelf.com


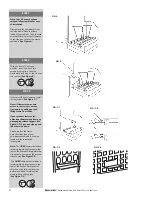
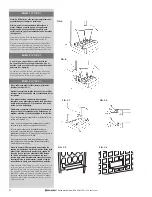
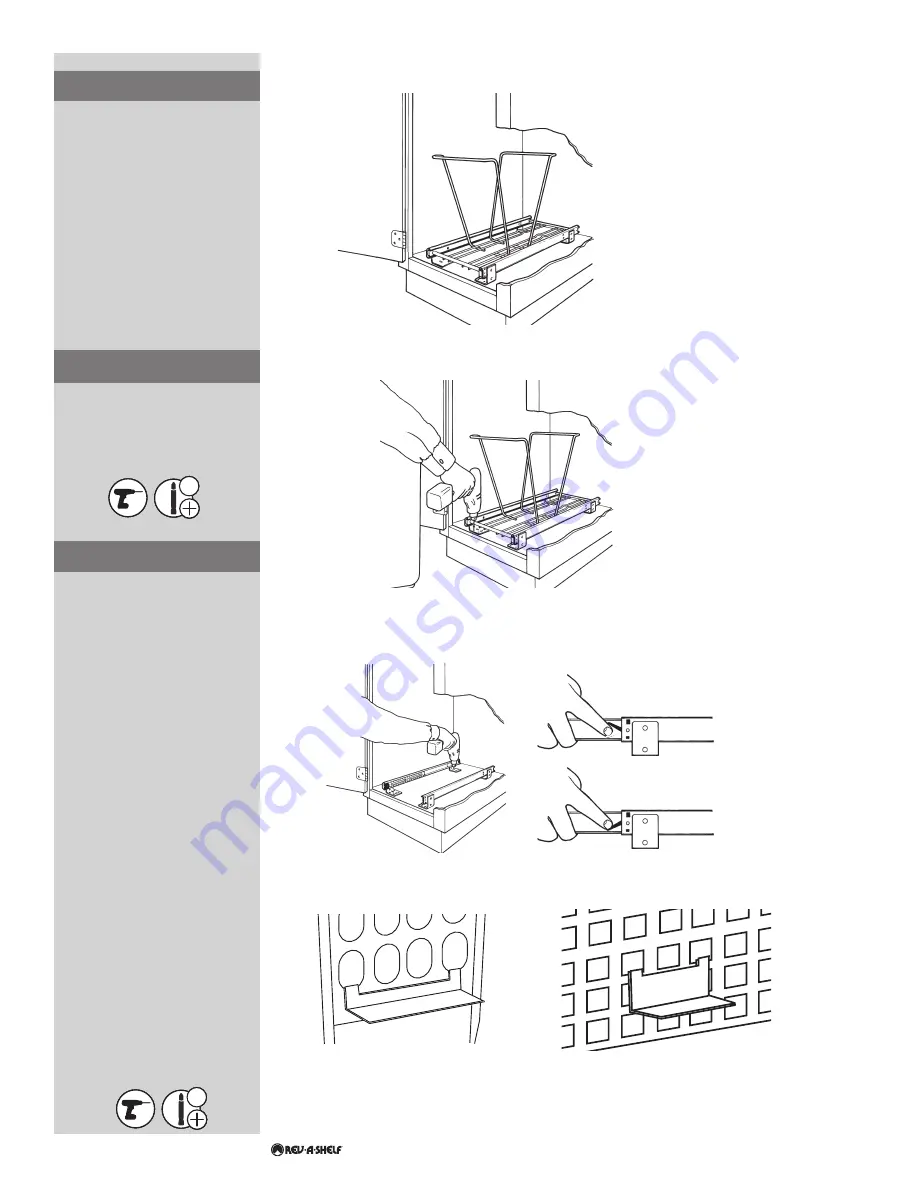
FIG. C-1

FIG. C-3

FIG. C-4

FIG. C-2

#2

#2

#2

#2

#2

#2

Note: Your RV series has been 

shipped fully assembled for ease 

of installation.

First remove the container(s) from 

the wire frame. Place the frame 

inside of your cabinet. Look to make 

sure that there is plenty of clearance 

to shut the door and for the waste 

containers (

See Figure A

).

STEP 1

If there is sufficient clearance, install 

(2) rear screws (

See Figure C-1

). 

Note: If framework prevents 

access to rear screws, remove 

framework by pulling out and 

lifting frame from slides.

If your product features full 

extension slides remove frame by 

disengaging release triggers (See 

Figure C-2). Press one side up and 

the other side down.

Finally, replace the frame  

onto the slides then place  

your waste containers in the wire 

frame and the installation  

is complete. 

Note:

 The 

HPRV

 hamper includes a 

retaining clip which attaches to the 

rear of the hamper. Simply slide this 

clip onto the hamper on the bottom 

row of holes (

See Figure C-3

).  

 The 

HURV

 utility basket includes a 

retaining clip which attaches to the 

rear of the basket. Simply center 

this clip on the third row from the 

bottom and bend retaining clips 

down to keep clip in place  

(

See Figure C-4

). 

STEP 2

With the frame in a closed 

position, insert the front two 

screws, making sure that the 

framework is square to the front of 

the cabinet 

(See Figure B)

.

STEP 3

FIG. A

FIG. B

Содержание HURV-1512

Страница 1: ...UIRED 15 MIN ESTIMATED ASSEMBLY TIME CARE AND MAINTENANCE Clean with a damp cloth and wipe parts dry Depending on unit purchased Door Mounting Kit Sold Separately Part RV DM KIT HURV 1512 RV 9PB RV 18PB 2 RV 18PB 1 RV 1216 CK HPRV 1520 PARTS LIST No Description Qty A Base Unit 1 B Waste Containers Hamper 1 or 2 C 8 x 3 4 Truss Head Screws 4 A B C WATCH VIDEO TUTORIALS OF PRODUCT INSTALLATIONS WWW ...

Страница 2: ...ion slides remove frame by disengaging release triggers See Figure C 2 Press one side up and the other side down Finally replace the frame onto the slides then place your waste containers in the wire frame and the installation is complete Note The HPRV hamper includes a retaining clip which attaches to the rear of the hamper Simply slide this clip onto the hamper on the bottom row of holes See Fig...

Страница 3: ...je para puerta ven dido por separado Part RV DM KIT Ensemble d installation sur porte ven du séparément No de pièces pour ensembles RV DM KIT HURV 1512 RV 9PB RV 18PB 2 RV 18PB 1 RV 1216 CK HPRV 1520 Lista de partes Liste des pièces A B C INSTRUCCIONES DE INSTALACIÓN INSTRUCTIONS D INSTALLATION INSTRUCCIONES DE INSTALACIÓN CONTENEDORES Y CESTAS DE BASURA RV SERIES INSTRUCTIONS D INSTALLATION SYSTÈ...

Страница 4: ...ez le en le tirant et en le levant des côtés Si votre produit comporte des glissières pleine extension enlevez le cadre en désengageant les gâchettes voir figure C 2 Appuyez sur un côté vers le haut et sur l autre côté ver le bas Puis replacez le cadre dans les glissières et placez le s contenant s à déchet dans le cadre métallique L installation est terminée Note Le Panier HPRV comprend une attac...

Отзывы: