


• Make sure that the jumper “5V_IN” is set to USB. Here, the jumper must connect the
central pin of the 3 pins to the outer pin next to the micro USB2.0 port (USB_M). The
pin is labelled with “USB”.
• With the jumper “J1”, you can change the setting from “5V” to “RI” for both of
the RS232 ports. At delivery, the setting “5V” is selected. The jumper with the label
“5V_1” and “RI_1” is accordingly for the connector “UART1”. The label “5V_2” and
“RI_2” is for the connector “UART2”. Change the jumper position, if necessary.
• Connect a micro USB 2.0 cable (not included in the delivery) with the micro USB2.0
port (USB_M) on the board.
Connect the USB plug type A to a free USB connector on your Raspberry Pi
®
.
• It does not matter if your Raspberry Pi
®
is switched on or off when connecting the
cable. The board will be recognised without problem during operation.
• Alternatively, you can use the 5-pin connector (USB_P). Always observe the correct
allocation. You can find this information either in the data sheet in English by the
manufacturer or on the board. Also observe the documentation of the Raspberry
Pi
®
.
(VCC = 5 V/DC; GND = ground; D+ = data ; D- = data cables -)
• The powered USB hub as well as both of the serial RS232 ports will be automatically
recognised and installed. An external driver is not necessary.
• Additionally, you can supply external voltage to the product.
Connect it to the white 2pole plug “PWR”. Observe the correct polarity.
(+5V = 5 V/DC; GND = ground)
Change the jumper position to “PWR”. Here, the jumper must connect the central
pin of the 3 pins to the outer pin next to the additional white power connector. The
pin is labelled with “PWR”. This will disconnect the voltage supply via USB and
move it to the external connector.
Make sure that in this case the external power supply must already be ac-
tive when connecting the board via USB to a Raspberry Pi
®
that is switched
on.
Disposal
Electrical and electronic products do not belong in the regular household
waste.
Dispose of the waste product in accordance with the applicable legal regu-
lations.
Technical data
Power supply ...................................... via micro USB2.0 connector (USB_M), 5-pin con-
nector (USB_P) or via the external 2pole connec-
tor (PWR)
Operating voltage............................... 5 V/DC
Supported operating system ............ Linux from kernel 2.4.31
Connectors (Inputs) ........................... Micro-USB2.0 connector; 5-pin USB connector;
external 2pole connector for power supply
Connectors (Outputs) ........................ 2x USB2.0 connector type A (USB_1_2); soldered-
on 9pole RS232 port (UART1); 9pole RS232- port
per cable (UART2)
Transmission rate RS232 ................... max. 230 kBit
Dimensions (W x H x D)..................... 66 x 18 x 56 mm
Weight .................................................. 29 g (only the board); 55 g (board, RS232 cable,
screw set)
Operating conditions ......................... 5 °C to +50 °C; 20% to 80% relative humidity
Storage conditions............................. -25 °C to +70 °C; 15% to 90% relative humidity
G
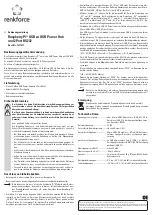
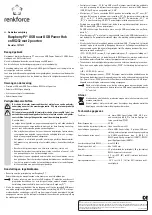
Operating instructions
Raspberry Pi
®
Powered USB to USB Hub
and 2 Port RS232
Item no. 1377411
Intended use
The product extends your Raspberry Pi
®
with a powered USB hub with 2 USB2.0 con-
nectors and 2 RS232 interfaces.
It is to be connected to a USB port.
A driver installation is not necessary.
Power is supplied via USB (micro USB2.0 port or 5-pin connector) or via the additional
external 2pole connector.
Carefully read the entire operating instructions which contain important information
about operation and use. Observe all safety instructions!
Package contents
• Board powered USB to USB hub and and 2 RS232 ports
• Cable with 9pole RS232port
• Screw set with spacers
• Operating instructions
Safety instructions
The warranty/guarantee will be void in the event of damage caused by fail-
ure to observe these operating instructions. We do not assume any liability
for any resulting damage!
We do not assume any liability for material and personal damage caused
by improper use or non-compliance with the safety instructions. In such
cases, the warranty will be null and void!
Dear customer,
The following safety instructions and hazard warnings are intended not only
to protect your health but also to protect the device. Please read the follow-
ing points carefully:
• When touching or connecting the board, appropriate safety precautions
against static charge should be taken (e.g., earth connection, insulating
support, etc.).
• The product is only suitable for dry, enclosed indoor areas. It must not get
damp or wet as this would damage it.
• Protect the product from cold, heat, direct sunlight, dust and dirt.
• Handle the product with care; it can be damaged by impacts, blows, or
accidental falls, even from a low height.
• The product is not a toy and it should be kept out of the reach of children.
Position the product so it is out of the reach of children.
• Do not leave packaging material carelessly lying around, since it could
become a dangerous plaything for children.
Connection and start-up
• First, attach the board to your Raspberry Pi
®
.
To do this, use the screw set and the spacers provided.
Please keep in mind that not all Raspberry Pi
®
models have mounting holes.
In this case, make sure in particular that the product does not cause a short
circuit (e.g., through contact with your Raspberry Pi
®
)!
• Now connect the enclosed cable which supplies the second RS232 port to the
board. The small pin header belongs to the connector “UART2”. The pink-marked
wire of the cable is the pin1. It belongs to the pin1 of the board. It is marked with an
arrow. The correct polarity will be additionally guaranteed with the pin10 fixed on
the plug.
This is a publication by Conrad Electronic SE, Klaus-Conrad-Str. 1, D-92240 Hirschau (www.conrad.com).
All rights including translation reserved. Reproduction by any method, e.g. photocopy, microfilming, or the capture in electronic data
processing systems require the prior written approval by the editor. Reprinting, also in part, is prohibited. This publication represent
the technical status at the time of printing.
© Copyright 2015 by Conrad Electronic SE.


