32
g) Saving the settings
You can save your own settings in the drum sets “046“ to “050“, e.g.
manually selected drum sounds for each pad (see chapter 12. c).
Briefly push the “SAVE“ (16) button.
The drum set “046“, for example, is flashing in the display now.
Select one of the memories with the “SELECT
“ or “SELECT
“
(15) buttons (drum set “046“ to “050“).
Save the drum set by pushing the “SAVE“ (16) button again briefly.
If an error occurs when saving, “Err“ will appear in the display.
Then try to store the drum set in another memory slot.
h) Starting/ending playback of a song
Activate the setting menu by briefly pushing the “SONG“ (12) but-
ton. The decimal digit in the display lights up at “SONG“.
Use the “SELECT
“ or “SELECT
“ (15) button to select one of
the 100 songs now (001 - 100).
The first 80 songs are played in an endless loop.
Briefly push the “START/STOP“ (13) button to start or stop play-
back of a song.
You can also use the “SELECT
“ or “SELECT
“ (15) button at
any time during playback to select another song.
Appendix C (chapter 18) contains a table with all songs.
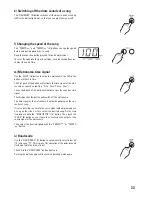
i) Setting the master volume
Use the “
MASTER VOLUME
“ (3) rocker to set the volume for
playback via the speakers or the headphones (L00 - L16).
Please observe that the rocker (3) sets the basic volume of the de-
vice.
If the volume of an individual pad is to be changed (e.g. to incre-
ase or reduce the volume of a drum effect), this is done using the
“VOLUME“ (14) button, see chapter 11. d).
j) Setting the song volume
The “ACC. VOLUME
“ and “ACC. VOLUME
“ (4) buttons are
used to set the song playback volume (A00 - A16).
This can be adjusted independently of the volume setting of the
pads


