66
XM-60 and XM-600 multi-axis calibrator
www.renishaw.com/xm60
Appendix F
Straightness measurement
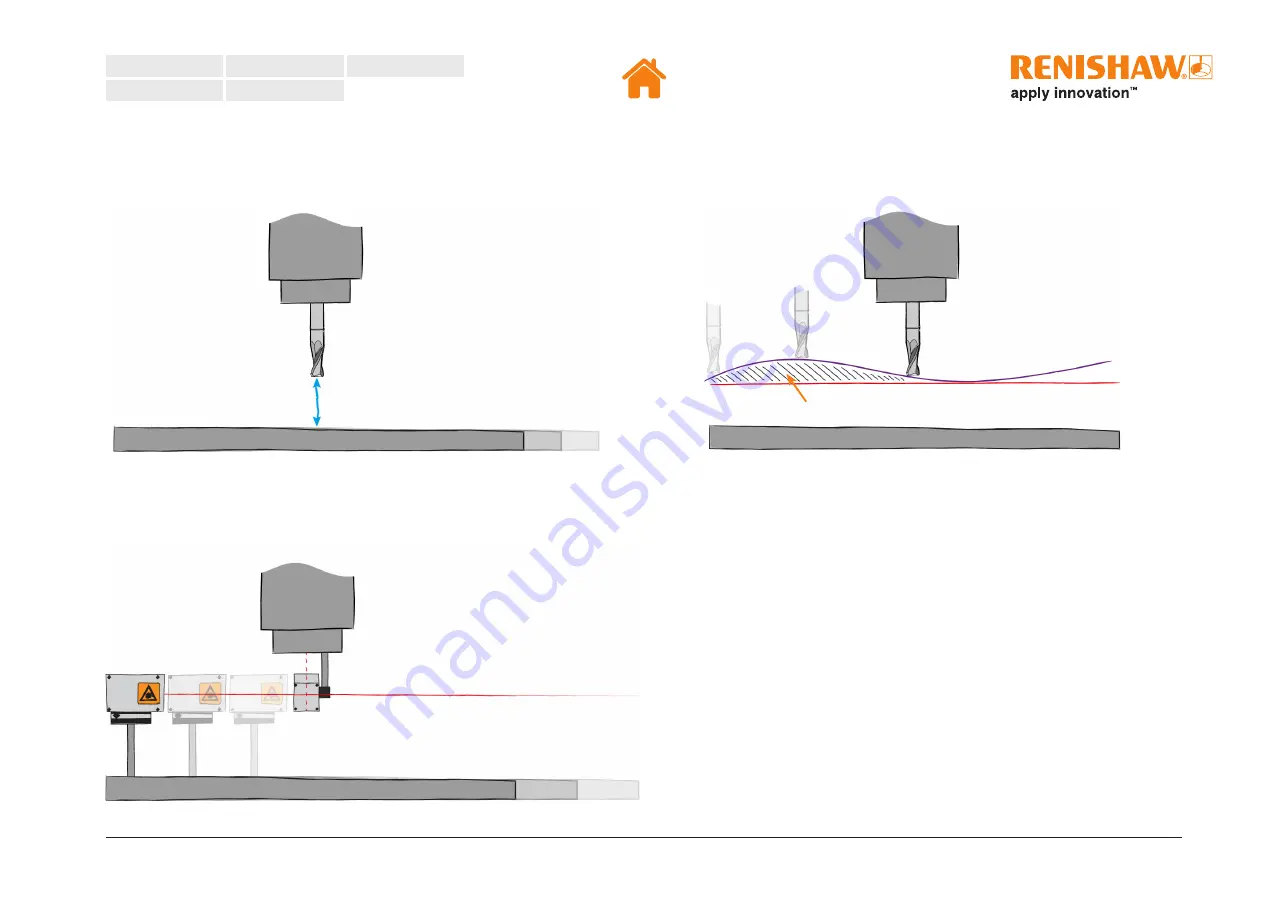
Consider a tool machining a component on a machine bed. As the bed moves
from right-left, errors in the machine cause the height of the tool to vary above
the bed.
To measure this effect we measure the height between the tool and the bed
at ‘intervals’ along the movement of the axis. The error is the variation from a
straight line.
Error
Placing the launch unit on the bed of a machine means that the laser beam
becomes the reference. Variations in height are detected by the receiver as
the machine moves left-right.


