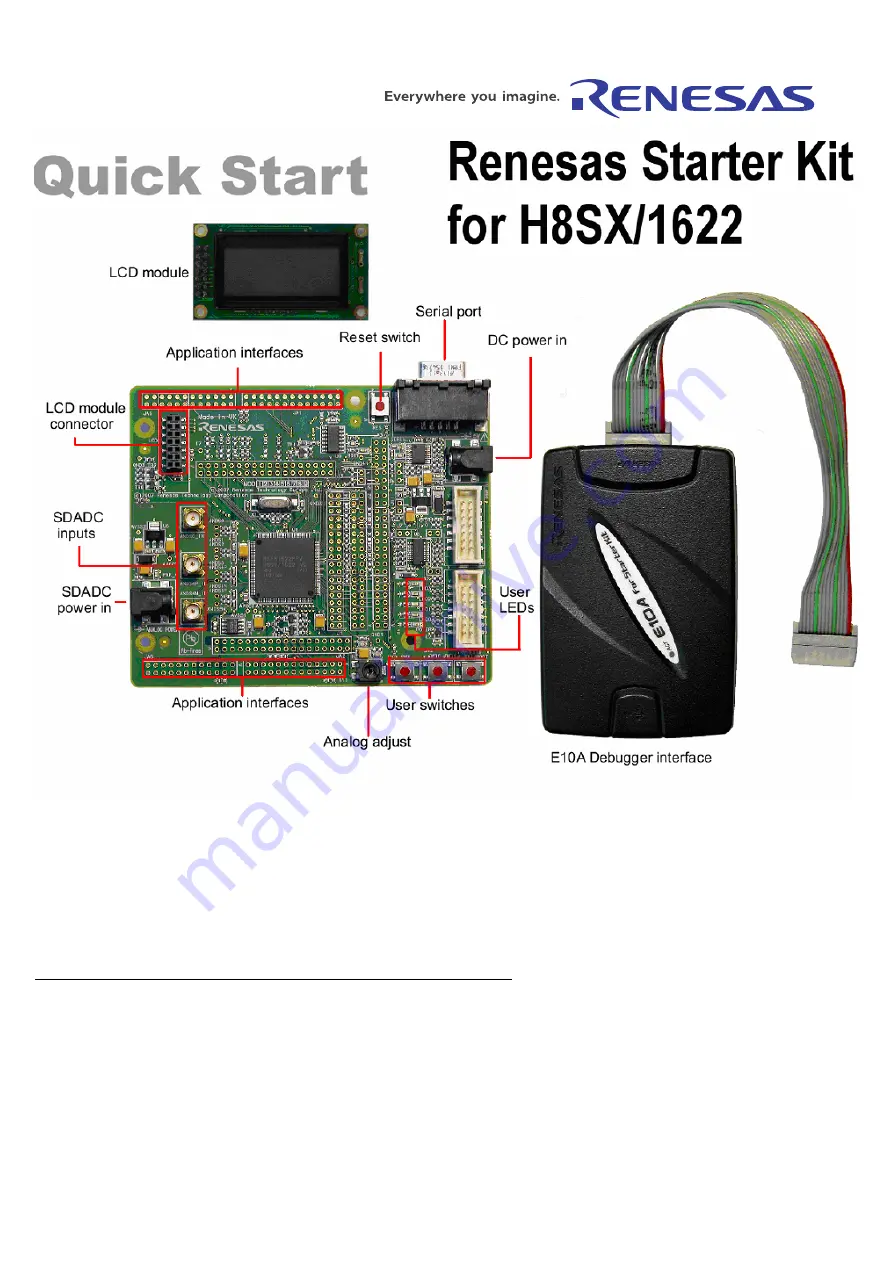
background image


1. Installation 

Do not connect the E10A debugger hardware until the software support has been installed. 

1.


Insert the CD into your computer’s CD-ROM drive. The CD should automatically run the installation program. If the installer does not start, browse to the CD root 
folder and double click on ‘setup.exe’. 

2.


The installer will ask you which language is to be used, please choose the appropriate one. 

3.


On the first screen of the installer proper, click <Next>. 

4.


The License Agreement will be shown, click <Yes>. 

5.


The next screen asks you to pick the world region – please select and click <Next>. 

6.


Select the RSK you wish to install and click <Next> to continue. 

7.


The destination folders are specified on the next screens.  It is recommended to accept the default settings. Click <Next> to continue. 

8.


Click <Next> on all screens until the Installation process commences. 

9.


After the installation the machine’s site code will be shown, this is not important at this stage, click <Next> then <Finish>. 

10.


Auto update dialog box will be launched. Configure the Auto-Update settings dialog to allow your installation to be checked for available updates. 

Содержание Single-Chip Microcomputer H8SX/1622

Страница 1: ...ook over all the business of both companies Therefore although the old company name remains in this document it is a valid Renesas Electronics document We appreciate your understanding Renesas Electronics website http www renesas com April 1st 2010 Renesas Electronics Corporation Issued by Renesas Electronics Corporation http www renesas com Send any inquiries to http www renesas com inquiry ...

Страница 2: ...ct for an application categorized as Specific or for which the product is not intended where you have failed to obtain the prior written consent of Renesas Electronics The quality grade of each Renesas Electronics product is Standard unless otherwise expressly specified in a Renesas Electronics data sheets or data books etc Standard Computers office equipment communications equipment test and meas...

Страница 3: ...License Agreement will be shown click Yes 5 The next screen asks you to pick the world region please select and click Next 6 Select the RSK you wish to install and click Next to continue 7 The destination folders are specified on the next screens It is recommended to accept the default settings Click Next to continue 8 Click Next on all screens until the Installation process commences 9 After the ...

Страница 4: ...ter a name for the workspace The project name will be automatically completed with the Workspace name You can change this name to Tutorial if required Click OK 22 On the RSKH8SX1622 Step 1 window Select Tutorial and click Next 23 On the RSKH8SX1622 Step 2 window Click Finish 24 On the Project Generator Information window Click OK The project that is created has two configurations The Release confi...

Страница 5: ...the time of publication Please check for any updates to the device manual from the Renesas internet site at www renesas com renesas_starter_kits 6 Renesas H8 Compiler The version of the compiler provided with this RSK is fully functional but time limited You have 60 days to evaluate the full product before the compiler will limit the code linker to 64k bytes Full licensed H8 compiler versions are ...

Отзывы: