background image

10.

Use

Use

Turning The Speaker On/Off

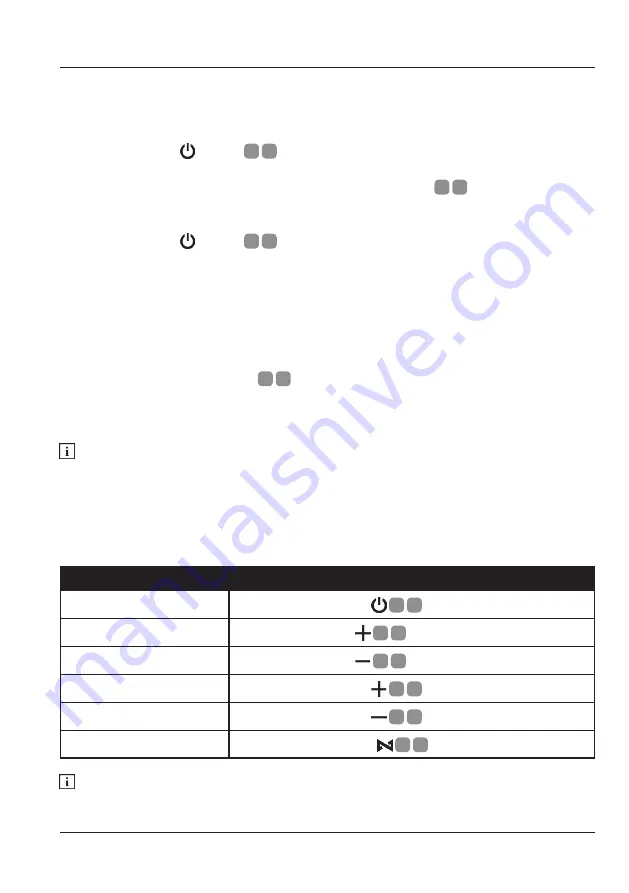
Press and hold the   button 

A


8

 for 2 seconds to turn the speaker on. The speaker 

will state “Power on” followed by a mode statement. The power level LEDs will light 

up and stay lit for approximately 10 minutes. The status LED 

A


1

 will 

ash white if 

the speaker is looking to pair or 

ash blue if the speaker is automatically connecting 

to a bluetooth device.

Press and hold the   button 

A


8

 for 2 seconds to turn the speaker off. The speaker 

will state “Power off”

Action:

Action:

Play / Pause

Single quick press on   

A


8

 button.

Skip Forward

Press and hold the   

A


10

 button for 2 seconds.

 Skip Back

Press and hold the   

A


9

 button for 2 seconds.

Single quick press on   

A


10

 button.

Volume -

Single quick press on   

A


9

 button.

Voice Assistant

Double quick press on   

A


7

 button.

    Voice Assistant will only work if the connected device has this feature and that it

         is compatible with this speaker.

Connecting A Bluetooth Device

This speaker can connect to smart phones, tablets, laptops and bluetooth capable 

MP3 players. When the speaker is turned on, it is automatically ready to pair.

Make sure your device’s bluetooth is on. Search and select from the available device 

list ‘REKA AUDIO’. Pairing is automatically completed when the speaker states

“connected” and the status LED 

A


1

 is 

ashing blue. Once a device has been

connected, it will automiatically connect to the speaker providing the speaker is still 

in the ‘paired device’ list of the device.

    Headphone and different model speakers are not compatible.

Bluetooth Audio Controls

This speaker has some basic feature bluetooth controls that are compatible with 

most bluetooth devices.

Содержание 708642

Страница 1: ...WIRELESS BLUETOOTH SPEAKER User Guide...

Страница 2: ...rging The Speaker Use Turning The Speaker On Off Connecting A Bluetooth Device Bluetooth Audio Controls Bluetooth Call Controls Resetting Bluetooth TWS Unparing TWS AUX Mode AUX Controls Charging A De...

Страница 3: ...Overview Product Care Storing Cleaning Trouble Shooting Technical Data Declaration Of Conformity Disposal Disposing Of The Packaging Disposing Of The Device 15 15 15 16 17 17 18 18 18...

Страница 4: ...s 3 year warranty and outstanding after sales service through our dedicated helpline We hope you enjoy using this product for many years to come If you require technical support or in the unlikely ev...

Страница 5: ...Scope Of Delivery Components 1 Wireless Bluetooth Speaker 2 USB A to USB Micro B Power Cable 3 3 5mm AUX Audio Cable 4 Adjustable Strap 2 3 2 Scope Of Delivery 4 1...

Страница 6: ...rticularly the safety instructions before using the product Failure to follow this user guide may lead to severe injury or product damage Intended Use This product is exclusively designed to be rechar...

Страница 7: ...European economic area This symbol refers to the box packaging The card used is made from widely recycled material This symbol refers to the disposal of waste electrical and electronic equipment acco...

Страница 8: ...WARNING CAUTION NOTE This symbol denotes situations that could cause injury to yourself or others This symbol denotes situations that could cause damage to the product or equipment as well as possible...

Страница 9: ...ating plate disconnect it from the mains power in the event of a malfunction or plug is faulty or expose them to damp or moist conditions possible shock re or damage to yourself or the product the con...

Страница 10: ...CAUTION Failure to comply with safety cautions and regulations can cause injury or property damage smoke or liquids leaking from the product STOP using the product IMMEDIATELY and call the service he...

Страница 11: ...Capacity LED 5 25 Capacity LED 6 Bluetooth Mode Button 7 TWS Button 8 Power Button 9 Volume Previous song 10 Volume Next song 11 Clip Mount 12 Micro USB Charge In Port 13 3 5mm AUX In Port 14 USB Cha...

Страница 12: ...B connector to the micro USB port A 9 The micro USB A 12 port is an input only charging point on the speaker DO NOT use the USB A port A 14 to charge the speaker A full charging cycle will take appro...

Страница 13: ...ick press on A 9 button Voice Assistant Double quick press on A 7 button Voice Assistant will only work if the connected device has this feature and that it is compatible with this speaker Connecting...

Страница 14: ...n Action Volume Single quick press on A 10 button Volume Single quick press on A 9 button Answer End Call Single quick press on A 6 button Rejects A Call Press and hold the A 6 button for 2 seconds Ca...

Страница 15: ...ode Once paired the master speaker s status LED A 1 will have a blink blue glow and the slave speaker s status LED A 1 will have a solid blue glow Bluetooth controls are only accessible on the master...

Страница 16: ...ice The speaker will automatically change to AUX mode indicated by a constant blue status LED A 1 and state Line in Disconnect the AUX cable to return to bluetooth mode Action Action Mute Single quick...

Страница 17: ...feature use the device s manufactures USB charge cable and connect the USB A end to the speakers 5V 1A USB A out port A 14 and the other end to the device Check the device for a charging icon or char...

Страница 18: ...ded for long term storage that you do the following o C 45o C You can reduce the effectiveness or damage the internal battery if the device is left with no charge for long periods stored in damp condi...

Страница 19: ...ir delete bluetooth pro le then re pair device Use away from high powered devices or strong RF signals No music your device Use a compatible music app None Check Bluetoothis on the device is connected...

Страница 20: ...Approx Dimensions Available Ports IP Rating Battery Battery Type Capacity Charge Time Play Time Ports Input Ports Input Voltage Micro USB Output Ports Output Voltage USB A Bluetooth Bluetooth Ver Fre...

Страница 21: ...c equipment WEEE must be disposed of correctly Equipment which is marked with the WEEE logo as shown on the left should not be thrown away with your household waste Contact your local authority waste...

Страница 22: ...rt in the event of possible operator error In order to make a claim under the warranty please send us This warranty does not cover damage caused by Accidental damage or unanticipated events e g Lightn...

Страница 23: ...support in the event of possible operator errors AFTER SALES SUPPORT enquiries quesh co uk 01270 508538 GB 1800 995 036 IE PRODUCT CODE 708642 SERVICE CENTRE Quesh LTD B7 First Business Park First Av...

Страница 24: ...e it has been brought to our attention In the unlikely event of such occurrence or if you require any information about the product please contact us via our helpline support services details of which...

Отзывы: