19
Adjusting the lifting column
Initialisation is required prior to adjusting the lifting column. This
brings the column to its starting position and synchronises it.
Initialisation:
a. Insert the power cable into a suitable plug socket.
b. Pressing the downward arrow on the control element moves the
lifting column down. The lifting column will have a safety stop
shortly before its end position. The downward arrow is to be
pressed again until the lifting column reaches its final position.
c. Now press the downward arrow on the control element again
and hold it down for at least 10 seconds.
d. Remove the power cable.
The initialisation is now complete and the mechanical height adjust-
ment can be carried out.
RAUWORKS Front,
Gesamtsystem "Accoustic" ,
Detail Hubsäule oben ;
Geometrie aus REHAU-Zeichnung
PKS-16078 B vom 08.11.2012 ,
für Einbauanleitung.
M1:1
08.11.12 Fa. REHAU AG+Co,
Konstruktion CCT-IS,
Kiessling 2424
RAUWORKS Front,
Gesamtsystem "Accoustic" ,
Detail Hubsäule komplett ;
Geometrie aus REHAU-Zeichnung
PKS-16078 B vom 08.11.2012 ) ,
für Einbauanleitung.
M1:5
08.11.12 Fa. REHAU AG+Co,
Konstruktion CCT-IS,
Kiessling 2424
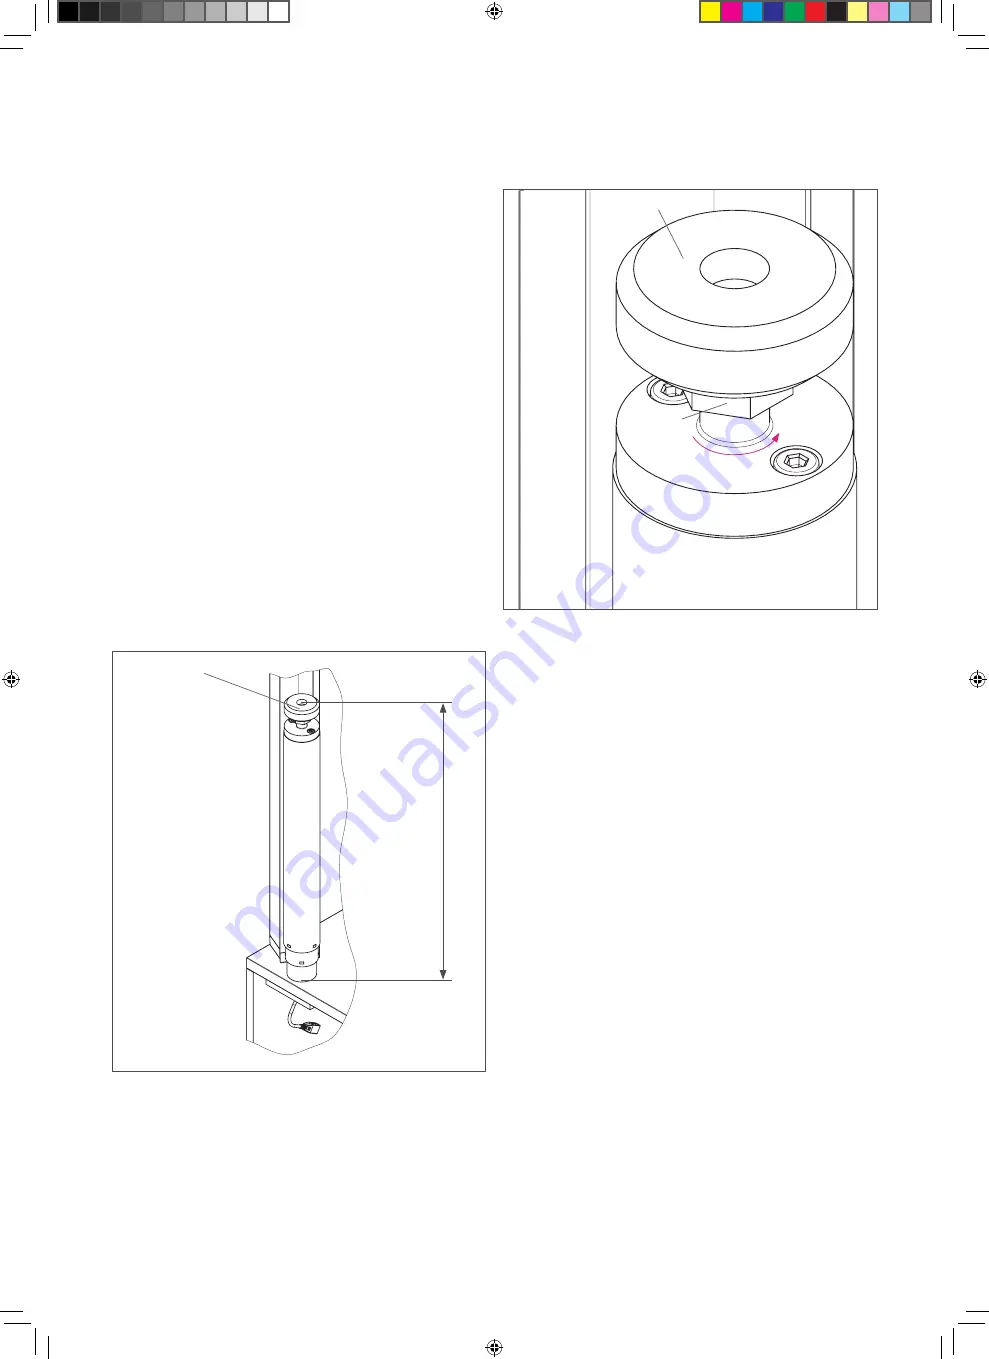
Mechanical height adjustment:
a. Set the length of the lifting column with the help of a tape
measure to 640 mm. Turn the adjusting disc to the left or right to
do this.
b. Screw in the locking nut (anti-clockwise).
Use a 30 mm spanner to do this.
Locking nut
Adjusting disc
Adjusting disc
640 mm length of the lifting column
(to the t
op edge of the adjusting disc)
B41604_RAUWORKS_front_elektr_Montageanleitung_DE_EN_FR3_eps.indd 19
4/26/2013 5:15:04 PM


