73
If the "gear" symbol (figure 17, item 10) is selected, you will see further symbols to operate the model.
"REV" (figure 17, item 13) inverts the video image by 180°. Therefore, everything is upside down.
Select "VR" (figure 17, item 14) to activate a "3D function". The live view of the camera images on the display of your
Smartphone is divided in two here. This serves to perform FPV operation virtually in 3D (i.e. with spatial view) with
"Virtual Reality glasses" ("VR glasses", not enclosed, must be purchased separately). Activate the 3D function (figure
17, item 14) in the App and install your Smartphone in the VR glasses. Now put on the VR glasses and start flying.
Use the symbol shown in figure 17, item 15 to activate headless mode. This is a relative control mode, i.e.no matter
the alignment of the quadrocopter, it will always fly to the right when viewed from the pilot's position when steering to
the right - no matter if the model points backwards, to the left, front or right. The quadrocopter is shown the direction
into which it is to go with the right control element ("right dot" for nod and roll) at all times. For operation in headless
mode, also observe the notes in chapter 14. g).
If the options of the trim elements are not sufficient to make the model fly stably and without drift or if it is flying differ
-
ently from what you are used to, you need to re-calibrate the sensors of your quadrocopter. For this, put the quadro-
copter onto a level surface ready to start. Then touch the symbol for calibration (figure 17, item 16). The LEDs in the
outriggers start to flash. Calibration is successfully completed when the LEDs are lit permanently again.
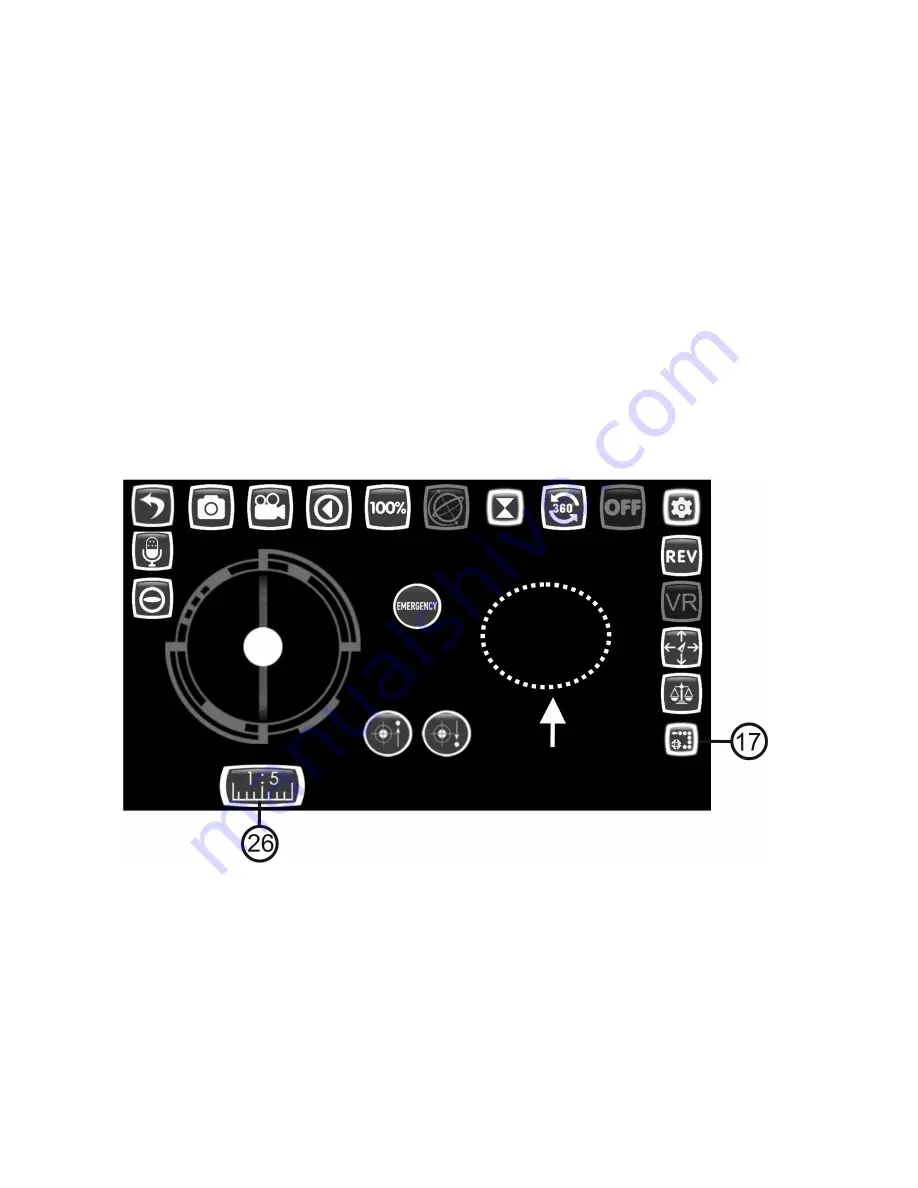
The symbol shown in figure 17 or 18, item 17 activates the function "Flight route". An additional symbol for the time
setting (see figure 18, item 26) is displayed here additionally. Figures drawn on the display (see arrow in figure 18, e.g.
a circle) or a route are automatically flown by the quadrocopter.
Figure 18


