RedBack Laser CXR880 Скачать руководство пользователя страница 9

9

Vertical Line Operation 

(refer to diagram page 5)

The vertical lines on the CXR880 can be used both indoors visibly and 

outdoors in pulse mode with the included LRMULTI receiver set in line mode 

(see receiver instructions on page 12).  Lines can used either in conjunction 

with the rotating beam or on their own.  Note: all controls for the Line modes 

are located on the laser’s keypad only.

• 

Once the laser has been powered up and auto levelled turn on the first 

two vertical lines press the V

Y

/P button          (short press).  Press V

button         for the other two vertical lines.  Pressing again will turn 

each set of lines off.

• 

To use the lines outdoors with the LRMULTI receiver the lines need to 

be set into pulse mode, this is done by pressing and holding the V

Y

/P  

button          1 second the LED next to this button will light.  Note: the 

receiver need to be set into Line Mode see page 12.

• 

Lines can be used in Manual levelling mode simply by pressing the 

Slope/Grade button           , now the laser can be set at any desired 

angle either using the Slope Grade Direction buttons                or 

manually tilting the laser housing to the desired angle.

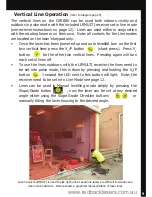
Laser receiver LRMULTI is used to pick up the lines as all line lasers are difficult to visually see 

when used outdoors.  Picture shows a graphical representation of laser lines

www.redbacklasers.com.au

Содержание CXR880

Страница 1: ......

Страница 2: ...laser beam Do not disassemble the instrument or attempt to perform any internal servicing Repairs and service should be performed only authorised service centres of Redback Lasers This instrument com...

Страница 3: ...imply align over your datum and using your included LRMulti Receiver in line mode you can quickly and accurately set up your site The CXR880 is also ideal for all types of internal fit out such as win...

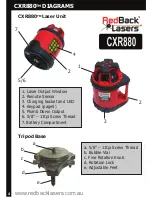
Страница 4: ...Window 2 Remote Sensor 3 Charging Socket and LED 4 Keypad page5 5 Plumb Down Output 6 5 8 11tpi Screw Thread 7 Battery Compartment Tripod Base a b c d e a 5 8 11tpi Screw Thread b Bubble Vial c Fine R...

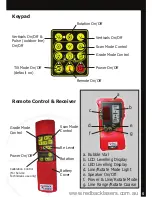
Страница 5: ...ntrol Power On Off Remote On Off Tilt Mode On Off default on a b c d e f g a Bubble Vial b LCD Levelling Display c LED Levelling Display d Line Rotate Mode Light e Speaker On Off f Power Line Rotate M...

Страница 6: ...hipped Running rechargeable batteries completely flat will increase battery life The CXR880 can operate off mains by plugging the charger for indoor use only into the unit Remember the CXR880 can oper...

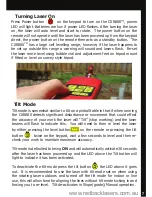
Страница 7: ...R880 detects significant disturbance or movement that could effect the accuracy of your work the laser will Tilt stop working and the laser beams will flash to indicate this You will need to then re l...

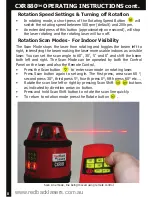
Страница 8: ...king the laser more usable indoors as a visible laser You can set the scan angle to 60o 30o 5o and 0o and shift the beam both left and right The Scan Mode can be operated by both the Control Panel on...

Страница 9: ...al lines Pressing again will turn each set of lines off To use the lines outdoors with the LRMULTI receiver the lines need to be set into pulse mode this is done by pressing and holding the VY P butto...

Страница 10: ...cated to the user Ideally locate the laser away from other workers and machinery to avoid any accidental disturbance to the laser Turn the laser on allow to level and begin rotating On either the cont...

Страница 11: ...e laser along the X axis and hold the staff at this point slide the receiver up down the staff until the receiver indicates level see receiver instructions page 12 Then making a note of the height on...

Страница 12: ...ine mode in fine mode indicated by the accuracy of level is at its highest with only small movements up or down by the receiver taking it off level In coarse mode there is more movement up and down al...

Страница 13: ...datum corner for the desired 90 degree square using the plumb down reference point Next align one of the vertical lines with one of the lengths by placing the receiver on it side at the far end of th...

Страница 14: ...rtified by one of our technicians here in Australia prior to despatch and should under normal conditions not go out of calibration A calibration certified sticker with the date and name of technician...

Страница 15: ...utton on receiver Note the receiver does not work when the rotating beam is in scan mode Q When I try to move the line lasers the laser stops working A Tilt Mode may be activated so any movement of la...

Страница 16: ...arranty CMI warrants that our products will be free from defects in material and workmanship for the warranty period CMI promises to repair or replace free of charge the product or part of product if...

Отзывы: