Page 15
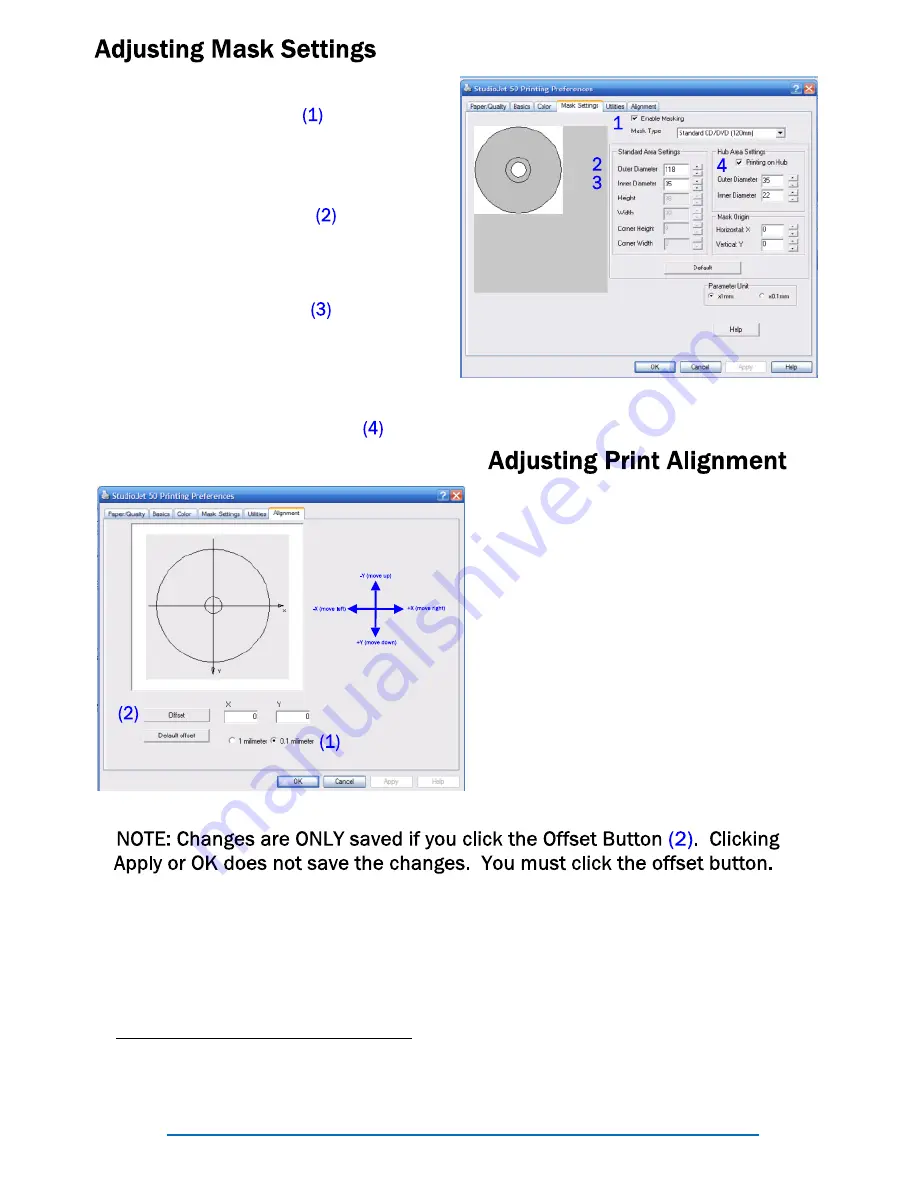
First, make sure the enable masking
check box is checked.
If your image is not printing all the way
to the outer edge then increase the
Outer Diameter setting.
If you image is not printing all the way
to the inner edge then decrease the
Inner Diameter setting.
If you are using hub-printable media
then check the Printing on Hub check
box and set the outer and inner diame-
ter for the Hub Area Settings.
If the printer is printing out of align-
ment you will need to change the
“offset”. This just shifts the printed
image up, down, left or right of center.
To shift an image down or right you
enter positive numbers, to shift an
image up or left you enter negative
numbers. The number you enter rep-
resents 1 millimeter or 1 tenth of a
millimeter depending on the option
selected
(1).
Usually you will only
need to make small adjustments and
the .1 millimeter option is preferred.
To adjust the offset simply enter a positive or negative (-) value into the X
and/or Y offset box and then click the offset button. This saves the changes
to the printer. Now you can print another disc and check to see if you need
to make further adjustments.
Sample Offset Entries
Result
Negative x-value (I.e. -2)
Moves image left 2 units
Positive x-value (I.e. 3)
Moves image right 3 units
Negative y-value (I.e. -1)
Moves image up 1 unit
Positive y-value (I.e. 4)
Moves image down 4 units


