ReChargX
™
RX160
8am - 8pm ET Mon - Fri
© 1995-2014 ReChargX, EmptyX, TonerRefillKits, TonerRefillKits.com, the TonerRefillKits logo, the
V4.0 - 2014.04.22
800.527.3712 or 352.343.7533
ReChargX and EmptyX logos are trademarks owned by TonerRefillkits.com, LLC. All rights reserved.
Page 6 of 10
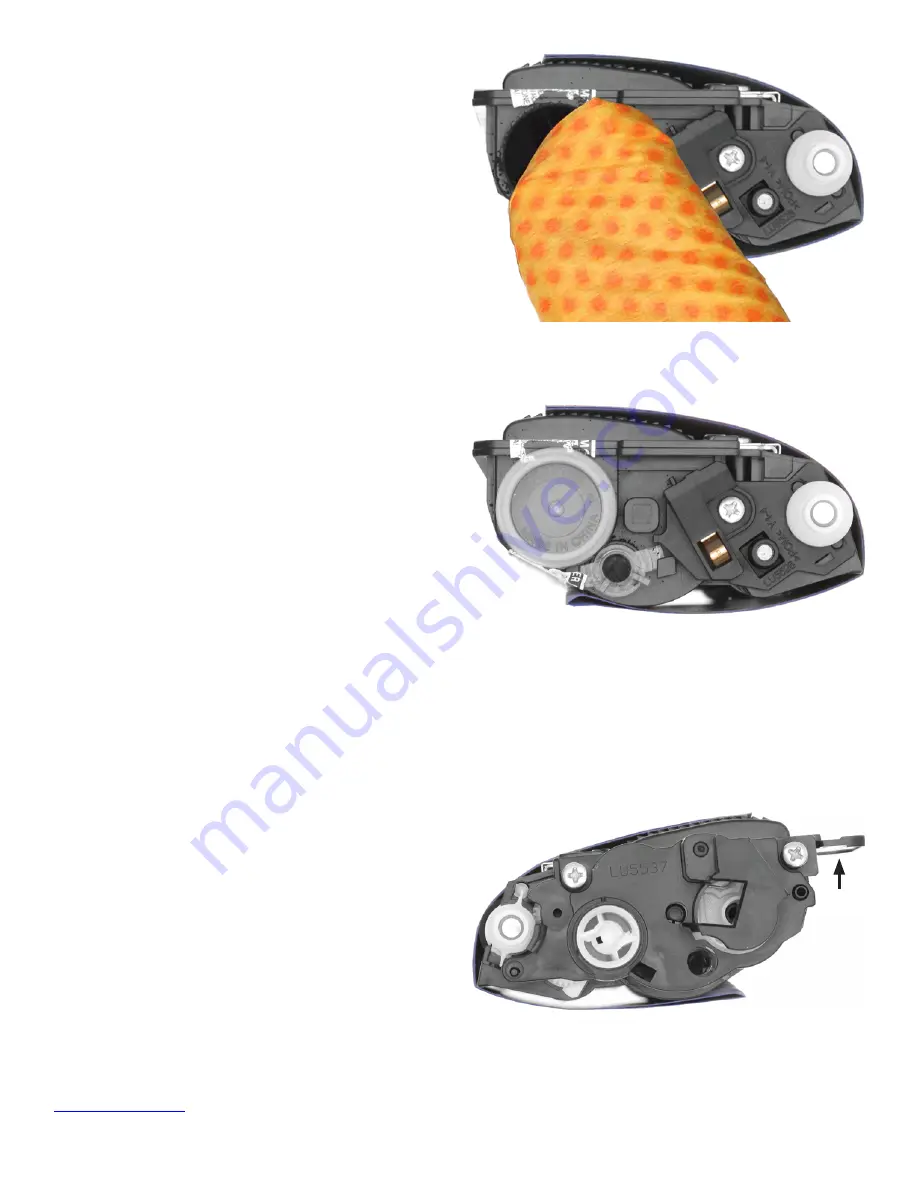
Step 11: Clean the area around the toner
hopper opening
For the replacement toner hopper plug to seal
properly, the area around the toner hopper opening
must be cleaned with the toner grabber cloth before
the plug is inserted (figure 11-1).
Step 12: Insert the toner hopper plug
Now that the area around the toner hopper opening
is clean, place the replacement plug over the hopper
hole. Press firmly on the plug to ensure the plug is
seated firmly in the hopper hole (figure 12-1).
About the cartridge reset mechanism
Brother uses a “page counting” mechanism (a
combination of gears, springs and “flags”) to report to
the printer an estimate of the amount of toner
remaining in the cartridge - whether full, empty or
somewhere in-between.
Without properly resetting/addressing these
mechanisms, even after the cartridge has been
refilled, the cartridge will still appear to the printer
as being empty resulting in a false “toner low” or
“replace toner” message.
Step 13: Remove the cartridge end cap
Position the cartridge on your work surface so the
black plastic end cap (which covers the internal
gears of the cartridge) is facing upward and the
handle of the cartridge (A) is on the right-hand
side (figure 13-1).
Figure 11-1:
Cleaning the area around the toner hopper opening
Figure 12-1:
Replacing the toner hopper plug
A
Figure 13-1:
Positioning cartridge with end cap facing up


