background image

Note:

Contact READY Robotics for your license code. You can use any USB format for

these steps. Don't use the USB installer that you installed Forge/OS with unless you
clean and reformat it.

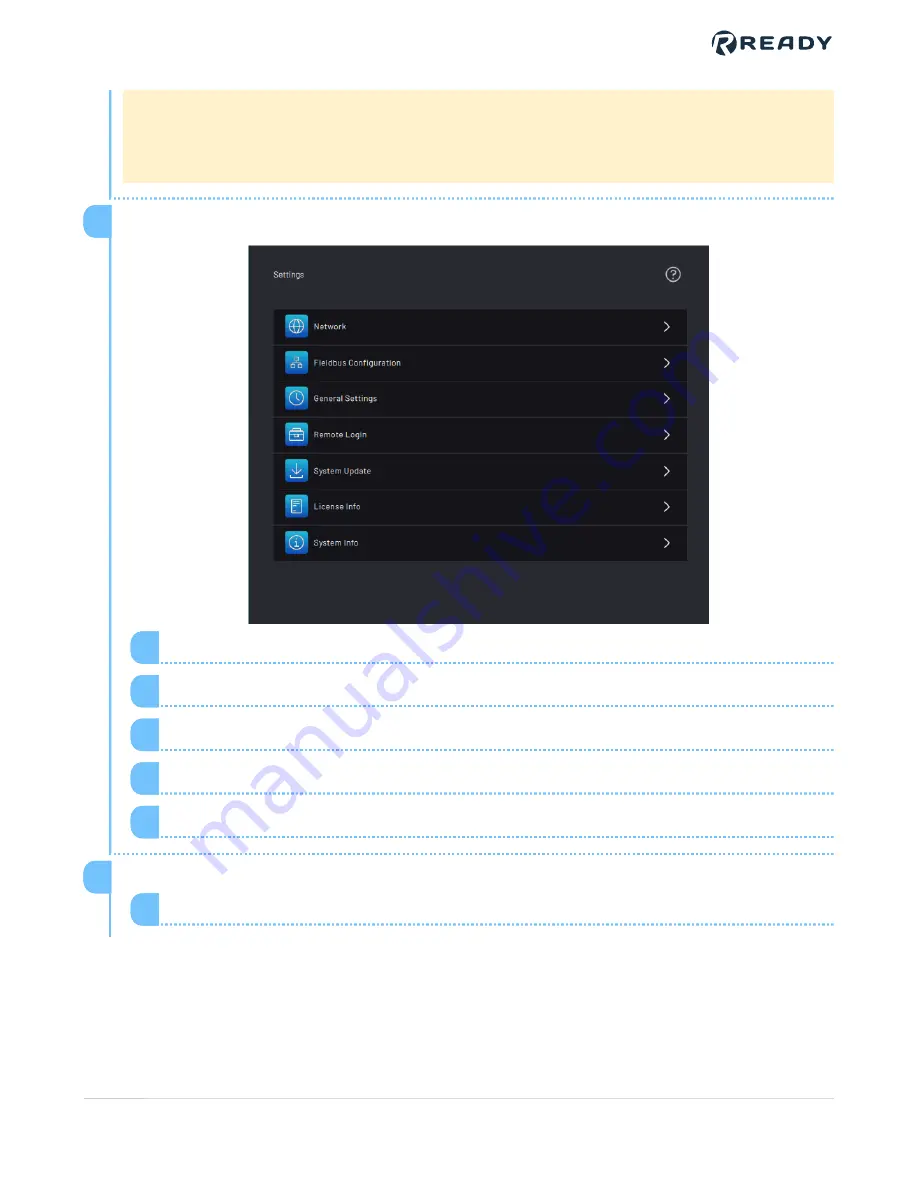
On the Settings app main screen, tap

License Info

.

Tap

Generate Certificate

.

1

Enter your license code.

2

Insert the USB into your Forge hub.

3

Tap

Start Writing Certificate to USB Drive

when prompted.

4

Remove the USB from your Forge hub.

5

5

Import the activation certificate and create the unlock certificate.

Insert the USB into your PC.

1

6

VERSION 1.0.1

© 2021 COPYRIGHT READY Robotics ALL RIGHTS RESERVED

17

Содержание FORGE OS%

Страница 1: ...EPSON VT6L Startup Guide...

Страница 2: ...by themselves a fully integrated workcell As required in ISO 10218 2 READY Robotics strongly recommends performing a complete risk assessment of the integrated workcell per ISO 12100 You may wish to u...

Страница 3: ...ds 9 Setting Up Forge OS 16 Device Configuration Pt 1 22 Import The Project In EPSON RC 25 Configure Your Robot For Control Through A Remote I O Device 31 Build The Driver 37 Start The Driver In Remot...

Страница 4: ...troller 4 Power up the systems 5 Install and set up Forge OS 6 Get robot files from Forge OS 7 Import the robot files into EPSON RC 8 Configure the robot for Remote I O control 9 Build and start the r...

Страница 5: ...ws for testing on a simulated robot at epson com Support wa00904 Note To verify that you have the full version of EPSON RC installed open it in Program Mode Then look for a USB selection in the Connec...

Страница 6: ...scription PN Supplier Qty NETWORKING USB CABLE A B BLK 2M 602 1750 ND Digi Key 1 CABLE ETHERNET 25 GREY 7734T6 McMaster Carr 1 The EPSON Emergency cable with attached 25 pin D Sub Emergency connectors...

Страница 7: ...e into the LAN port on the robot controller 1 Plug the other end of the Ethernet cable into your Forge hub Shown here LAN1 port on the Forge Ctrl 2 2 Connect an EPSON Emergency connector 3 VERSION 1 0...

Страница 8: ...Connect a 25 pin D Sub EPSON Emergency connector to the EMERGENCY port on the robot controller VERSION 1 0 1 2021 COPYRIGHT READY Robotics ALL RIGHTS RESERVED 8...

Страница 9: ...e below You will also need another Ethernet cable Description PN Supplier Qty Controller Emergency Terminal Block Kit to break out to 25 pin terminal Block RE000975 1 EPSON 1 CABLE ETHERNET 25 GREY 77...

Страница 10: ...VERSION 1 0 1 2021 COPYRIGHT READY Robotics ALL RIGHTS RESERVED 10...

Страница 11: ...onnect your EPSON robot from its power source 1 Plug the 25 pin D Sub Emergency connector into the green WAGO board from the EPSON kit 2 VERSION 1 0 1 2021 COPYRIGHT READY Robotics ALL RIGHTS RESERVED...

Страница 12: ...PSON Emergency Connector Function Brown Enabling Switch Blue Enabling Switch White Enabling Switch Green Enabling Switch Pink Pin 1 Emergency Stop Yellow Pin 9 Emergency Stop Black Pin 10 Emergency St...

Страница 13: ...ncy Connector External 24V Power Supply Fence Device Function 24V Fence Contact 11 Safety Door Input 1 Pin 7 Fence Contact 12 Safety Door Input 1 24V Fence Contact 11 Safety Door Input 1 Pin 8 Fence C...

Страница 14: ...ON s robot manual for more information on pin assignments and installing a safeguard latch system or other features appropriate for your system 5 VERSION 1 0 1 2021 COPYRIGHT READY Robotics ALL RIGHTS...

Страница 15: ...able is a black Ethernet cable Connect it to a longer Ethernet cable to plug into your Forge hub Here is an example 6 Power up the robot Forge hub and KEBA pendant 7 VERSION 1 0 1 2021 COPYRIGHT READY...

Страница 16: ...s is where you connect the pendant to Forge OS each time you reboot It may take some time for the blue button to appear When it does tap PAIR PENDANT 1 Tap Admin and sign in The default Admin password...

Страница 17: ...ettings app main screen tap License Info Tap Generate Certificate 1 Enter your license code 2 Insert the USB into your Forge hub 3 Tap Start Writing Certificate to USB Drive when prompted 4 Remove the...

Страница 18: ...al me selfservice activation aspx Type 1 cid 7461 pid 8933 lang en US 3 Paste the contents of the activation certificate file and click Activate 4 The portal generates new text characters Copy all of...

Страница 19: ...t these license activation steps 5 If you need to update Forge OS from a USB drive you can do that through the System Update screen Note Contact READY Robotics for an update file Update files are too...

Страница 20: ...w under Available Versions tap the version to install 3 Wait for the update to finish and restart Forge OS using the power button at the bottom of the screen 4 You can change system preferences from t...

Страница 21: ...and Date settings or the Admin login password Note If you later forget what you change your password to contact READY Robotics to reset it 2 Tap SAVE to save changes and exit the General Settings men...

Страница 22: ...start to add the robot in Forge OS and get the robot files to put onto the robot controller In the Admin role tap the Device Configuration icon to open the Device Configuration app 1 VERSION 1 0 1 20...

Страница 23: ...Tap Add Device to open the Device Library 2 In the Device Library list select EPSON industrial robot Then tap NEXT 3 VERSION 1 0 1 2021 COPYRIGHT READY Robotics ALL RIGHTS RESERVED 23...

Страница 24: ...later 4 Insert a USB flash drive into the Forge hub as instructed on the screen Use an empty flash drive with at least 2GB of storage 5 Tap Start Transfer and wait for it to finish 6 Remove the USB dr...

Страница 25: ...ter with EPSON RC installed 1 Open EPSON RC in Program Mode After clicking the EPSON RC icon you may get a pop up asking if you want to run in Auto Mode or Program Mode Click Change to Program Mode 2...

Страница 26: ...change to Program Mode click No or you ll have to close RC and try again 3 If asked to close the current PC project or to stop other projects choose Stop all tasks in the controller and use the curren...

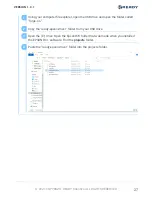
Страница 27: ...eady epson driver folder from your USB drive 2 Open the C drive Open the EpsonR70 folder that was made when you installed the EPSON RC software Find the projects folder 3 Paste the ready epson driver...

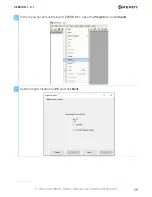
Страница 28: ...In the menu bar across the top of EPSON RC open the Project tab Click Import 6 Set the import location as PC and click Next 7 VERSION 1 0 1 2021 COPYRIGHT READY Robotics ALL RIGHTS RESERVED 28...

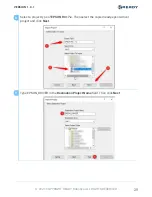
Страница 29: ...f EPSON RC 7 x Then select the copied ready epson driver project and click Next 8 Type EPSON_DRIVER in the Destination Project Name field Then click Next 9 VERSION 1 0 1 2021 COPYRIGHT READY Robotics...

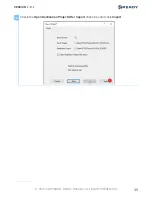
Страница 30: ...Check the Open Destination Project After Import check box and click Import 10 VERSION 1 0 1 2021 COPYRIGHT READY Robotics ALL RIGHTS RESERVED 30...

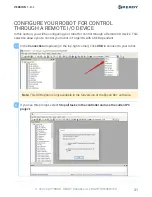
Страница 31: ...ntrol your robot in Forge OS with a KEBA pendant In the Connection dropdown in the top right corner click USB to connect to your robot Note This USB option is only available in the full version of the...

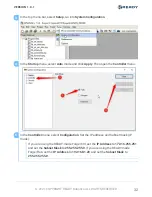
Страница 32: ...select Configuration Set the IP address and Subnet mask IP mask If you are using the READY made Forge Ctrl set the IP Address to 172 16 255 251 and set the Subnet Mask to 255 255 255 0 If you are usin...

Страница 33: ...Note Configuring the driver with a Remote I O control device will allow your robot to run independent of a PC 6 Click Apply 7 In the Controller menu select Preferences 8 VERSION 1 0 1 2021 COPYRIGHT R...

Страница 34: ...ttings in the image below Then click Apply Enable virtual I O 1 Disable auto safeguard position recovery 2 Enable independent mode 3 Enable background tasks 4 Enable advanced task commands 5 9 VERSION...

Страница 35: ...g warning Click OK 10 Expand theTCP IP menu Set the TCP IP Ports to the values listed below Leave the IP Address as the default value Set Port 201 to 49152 then Apply 1 Set Port 202 to 49153 then Appl...

Страница 36: ...Set Port 203 to 49154 then Apply 3 Click Close and wait for the controller to reboot 12 VERSION 1 0 1 2021 COPYRIGHT READY Robotics ALL RIGHTS RESERVED 36...

Страница 37: ...program files to the robot In the top menu bar open the Project dropdown Click Build 1 Verify that you have a successful build by looking for a Build complete no errors message in the Status window 2...

Страница 38: ...you get build errors refer to the troubleshooting section If you see the below prompt select Yes to overwrite the project on the controller 3 VERSION 1 0 1 2021 COPYRIGHT READY Robotics ALL RIGHTS RES...

Страница 39: ...e steps to start it in Remote I O mode to test it In the top menu bar open the Run dropdown Click Run Window 1 To start the driver in Remote I O mode click the Enable Remote I O button Click Yes in th...

Страница 40: ...ent PC project 3 Verify that you see something like this in the Run Remote Console Note If the robot reboots for any reason the driver will auto launch and be ready to run 4 If you want to close RC hi...

Страница 41: ...16 255 251 If you are using the READY made Forge Hub enter the IP Address 192 168 1 20 2 1 In Forge OS confirm your device settings and tap SAVE to add the robot Forge OS attempts to communicate with...

Страница 42: ...the robot controller s Input Output IO signals for use in the Device Control Panel and Task Canvas Enter a Display Name i e Open Machine Door Open Pneumatic Vise or Start Machining Cycle to show what...

Страница 43: ...in the Device Control Panel check the DCP box next to that signal Note To use these I O signals you must integrate your automation equipment with the robot controller 2 Tap SAVE 3 Forge OS returns to...

Страница 44: ...obot outside of its joint limits In these situations the robot is not movable in Forge OS or in the EPSON RC Robot Manager If this is the case use the following instructions to recover your robot to a...

Страница 45: ...If you set a password enter your password then press OK 3 If prompted with the below warning click Yes 4 VERSION 1 0 1 2021 COPYRIGHT READY Robotics ALL RIGHTS RESERVED 45...

Страница 46: ...5 In the Connect pop up select Stop all tasks Then click OK 6 Reload your project if necessary In the top menu bar open the Project dropdown 1 Expand the Recent Projects menu 2 2 VERSION 1 0 1 2021 CO...

Страница 47: ...file 3 If prompted to disconnect click No 3 Open the Command Window In the top menu bar open the Tools dropdown 1 Click Command Window 2 4 Turn motors off 5 VERSION 1 0 1 2021 COPYRIGHT READY Robotics...

Страница 48: ...which joint that you are releasing the brake for and what position that joint is in you may need to catch the robot as it falls Doing so will avoid damage to the robot and any nearby objects that it m...

Страница 49: ...heir 0 position In the Command Window type Go JA 0 0 0 0 0 0 then hit Enter 9 Restart the driver in Auto mode by first navigating to the top menu bar and opening the Setup dropdown Go into System Conf...

Страница 50: ...ave configured your robot for control through a Remote I O device Open the Controller tab 1 Navigate to Preferences 2 Un check and re check Virtual I O 3 Click Apply 4 VERSION 1 0 1 2021 COPYRIGHT REA...

Страница 51: ...Click Close Note After the controller restart is complete the robot will be back in Auto mode and the driver should have restarted 5 VERSION 1 0 1 2021 COPYRIGHT READY Robotics ALL RIGHTS RESERVED 51...

Страница 52: ...when building the robot driver from the Project dropdown Try deleting and adding the robot in System Configuration In the top menu bar select Setup Go into System Configuration 1 VERSION 1 0 1 2021 C...

Страница 53: ...t 1 Note what the settings of the configured robot are If they don t match your robot model make a note of that 2 Click Delete and Yes to re configure the Robot 1 file 3 VERSION 1 0 1 2021 COPYRIGHT R...

Страница 54: ...lick Add Enter the robot s information and then click OK 4 Close out of the System Configuration menu 5 Try to re build the project 6 VERSION 1 0 1 2021 COPYRIGHT READY Robotics ALL RIGHTS RESERVED 54...

Страница 55: ...s and hardware integration guides check out our Support page support ready robotics com For articles whitepapers and other resources check out our Resources page ready robotics com resources For produ...

Страница 56: ...VERSION 1 0 1 2021 COPYRIGHT READY Robotics ALL RIGHTS RESERVED 56...

Отзывы: