background image


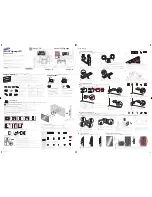
Attach the Wall Mount Bracket (not included) 

Before you begin the third-party manufacturer instructions, be sure to do the following things: 
1.


Place the TV face down on a clean, safe and cushioned surface. 

2.


Remove the TV stand if you already attached it. 

3.


Place the spacers (not included) in the corresponding bracket holes. 


CAUTION: 

  When you attach the mount, be sure to use the spacers ( provided by the third-party 

manufacturer ) between the TV and the bracket. 

  To prevent internal damage to the TV and ensure it is mounted securely, be sure to use fixing 

screws (not provided) that are 12 mm in length when measured from the attaching surface of 
the mounting hook. 


Wall mount hole pattern VESA (mm) 

400 × 200 

Wall mount screw size (mm) 

M6 

Follow instructions provided with the wall mount bracket. 
• To complete the installation, please contact the wall mount manufacturer or the retailer from 
which you purchased the TV. 
• The selected screws are 12 mm in length when measured from the attaching surface of the rear 
cover. The diameter and length of the screws differ depending on the wall mount bracket model. 
NOTE:  The  diameter  and  length  of  the  screws  differ  depending  on  the  wall  mount  bracket 
model.

12 mm 

Wall mount bracket 

Screw 

Spacer 

Rear cover of the TV 

Содержание RTRU5527-B-US

Страница 1: ...shown is for US models only Channel availability is subject to change and varies by region Illustrations in this guide are provided for reference only and may differ from actual product appearance Product design and specification may be changed without notice ...

Страница 2: ...two blades with one wider than the other A grounding type plug has two blades and a third grounding prong The wide blade or the third prong are provided for your safety If the provided plug does not fit into our outlet consult an electrician for replacement of the obsolete outlet 10 Protect the power cord from being walked on or pinched particularly at plugs convenience receptacles and the point w...

Страница 3: ...nd supporting structure grounding of the lead in wire to an antenna discharge unit size of grounding conductors location of antenna discharge unit connection to grounding electrodes and requirements for the grounding electrode 24 When replacement parts are required be sure the service technician uses replacement parts specified y the manufacturer or those that have the same characteristics as the ...

Страница 4: ...rbox style 16 9 media on a normal 4 3 display black bars at top and bottom of screen or viewing normal style 4 3 media on a widescreen 16 9 display black bars on left and right sides of screen The following symptoms are not signs of malfunction but technical limitation Therefore we disclaim any responsibility for these symptoms LCD Panels are manufactured using an extremely high level of precision...

Страница 5: ...instructions may cause harmful interference to radio Communications However there is no guarantee that interference will not occur in a particular installation If this equipment does cause harmful interference to radio or television reception which can be determined by turning the equipment off and on the user is encouraged to try to correct the interference by one or more of the following measure...

Страница 6: ...the front of the TV at any time because it could crack To attach the left and right legs that forms the stand 1 Carefully place your TV face down on a soft flat surface to prevent damage to the TV or scratching to the screen 2 Place the legs into the bottom slots of the TV insert and tighten the screws found in the accessories bag in the circled area with the screwdriver not provided 3 The the TV ...

Страница 7: ...urely be sure to use fixing screws not provided that are 12 mm in length when measured from the attaching surface of the mounting hook Wall mount hole pattern VESA mm 400 200 Wall mount screw size mm M6 Follow instructions provided with the wall mount bracket To complete the installation please contact the wall mount manufacturer or the retailer from which you purchased the TV The selected screws ...

Страница 8: ...nnect it to the TV using the best connection method available From most to least desirable HDMI input Digital HD and SD video AV input analog SD video Antenna input You can also enjoy live TV broadcast by connecting an HD antenna to the AIR CABLE port Connecting a component with a composite AV video cable If the best connection available on your component is AV or composite video output connect it...

Страница 9: ...I 2 HDMI 3 Connecting headphones or analog sound bar You can connect headphones or an analog sound bar not provided to the TV s headphone jack Tip Inserting a plug in the headphone jack disables the sound from the TV s built in speakers Warning Loud noise can damage your hearing When using headphones use the lowest volume setting on your headphones that still lets you hear the sound TV label Port ...

Страница 10: ... the back of your TV to an external modem or router using a LAN Ethernet Cat 5 cable not provided See the illustration below We recommend using a modem or router that supports Dynamic Host Configuration Protocol DHCP Modems and routers that support DHCP automatically provide the IP address subnet mask gateway and DNS so you don t have to enter them manually Most home networks already have DHCP Con...

Страница 11: ...A WEP WPA2 AC power Plug your TV into a power outlet You can tell that the TV has power because the status light on the front of the TV lights up Remote control batteries Open the back of your Roku TV remote control and insert the included batteries as indicated in the label in the battery compartment Reattach the back cover IMPORTANT NOTICE Depending on the country where the TV is installed certa...

Страница 12: ...ile device go to http go roku com tvmanual The page How to set up your Roku TV opens 2 Click the Roku TV User Guide link in this article to download the user guide 3 If the user guide does not open automatically after the download completes go to your browser s download location and open Roku TV User Guide n n pdf n n represents the current version number of the Roku TV software described in the u...

Страница 13: ...tting information You see a normal picture but do not hear any sound Check that volume is turned up Check if Mute mode is ON Turn off mute by pressing the Mute button again or pressing volume up Make sure there is nothing plugged into headphone jack on the TV Connecting headphone to the TV will mute the main speakers Make sure TV speakers are enabled To enable them go to Settings Audio TV Speakers...

Страница 14: ... are inserted properly Check that there are no obstacles between the remote control and the front of the TV Try moving closer to the TV If the LED on the TV flashes when you press any of the buttons on the remote control the issue is not with the remote control If all of these measures fail try unplugging the TV waiting 30 seconds and then reconnecting AC power Model Name RTRU5528 B CA RTRU5527 B ...

Страница 15: ...guarantees including any warranties conditions representations or guarantees under any Sale of Goods Act or like legislation or statue is hereby expressly excluded Save as herein provided C I Service Dept Canada or C I Service Dept USA shall not be responsible for any damages to persons or property including the unit itself howsoever caused or any consequential damages arising from the malfunction...

Страница 16: ...ar the transportation cost to and from the Service Centre Unless you have made other arrangements with your dealer at the time of purchase whereby he undertakes this responsibility At the sole discretion of Curtis Televisions are either consumer carry in to an Authorized Curtis Service Centre or directly exchanged for a new or refurbished remanufactured unit Proof of purchase in the form of an ori...

Страница 17: ...ountries Roku ROKU ROKU TV and the ROKU logo are the trademarks or registered trademarks of Roku Inc All other trademarks and logos herein are the property of their respective owners RCA RCA the RCA logo the two dogs Nipper and Chipper logo are registered trademarks or trademarks of RCA Trademark Management and are used under license by Curtis International Ltd Any other product service company tr...

Страница 18: ...18 ...

Страница 19: ...les modèles américains La disponibilité des chaînes est sujette à changement et varie selon les régions Les illustrations dans ce mode d emploi sont seulement pour votre référence et peuvent différer de l apparence du produit réel La conception et les spécifications du produit peuvent être modifiées sans préavis ...
Страница 20: ... mise à la terre a deux lames et une troisième broche de terre La lame large ou la troisième broche est destinée à vous protéger Si la fiche ournie ne s insère pas dans votre prise contactez un électricien pour faire remplacer la prise désuète 10 Empêchez Ie cordon d être piétiné ou pincé surtout aux fiche prises de courant et au point de leur sortie de I appareil 11 Utilisez uniquement les access...

Страница 21: ...support à la terre 24 Quand il est nécessaire de remplacer certaines pièces de l appareil assurez vous que le réparateur utilise des pièces recommandées par le fabricant ou ayant les mêmes caractéristiques que les pièces originales Le remplacement par des pièces non autorisées peut causer un incendie des chocs électriques ou être la source d autres dangers 25 Après service ou réparation demandez a...

Страница 22: ...usine ne pourra être réclamé L écran LCD de ce téléviseur est constitué de cellules minces et est le fruit d une technologie très précise Il peut y avoir des cellules qui n émettent pas de lumière ou qui restent allumées Ceci n est pas dû à un défaut de l appareil N installez pas le l écran LCD près d équipement électronique sensible aux ondes électromagnétiques II existe de l équipement qui trop ...

Страница 23: ...installé et utilisé en accord avec les instructions pourrait causer des interférences nuisibles pour les communications radio Cependant il n existe pas de garantie que l interférence n adviendra pas sur une installation en particulier Si cet appareil ne cause pas d interférence nuisible pour une réception radio ou télévision qui peut être déterminée par l allumage ou non de l appareil l utilisateu...

Страница 24: ...r elle pourrait se casser Pour monter les pieds droit et gauche qui forment le support 4 Placer avec soin la TV sur la face avant sur une surface plane et lisse afin d empêcherdes dommages sur la TV ou des égratignures sur l écran 5 Placer les pieds dans les fentes au bas de la TV insérez et resserrez les vis disponibles dans le sachet d accessoires dans la zone encerclée à l aide du tournevis non...

Страница 25: ...r les cales d espacement fournies par le fabricant tiers être la TV et le support Afin de prévenir des endommagements internes sur la TV et de sécuriser son assemblage assurez vous d utiliser des vis de montage non fourni d une longueur de 12 mm de la surface au jusqu à la face arrière Dimensions du trou norme VESA mm 200 200 Taille des trous de vis du support mural mm M6 Suivez les instructions p...

Страница 26: ... 300 ohm vous devez utiliser un adaptateur de 300 75 ohm non fourni pour adapter le câble à une connexion qui est compatible avec l entrée de l antenne du téléviseur HDMI entrée HD Numérique et vidéo SD AV Entrée vidéo SD analogique Entrée d antenne vidéo SD analogique en utilisant NTSC Connexion d un composant avec un câble vidéo AV composite Si la meilleure connexion sur votre composant est la s...

Страница 27: ...audionumériques à un récepteur ou une barre de son Marque de la TV Port Câble Equipement externe HDMI1 ARC HDMI 2 HDMI 3 Connexion du casque à écouteurs ou une barre de son analogique Vous pouvez connecter un casque à écouteurs ou une barre de son analogique non fourni à la prise du casque à écouteurs du téléviseur Conseil Insérez une fiche dans la prise casque pour désactiver le son des enceintes...

Страница 28: ... sur votre récepteur ou une barre de son Cette connexion utilise la fonction du Canal de Retour Audio ARC du HDMI pour envoyer le son du téléviseur à un appareil compatible Pour utiliser cette fonction vous devez configurer le téléviseur pour activer HDMI ARC Marque de la TV Port Câble Equipement externe OPTICAL HDMI1 ARC Réparation pour la connectivité Internet Connexion à un réseau câblé Etherne...

Страница 29: ...aptateur réseau sans fil interne il ne supporte pas l utilisation d un adaptateur réseau USB Pour une meilleure expérience de visionnement nous vous recommondons d utiliser un routeur sans fil ou un point d accès qui supporte les normes de réseau sans fil suivantes selon votre modèle du téléviseur Si le routeur sans fil n est pas compatible avec DHCP votre TV peut se connecter facilement au réseau...

Страница 30: ...ion secteur Si le problème n est pas résolu référez vous aux conseils ci dessous Si le problème persiste contactez le service après vente du client PROBLEMES SOLUTIONS POSSIBLE Vous ne voyez pas d image lorsque vous allumez la TV Lorsque le téléviseur est éteint verifiez si le voyant LED est allumé Si le téléviseur s allume pressez n importe quel bouton de la télécommande pour s assurer qu il n es...

Страница 31: ...z de cacher la chaîne accédez à Settings TV inputs Antenna TV Edit channel lineup Vous voyez des lignes horizontales verticales sur l image ou elles remuent Eteignez et ou retirez tout appareil électrique qui pourrait se trouver près de la TV Insérez le câble d alimentation de la TV dans une autre prise Vous ne pouvez pas connecter votre réseau Wifi Assurez vous d avoir sélectionné le bon nom de r...

Страница 32: ...travail Si vous avez acheté votre produit plus de 1 ans un frais de réparation peuvent s appliquer Rien dans cette garantie impliquera que C I sera responsable ou est responsable de n importe quels dommages à n importe quels articles placés dans ce produit si en raison de n importe quel défaut du produit ou son usage EXCLUSIONS Comme en ceci fourni pour Le Département de Service C I Canada ou le D...

Страница 33: ...Canton MI 48187 U S A 3 C I réserve la droite pour réparer ou remplacer les parties qui sont devenus défectueuses POUR OBTENIR DES RÉPARATION SI ACHETER AUX CANADA Pour obtenir le service Appelez le 1 800 968 9853 Ayez sous la main la date d achat de l appareil et son numéro de modèle série Le numéro de modèle et de série se trouve à l arrière de votre appareil Un représentant essaiera de régler v...

Страница 34: ... le logo ROKU sont des marques déposées et a propriété de Roku Inc Les autres logos de chaînes marques et noms de produits sont des marques et marques déposées de leurs détenteurs respectifs RCA RCA le logo RCA logo le logo des deux chiens Nipperet Chipper logo sont des marques de RCA Trademark Managementet sont utlisées sous licences par Curtis International Ltd Tout autre produit service entrepr...

Отзывы: