


6
Copyright © 2020 RCA Communications Systems
www.RCACommunicationsSystems.com
Communications Systems
RDR6350 Digital Mobile
Two-Way Radio
INSTRUCTION MANUAL
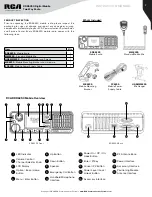
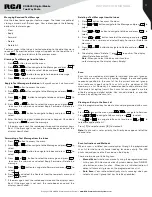
PTT
P1
P1
P1
P1
P1
P2
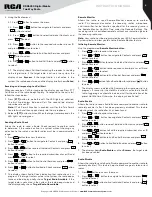
Selecting a Zone
Zones are groups of channels.
RDR6350 offers up to 64 zones with a maximum of 1000 channels per
zone.
Change zones with radio’s function keys as programmed by your RCA
Communications Systems dealer or radio’s menu.
To select the appropriate zone, please follow these steps:
1. Using the Radio User Menu
1.1. Press button to access the menu.
1.2. Press or button to navigate to Zone, press to enter.
1.3. Press or button to select the appropriate zone, and
press to confirm.
2. Using the Radio Option menu:
2.1. Press button to access the Option.
2.2. Press or button to navigate to Zone, press to enter.
2.3. Press or button to select the appropriate zone, and
press to confirm.
• Shortcut key:
you can toggle to the appropriate zone by pressing
the Zone Up or Zone Down key preset by your dealer. The shortcut
keys are customizable.
Selecting a Channel, Subscriber ID or Group ID
Once the required zone is displayed (if you have multiple zones in
your radio), turn the programmed Channel Selector Knob to select the
desired channel or by using the radio’s Menu navigate to the desired
subscriber alias or ID, or group alias or ID.
Receiving and Responding to a Group Call
To receive a call from a group of users, your radio must be
configured as part of that group. When you receive a Group Call:
1. The LED indicator appear solid green.
2. The first line of the display shows Individual Call. The second line
displays the subscriber alias or ID.
3. Press the
[PTT]
button to respond to the call and the LED indicator
lights up red.
Note:
If Talk Permit Function is enabled, wait for the Talk Permit
Tone to finish and then speak clearly into the microphone.
4. Release the
[PTT]
button to listen again.
5. If there is no voice activity for a set period of time, the call ends.
Receiving and responding to an Individual Call
A Private Call is a call from an individual radio to another individual
radio. There are two types of Individual Calls. The first type is when a
radio presence check is performed prior to setting up the call, while
the other sets up the call immediately. When you receive an Individual
Call:
1. The LED indicator appear solid green.
2. The first line of the display shows Individual Call. The second line
displays the subscriber alias or ID.
3. Press the
[PTT]
button to respond to the call and the LED indicator
lights up red.
Note:
If Talk Permit Function is enabled, wait for the Talk Permit
Tone to finish and then speak clearly into the microphone.
4. Release the
[PTT]
button to listen again.
5. If there is no voice activity for a set period of time, the call ends.
Receiving and All Call
An All Call is a call from an individual radio to every radio on the
channel. It is used to make important announcements requiring all
radio user’s full attention. When you receive an All Call:
1. The LED indicator appear solid green.
2. The first line of the display shows All Call. The second line displays
the subscriber ID.
Note:
The radio stops receiving the All Call if you switch to a different
channel while receiving the call.
Making a Radio Call
You can select a channel, subscriber ID, or group by using:
• The channel Selector Knob
• The programmable buttons
• The contacts list
• Manual Dial (using contacts list)—This method is for Private Calls
only and is dialed using the keypad microphone.
Making Call with Channel Selector Knob
Making a Group Call
1. To make a call to a group of users, your radio must be configured
as part of that group. Turn the Channel Selector Knob to select the
channel with the active group alias or ID.
2. Press the
[PTT]
button to make the call. When the target radio
responds, the LED lights up green. The first line displays
Group Call. The second line displays subscriber alias or ID.
Note:
If Talk Permit Function is enabled, wait for the Talk Permit
Tone to finish, then speak clearly into the microphone.
3. Release the
[PTT]
button to listen.
4. If there is no voice activity for a predetermined period of time,
the call ends. The radio returns to the screen you were on prior to
initiating the call.
CONVENTIONAL MODE
Note:
The functions described in this section are available only in
digital mode.
Making and Receiving Calls


