First Things First
8
Recording Pictures
Since there needs to be pictures taken before the camera
will display stored files, let’s walk through the steps to
capture images.
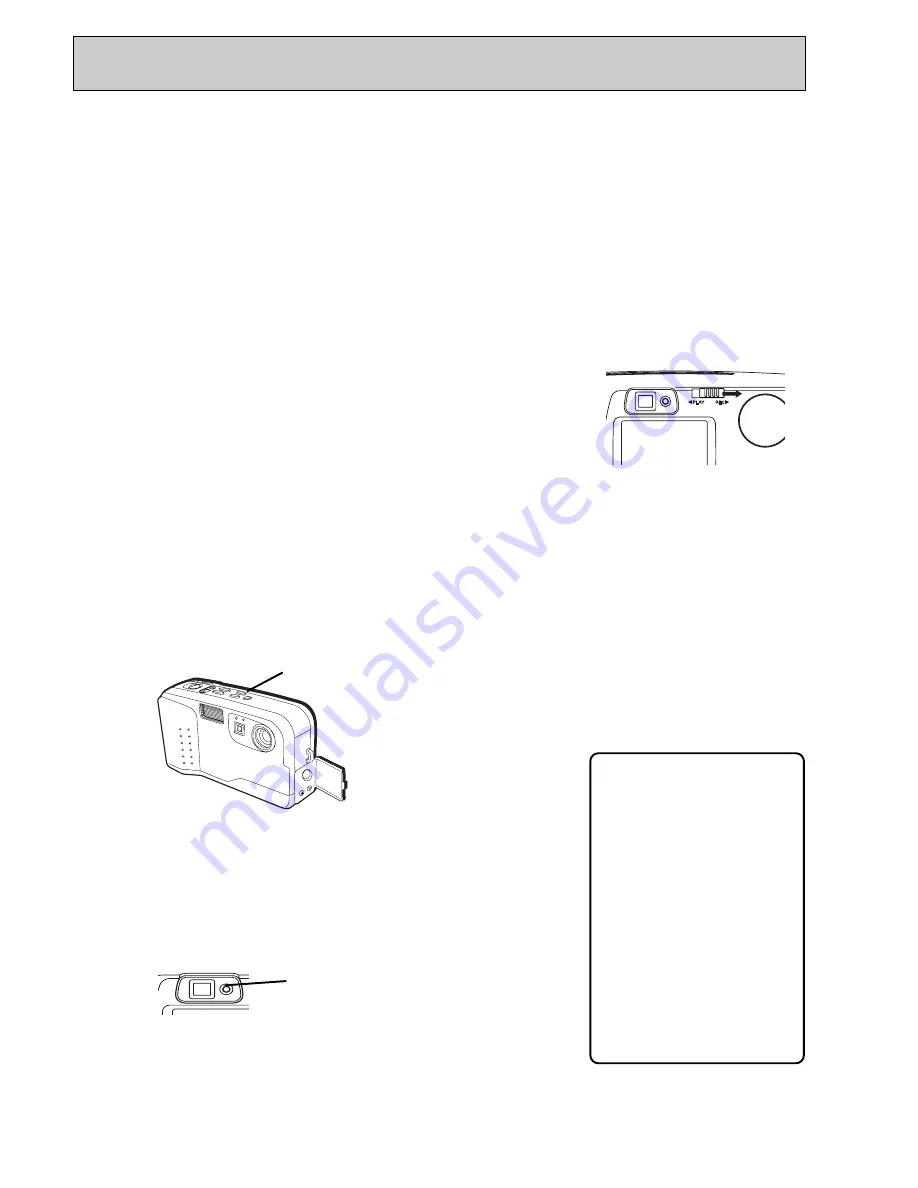
The switch on the back of the camera determines if
PLAY or REC mode is used. Play is how you view
stored pictures and REC is how they are taken (for more
information about the specific aspects of PLAY and
REC modes, see the next section, “Setting Preferences”).
Put the Camera in Record (REC) Mode
Slide the mode switch on the back of the camera to
REC.
Turn on the Camera
Now that the batteries and CompactFlash card have
been installed it’s time to power up the camera and
take some pictures. Turn on the power by pressing the
POWER button on top of the camera.
The LCD monitor on the back of the camera should turn
on the first time you press the POWER button in REC
mode. From the factory, LCD ON is the default. This
monitor can be turned off to conserve the life of the
camera’s batteries.
Once the green light by the viewfinder (on the back)
stops blinking, the camera is ready to capture images.
The power button
Note:
the LCD monitor is a
major drain on the
life of batteries. For
optimal battery
performance, turn off
the monitor by
pressing the LCD
button on top of the
camera and frame
your pictures using
the optical viewfinder.
This green light blinks when the
camera is warming up.
The mode switch on the back of the
camera serves two functions; PLAY
and REC. Taking pictures requires
the camera be in REC mode.
Содержание CDS4100
Страница 16: ......


