10
11
EN
EN
Troubleshooting Tips
Solution
• Check power cord for a secure
connection.
• Unplug the unit for a moment, and
then plug into power source again.
• Check the outlet by plugging in
another device.
• Increase the volume setting.
• Check connection to speakers.
• Check that you have selected the
appropriate function: CD, TAPE, Tuner.
• Make sure mute is off.
• Make sure headphones are not
plugged in.
• Check antenna connection.
• Move antenna.
• Turn off nearby electrical appliances,
such as hair dryer, vacuum cleaner,
microwave, fluorescent lights.
• Check that CD is in the tray.
• Check that CD label is facing up.
• Check that PAUSE mode is not on.
• Check that CD function is selected.
• Use CD lens cleaner.
• Clean the disc.
• Try another CD.
• Clean the disc.
• Check disc for warping, scratches, or
other damage.
• Check if something is causing the
system to vibrate. If so, move the
system.
• Make sure the speakers are at least 3
feet away or on a different surface
from the main unit.
Problem
System will
not turn on
No sound
Poor radio
reception
CD does not
play
CD sound
skips
Problem
CD button
will not
respond, or
does not
change
discs when
you press
DISC SKIP
Distorted or
noisy tape
recordings
Remote
control
does not
work
Solution
• Switch to another function (TAPE,
Tuner) and then back to CD.
• Inspect the tape head, clean it if
necessary.
• Check that the batteries are properly
installed.
• Replace weak batteries.
• Check the system is plugged into
power source.
• Point the remote directly at the
system’s front panel.
• Move closer to the system.
• Remove any obstacles between the
remote and the system.
Maintenance
Disconnect the audio system from the power source
before performing any maintenance.
Cleaning
Clean the exterior of the system using a soft dust
cloth.
CD Player
CAUTION!
This system operates with a laser. It must
be opened by only a qualified technician.
Tape Player
To prevent deterioration of sound quality, periodical-
ly open the door of each deck and clean the magnetic
heads, pinch roller, and capstan with a cotton bud
dipped in alcohol. Also, demagnetize the head by
playing a demagnetizing cassette (available through
an audio equipment store).
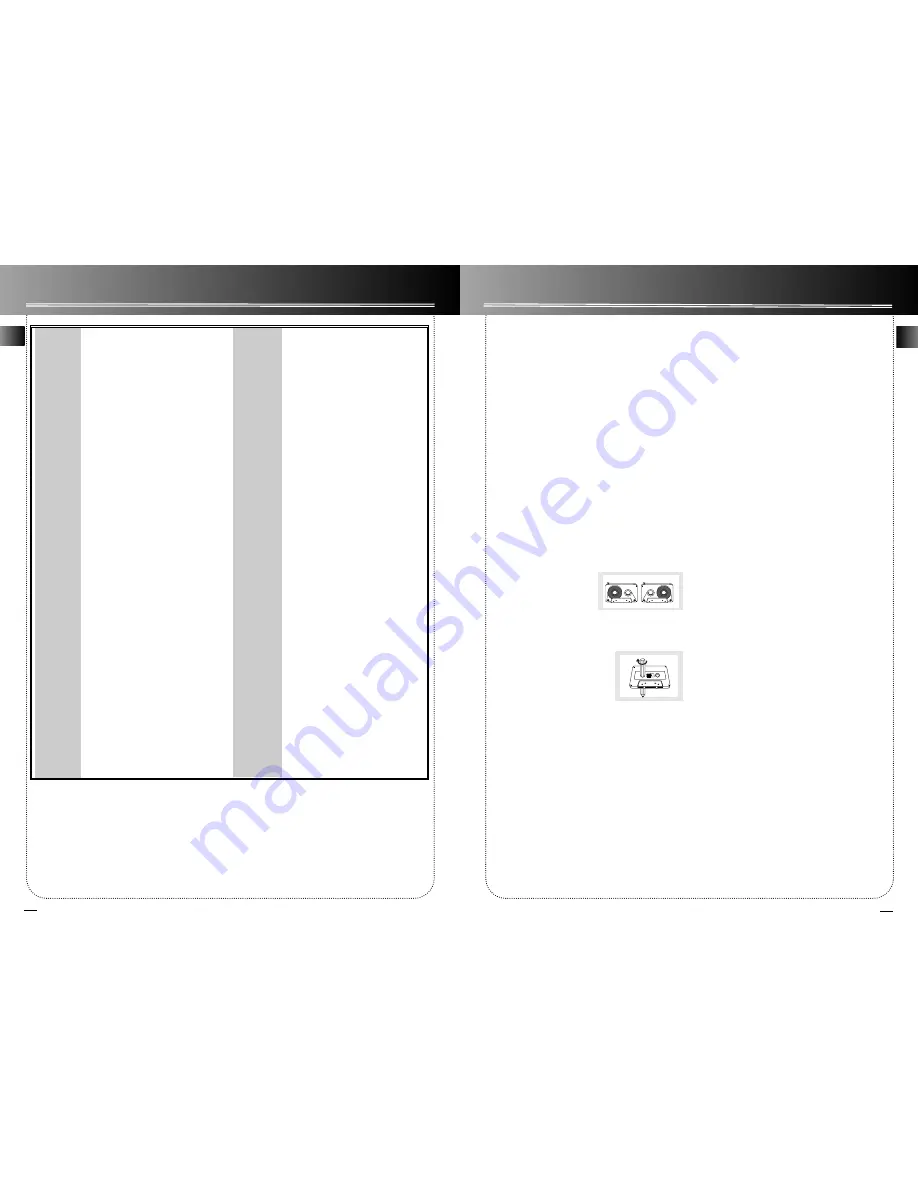
To protect recordings on
one or both sides of a tape,
remove the corresponding
tab. If you later want to
record on the tape, affix a
piece of adhesive tape over the hole.
Quit Slacking - A little bit of slack
in your tapes can cause scratches
on the tape, or worse yet, the
tape could break. If you notice
some slack in the tape, use a
pencil to tighten it up before
you insert it.
Handling CDs
• Do not touch the signal surfaces. Hold CDs by the
edges, or by one edge and the hole. Do not affix
labels or adhesive tapes to the label surfaces. Do not
scratch or damage the label. CDs rotate at high
speeds inside the player. Do not use damaged
(cracked or warped) CDs
Cleaning CDs
• Dirty CDs can cause poor sound quality. Always
keep CDs clean by wiping them gently with a soft
cloth from the inner edge toward the outer perime-
ter.
• If a CD becomes dirty, wet a soft cloth in water,
wring it out well, wipe the dirt away gently, and
then remove any water drops with a dry cloth.
• Do not use record cleaning sprays or antistatic
agents on CDs. Also, never clean CDs with benzene,
thinner, or other volatile solvents which may cause
damage to disc surface
CD Lens Care
When your CD lens gets dirty it can also cause the
system to output poor sound quality. To clean the
lens you will need to purchase a CD lens cleaner
which can maintain the output sound quality of
your system. For instructions on cleaning the CD
lens, refer to the ones accompanying the lens
cleaner.
A
Side A Protection
B
Side B Protection
A


