RC-Xplanes EDGE 540 T Outrunner Tabs Instruction Manual
Page 3 of 10
Distributed by RC-Xplanes 541-261-2707
rcxplanes.com
A
2005
STEP 1: Installing the Spars
1A:
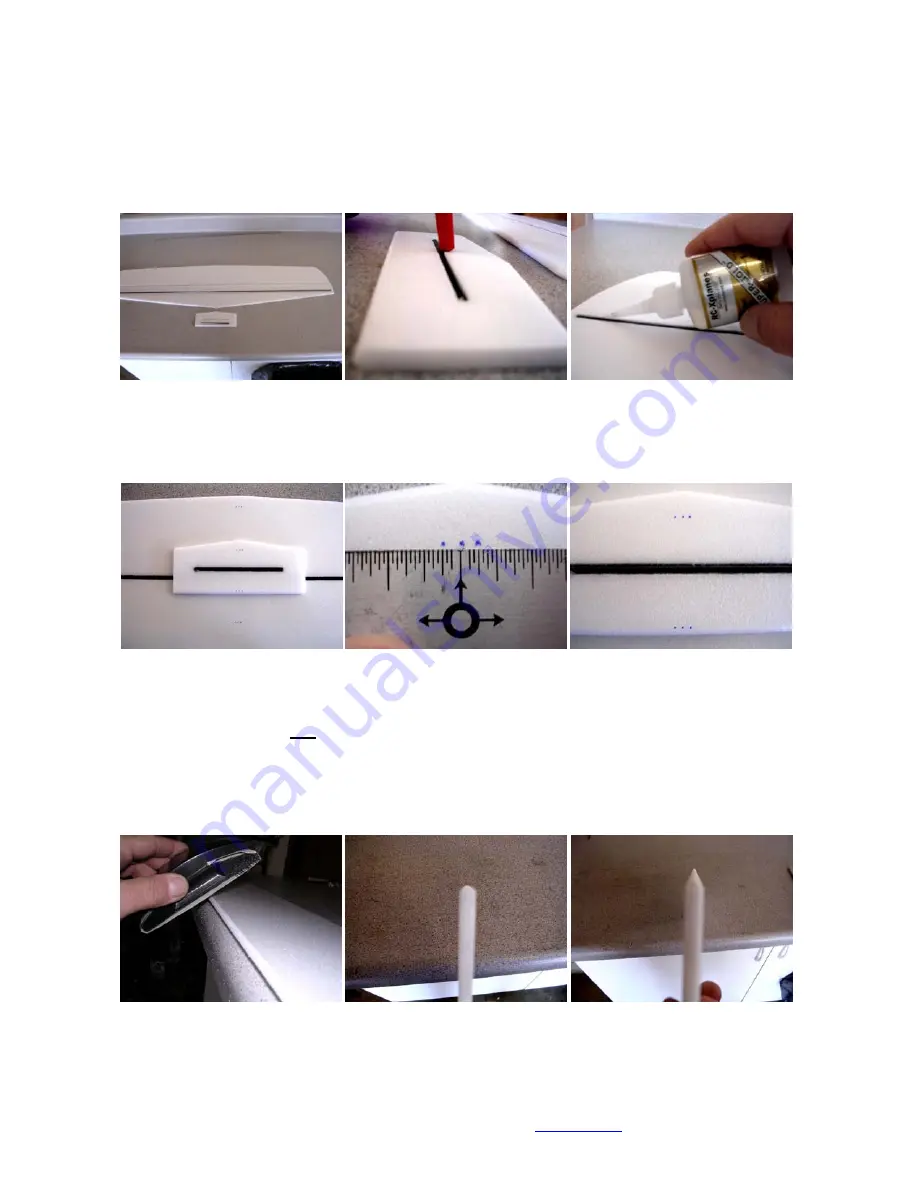
Your RC-Xplanes kit will have the grooves for the wing and stabilizer carbon tubes already cut. Lay the wing and stabilizer on a flat
bench with the grooves facing up. In the long hardware bag, find and install the 36” x 0.156” carbon tube into the wing slot. Find the 6”
x 0.156” carbon tube and install into the stabilizer to insure their fit. Run a bead of RC-Xplanes Thin Odorless CA down both sides of
the wing and stabilizer spars. While holding the surface flat on the bench and the carbon tube into the groove, spray some RC-
Xplanes CA accelerant on the groove and spar in 8-10 inch sections so you can hold the tube into the wing without getting stuck to
your plane. The CA will cure almost immediately when the accelerant is applied so make sure the spar is where you want it and
nothing else is in contact with the CA.
1B:
The main wing spar and stabilizer spar will look like this when installed.
Find the centerline of the wing and stabilizer by measuring from end to end and divide by 2. Do this as close to the leading edge and
trailing edge as you possibly can. Now measure out in both directions from center 1/8” and put a small mark at four locations on the
spar side of the wing and stabilizer. Two at the leading edge and two at the trailing edge for later reference when installing the wing
and stabilizer into the fuse. You should have four reference marks on the wing and four on the stabilizer that will reference the
fuselage sides later.
Step 2: Preparing The Edges and Motor Mount.
2A:
Use 220 grit sandpaper on a flat sanding block. This step takes very little time and it is very easy to remove too much material or gall
the foam when sanding so use
light
pressure. On all of the edges that are exposed to airflow, sand them into a rounded edge. Place
the part on the edge of your bench and sand lengthwise using a different angle on the tool for every pass. The rounded edges will look
something like the center picture. For all of the hinged edges of all the control surfaces, sand them into a double beveled configuration
by holding the part close to the edge of your bench. Keep the tool at 45 - 50 degrees and move it lengthwise along the leading or
hinged edge of the control surface. Use caution not to rush this by using too much pressure or letting the edge of the tool grab the
foam. Sand this angle until it is close to the center of the foam thickness and then turn the part over and do the same thing to the other
side. Sand this double bevel into the wing, stabilizer and fuselage where the control surfaces mount. The double beveled areas will
look similar to the right picture.


