10
Need Help?
Visit our web site for replacement parts, product support, a list of authorized service centers in the US and customer service contact information
at
www.razor.com
. Please have the product I.D. code (located on the white label of your product) available for better assistance. Additional Customer Service
contact information is listed at the back of this manual.
1
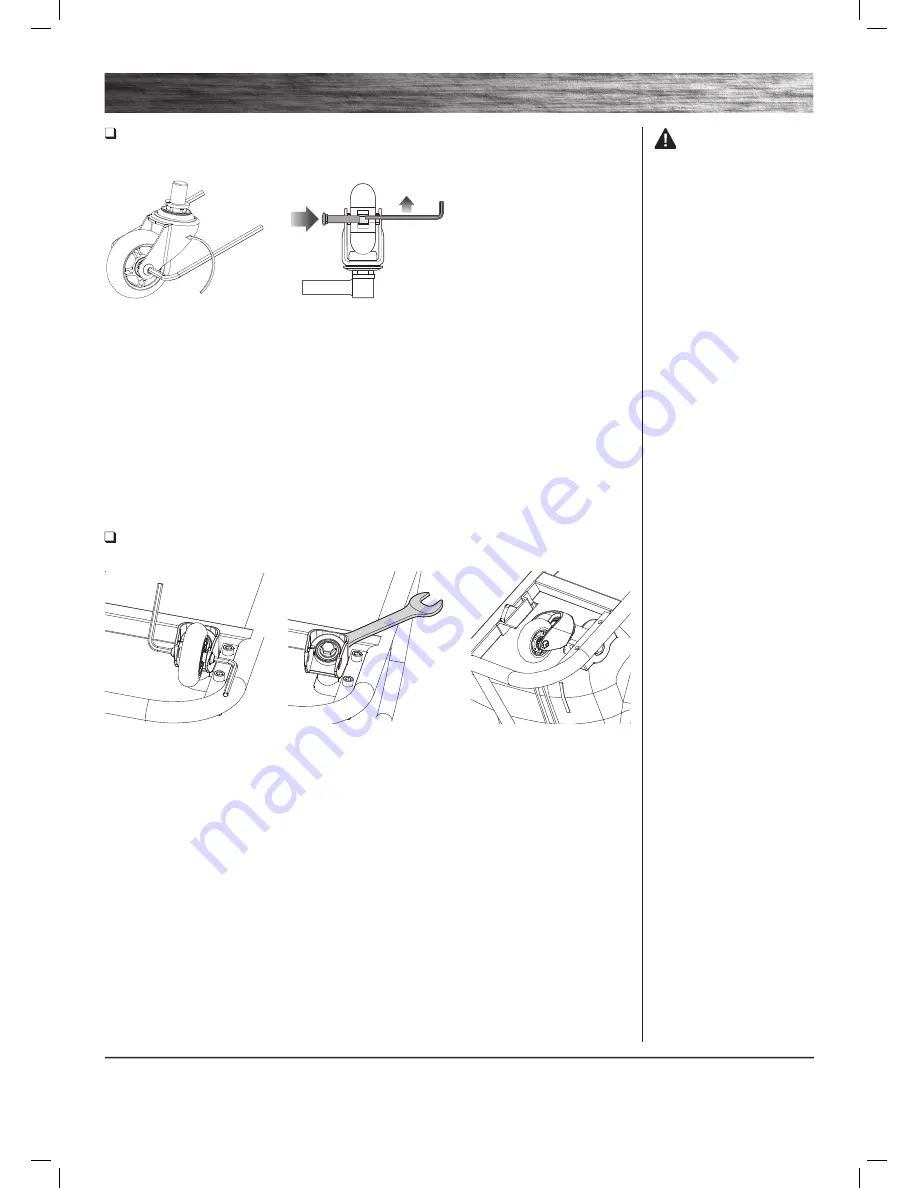
Carefully turn unit over. Using
two (2) 5 mm Allen wrenches;
loosen coupling bolt and remove
wheel from caster. Install the
replacement wheel into caster
and tighten coupling bolt to secure
wheel in place.
Note:
Make sure the spacer in the
center of the wheel is aligned with
the holes in the bearing before
inserting the coupling bolt.
Note:
Make sure the spacer in the
center of the wheel is aligned with
the holes in the bearing before
inserting the coupling bolt.
2
Using a 24 mm wrench, loosen
nut on the caster and remove caster.
3
Insert replacement caster into
the frame and secure in place with
nut removed in step 2. Re-attach
wheel to caster and secure in
place with couple bolt removed
in step 1.
1
Carefully turn unit over,
and using two (2) 5 mm Allen
wrenches; loosen coupling bolt
that attaches the wheel to the
caster and remove wheel.
Rear Wheel Replacement
Tools Required:
Two (2) 5 mm Allen wrenches
Rear Casters Replacement
Tools Required:
24 mm wrench and two (2) 5 mm Allen wrenches
Note:
Practice riding only in wide
open areas clear from curbs,
parking blocks and other obstacles.
Impacting the wheels against
any hard surface can damage the
wheels. Wheels are not covered
under your limited warranty.
WARNING:
Failure to
properly install and tighten the
screws, nuts and bolts that affi x the
steering wheel and seat can cause
you to lose control and crash.
REPAIR AND MAINTENANCE


