background image

40

REMOTE CONTROL INSTALLATION AND OPERATION

CAUTION: Before installing remote controls to the AFT thermostat model heaters, read the following:

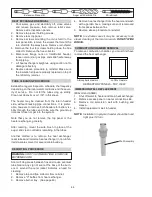
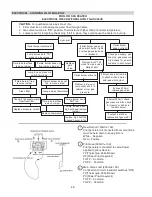
The digital thermostat model is remote-ready in most cases. The digital liquid crystal display (LCD)  shows the
actual pool temperature, operating status, and service codes (See examples below). The touch pad on the con-
trol panel allows you to select the desired pool or spa temperature. It also indicates when a remote system is
controlling the heater by displaying 

Remote

in the display. When connecting the heater to a remote system,

identify whether it is a two- or three-wire remote system. Select the appropriate instruction listed below to prop-
erly install the remote to the heater.

OFF Mode

Heating in the POOL Mode

Heating in the SPA Mode

Remote Mode

REMOTE OPERATION

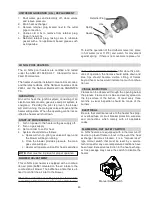
The AFT model heaters are equipped with the ability
to work with external remote controls.  The supplied 7-
pin  remote  wiring  connector  supplies  power  out  to
either a toggle switch or the switch contacts of a third
party  remote. The  remote  works  by  either  making  or
breaking  the  circuit  created  by  the  remote  wiring.
Typically,  a  remote  does  not  supply  power  to  the
heater, it only provides a switching function to turn the
heater On or Off. 

If your remote is supplying its own

voltage  to  the  heater,  it  will  not  work  with  this
heater and may damage the digital circuit board.

For operation of the heater using the onboard thermo-
static controls with a time clock, see the “Time Clock /
Fireman’s Switch” section.

Note:

Electrostatic Discharge (ESD) damage can be caused by

direct or indirect contact with the wiring or circuit board.  When
one  walks  to  the  heater  area,  an  electrostatic  charge  accumu-
lates  on  the  body.    Contact  of  a  finger  allows  the  body  to  dis-
charge, possibly causing device damage.  This damage can be
limited  if  the  service  person  discharges  himself,  following  ESD
preventive/removal practices, and holds on to the heater enclo-
sure for 5 seconds before proceeding.

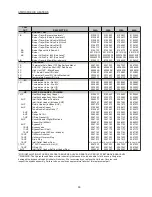
Pool Common

(BLK/ORN)

Spa Common

(ORN/BLK)

24VAC HOT

(BLU)

7-PIN Remote

Interface Harness

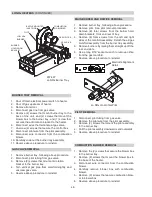
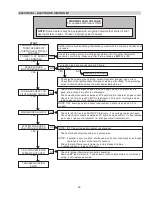
ACTIVATING THE REMOTE

To activate or deactivate the remote function, follow
these steps:

Press and hold the UP and DOWN arrow buttons for
3 to 5 seconds.

The second line of the display will alternate even
when the unit is off (“No Demand”).

NOTE:  When  in  remote  operation,  the  keypad
mode and temp buttons are disabled.

Содержание 206A

Страница 1: ...n your building Immediately call your gas supplier from a neighbor s phone Follow the gas sup plier s instructions If you cannot reach your gas supplier call the fire department Installation and service must be performed by a qualified installer service agency or the gas supplier This manual should be maintained in legible condition and kept adjacent to the heater or in a safe place for future ref...

Страница 2: ...l chemical shock dosing of the pool or spa water should not damage the heater providing the water is balanced Automatic chemical dosing devices and salt chlorinators are usually more efficient in heated water unless controlled they can lead to excessive chlorine level which can damage your heater and which is not covered under warranty Further advice should be obtained from your pool or spa builde...

Страница 3: ...ansformer Wiring 28 Wiring Diagram Millivolt Mechanical Therm 29 Wiring Diagram Digital Models Atmospheric 30 Wiring Diagram Digital Models Lo NOx 31 SECTION 4 SERVICING INSTRUCTIONS 31 General Location of Controls 32 Control Panel Removal 32 Control Adjustments Digital and AFT Models 32 Control Adjustments Millivolt Models 33 Thermostat Operation Digital Board 35 Diagnostics 35 Codes 35 Reading a...

Страница 4: ...is an easy task The upper front panel of the heater contains the control center that allows you to turn the heater On or Off and adjust the temperature set tings for the pool or spa The temperature range is factory set from 65 F 18 C to 104 F 40 C See figure above for location of toggle switch to turn the heater On and Off Section 4 of this manual contains more details about the use of the control...

Страница 5: ...OP Read the safety information above 2 Set the thermostat on the lowest setting 3 Turn On Off switch to the Off position 4 Remove heater door panel 5 Push in gas control knob slightly and turn clockwise to Off NOTE Knob cannot be turned from Pilot to Off unless knob is pushed in slightly Do not force 6 Wait 5 minutes to clear out any gas If you then smell gas STOP Follow B in the safety informatio...

Страница 6: ...formation above 2 Set the thermostat to the lowest setting 3 Turn off all electrical power to the appliance 4 This appliance is equipped with an ignition device which automatically lights the pilot Do not try to light the pilot by hand 5 Remove heater door panel 6 For Honeywell valve Turn gas control knob clockwise to Off For Robertshaw valve Models 266 406 Turn gas control knob clockwise to Off M...

Страница 7: ...anual gas control to the appliance SECTION 2 CAUTION Elevated water temperature can be hazardous The U S Consumer Product Safety Commission has these guidelines 1 Spa water temperatures should never exceed 104 F 40 C A temperature of 100 F 38 C is considered safe for a healthy adult Special caution is suggested for young children 2 Drinking of alcoholic beverages before or during spa or hot tub us...

Страница 8: ... on the filter If there is no pressure then you are not moving water or your gauge is broken Try to get the pump to run at its normal flow rate CAUTION Combustion air must not be contaminat ed by corrosive chemical fumes which can damage the heater and void the warranty WARNING Check the heater for possible rodent nests after long periods of non use 2 Your pump strainer basket may be full If so re...

Страница 9: ...l higher temperatures are reached Operating the heater for prolonged periods with pool water below 50 F can seriously damage the heater and is not cov ered by the warranty For cold climate areas please follow the winterizing procedures listed WINTERIZING THE POOL SPA HEATER Heaters installed outdoors in freezing climate areas may be shut down for the winter Observe the follow ing procedure for win...

Страница 10: ...ter STANDARD UNIT POLYMER HEADERS ASME UNIT CAST IRON HEADERS 1 Pagoda top 1 Pagoda top 2 2 CPVC union with O rings 2 2 In Out flanges 2 3 Plastic pipe finish flange for gas line 3 1 1 2 flange gaskets 2 4 Bonding lug with mounting screw 4 2 flange gaskets 2 Digital AFT models only 5 Flange bolts 4 6 Pressure relief valve 7 2 CPVC adapters 2 8 Plastic pipe finish flange for gas line 9 Bonding lug ...

Страница 11: ...ool Heaters All heaters can be used either indoor or outdoors The appropriate top designated for each type of use is required If necessary the top can be changed at a later date to change from outdoor to indoor or vice versa Millivolt heaters contain a self generating electrical system operating between 25 and 75 VAC Ambient Temperature Rating of Heater Components Millivolt Heater with Honeywell G...

Страница 12: ...ONS Top 30 Drafthood Back 6 Front Alcove Open Right Side 12 Water Side Vent 6 Left Side 6 Floor 0 Opposite Water Side OUTDOOR INSTALLATION Top Unobstructed Outdoor Stack Top 36 Stackless Top Floor 0 Right Side 12 Water Side Back 6 Left Side 6 Opposite Water Side Clearance from top of vent terminal Do not install on carpeting Clearance from top of heater When installed according to the listed minim...

Страница 13: ...inlet into any building The top surface of the heater shall be at least 3 ft above any forced air inlet or intake ducts located within 10 ft horizontally For installations in Canada pool heaters shall not be installed with the top of the vent assembly within 10 ft below or to either side of any opening into the building Refer to the latest revisions of CAN CSA B149 4 ft Minimum 4 ft Minimum 1 ft M...

Страница 14: ...d Supplied Ea Pallet Anchor Bracket Use hole closest to unit 4 total 1 1 4 x 1 3 4 S S Tapcon Bolt Washer Field Supplied Ea Pallet Anchor Bracket Use hole closest to unit 4 total 2 x 6 x 1 8 Pallet Anchor Bracket 4 Total Kit 011636 1 4 x 1 3 4 S S Tapcon Bolt Washer Field Supplied NOTE Use hole closest to unit with washer overlapping edge of unit 6 6 206 266 336 406 Atmospheric MODEL B 206 20 266 ...

Страница 15: ...nt Heater must always be vented to the outside See Vent Piping section pg 17 18 for details Minimum allowable space is shown on the nameplate OUTDOOR STACK INDOOR STACK NOTE The outdoor and indoor stacks are optional equipment and do not come standard with the heater OUTDOOR STACK KIT INCLUDES 1 Drafthood painted 1 Adapter plate 3 Mounting brackets clips 1 Top panel cover 2 1 foot sections of meta...

Страница 16: ...ng propane gas is MP a Millivolt heater using natural gas is MN Prefix C is for cast iron ASME headers P is for plastic polymer headers Suffix X is for cupro nickel tubing C is for copper tubing EXAMPLE P R406A EN X Plastic headers 406 model size digital natural gas cupro nickel Reduce input 4 for each 1000 ft above sea level when installed above 2000 ft elevation For Canada no de rating is requir...

Страница 17: ...on ASME headers P is for plastic polymer headers Suffix X is for cupro nickel tubing C is for copper tubing EXAMPLE P R407A EN X Plastic headers 407 model size digital natural gas cupro nickel For altitudes above 5 000 ft consult the factory For Canada no de rating is required for elevations up to 4500 ft Plastic polymer headers cannot be used for ASME installations Note For outdoor stack use J di...

Страница 18: ...codes to the latest edition of the National Fuel Gas Code ANSI Z223 1 Canada CAN CSA B149 18 B All Air From Outdoors When air is supplied directly from outside of build ing each opening shall have a minimum net free area as noted COMBUSTION AND VENTILATION AIR Indoor Units Only The heater must have both combustion and ventilation air Minimum requirements for net free air supply open ings are one o...

Страница 19: ...d a manual shut off valve locat ed outside the heater jacket All gas piping should be tested after installation in accordance with local codes CAUTION The heater and its manual shut off valve must be disconnected from the gas supply during any pressure testing of that system at test pressures in excess of 1 2 psi 3 45 kPa Dissipate test pressure in the gas supply line before reconnecting the heate...

Страница 20: ... VR8304 Heater Models 206 406 and 207 407 ELECTRONIC IGNITION GAS VALVES CONTINUED Gas Pressure Adjustment Robertshaw 7200 Heater Model 206 Robertshaw 7000 BDER Heater Models 266 336 Gas Pressure Adjustment Robertshaw 7000 DERHC Heater Model 406 PIPE SIZING FOR GAS CONNECTIONS Robertshaw 7000 BDERF Heater Models 207 407 Non Adjustable Gas Valve Maximum Equivalent Pipe Length ft Natural Gas 1000 BT...

Страница 21: ...BAFFLE Manufactured after 11 08 FLOW GPM PRESSURE DROP FT OF HEAD 206 207 266 267 336 337 406 407 20 4 0 25 4 0 4 6 30 4 0 5 2 35 4 0 5 8 5 2 40 4 6 5 8 5 2 5 2 50 4 6 6 3 6 9 6 9 60 4 6 6 9 6 9 6 9 70 4 6 8 1 9 2 9 2 80 4 6 9 2 9 8 9 8 90 6 9 10 4 10 4 10 4 100 8 1 11 0 12 1 12 1 110 10 4 11 5 13 3 13 3 120 11 0 12 7 17 9 17 9 125 11 5 13 8 20 2 20 2 CAST IRON HEADER ASME MODELS FLOW GPM PRESSURE...

Страница 22: ...ed scaling temper atures U G Plug Polymer Unitherm Governor Gasket POLYMER HEADERS STANDARD MODELS Before attaching the 2 inch unions to the inlet outlet header make sure the O rings are properly seated in the grooves Use AquaLube or equivalent non petro leum based lubricant on the O ring Hand tighten the unions Glue PVC piping directly to the unions INLET OUTLET HEADER POLYMER High temperature CP...

Страница 23: ...and outlet pipes at the heater Outlet pipes should be slightly warmer than inlet and comfort able to the touch If pipe is hot close bypass if cold open bypass PRESSURE RELIEF VALVE INSTALLATION To conform to local building codes it may be neces sary to install a pressure relief valve A 3 4 pressure relief valve having a capacity equal to the BTUH out put of the model to be installed is recommended...

Страница 24: ...hat any water leaks will not damage the structure of adjacent area PVC pipe may be glued directly into header unions Standard models only CAUTION An additional source of heated water e g a solar system must be connected to the main line ahead of the heater inlet pipe in order for it to act as the primary heat source If the primary system provides adequate heat to maintain set point the heater will...

Страница 25: ... sheets Clean off tube sheet area where the gasket seats Also clean off the header and the gasket Apply a non petrole um based lubricant to the gasket such as AquaLube Re attach the headers to the opposite sides making sure they are installed in an upright position Figure 5 Do not over tighten Torque should not exceed 7 ft lb 6 Reconnect high limit AGS and pressure switch wires 7 Digital AFT Model...

Страница 26: ... 9 Re install P6 connector ground wires SPG transformer junction box front door and plug right side with the left side s grommet plug NOTE 7 8 dia holes not utilized on jacket and control box can be used for fireman switch auxiliary control interface or power vent D 2 wiring The Electronic Intermittent Ignition Device automati cally lights the pilot and main burners upon a call for heat The heater...

Страница 27: ...EATER 120V LOW NOx HEATER SUPPLY SIDE SUPPLY SIDE RETURN or NEUTRAL RETURN or NEUTRAL HEATER 4 WIRES HEATER 7 WIRES GROUND L1 L1 HOT RED RED RED BLACK BLACK BLACK BLACK HOT BLACK GREEN GREEN GREEN GREEN WHITE WHITE WHITE WHITE WHITE 240V ATMOSPHERIC HEATER 240V LOW NOx HEATER HEATER 4 WIRES HEATER 7 WIRES GROUND L1 L2 L1 L2 RED RED BLACK BLACK BLACK HOT RED RED RED HOT HOT BLACK HOT BLACK GREEN GR...

Страница 28: ...28 WIRING DIAGRAM MILLIVOLT MECHANICAL THERMOSTAT ...

Страница 29: ...29 WIRING DIAGRAM DIGITAL MODELS ATMOSPHERIC ...

Страница 30: ...30 WIRING DIAGRAM DIGITAL AND AFT MODELS LO NOx Raypak Digital PC Board Part No 601769 Raypak AFT Board Part No 601944 ...

Страница 31: ... Header HL1 High Limit HL2 High Limit Pressure Switch Temp Sensor Well Pilot Roll Out Switch Gas Valve Transformer Draw Plug Drain Plug Located in rear header Unitherm Governor Mounted On Top Of Header HL1 High Limit HL2 High Limit Pressure Switch Temp Sensor Well Pilot Roll Out Switch Manual Gas Valve Transformer Draw Plug Air Switch Blower Hose Blower Digital Thermostat Circuit Board ...

Страница 32: ...stop adjustment ring illustrated below is adjustable by loosening the set screw rotating the knob stop ring to the desired location and re tightening the set screw SPA TEMPERATURE RANGE POOL TEMPERATURE RANGE KNOB STOP RING SET SCREW STAND BY TEMPERATURE KNOB STOP SHOWN ABOVE IS IN THE SPA TEMPERATURE RANGE KNURLED SCREW Temp Adjust Buttons Mode Button LCD Display ON OFF 2 Remove 4 screws from sid...

Страница 33: ...PA setting The LCD display indicates the mode the heater is in and the actual water temperature Temp Buttons If the heater is in POOL or SPA mode the desired water temperature SETPOINT will also be displayed and may be changed using the UP or DOWN buttons A manual toggle switch is also provided right below the MODE button to allow the heater to be turned off Operation In the POOL or SPA modes the ...

Страница 34: ...page 31 Locate the Program Mode button as shown in the figure on page 33 Press the program button 5 7 seconds until SETdef appears on the digital display Release the pro gram button 2 Press the Mode button sequentially until the desired program event is reached There are 5 dif ferent events that can be programmed They appear in the sequence listed below F Cfff Fahrenheit to Celsius Refer to step o...

Страница 35: ...rk SPR Spare fault code indicator FAULT CODES Display Definition BD1 Board failure EEP Microprocessor error FAN Blower pressure failure FFL Flame sensing when pilot and gas valves are closed GVC Gas valve closed GVO Gas valve open HL1 High limit switch 1 open HL2 High limit switch 2 open IGN Ignition failure ILO Ignition lockout Propane units only PRS Water pressure switch open ROL Heat roll out s...

Страница 36: ...he heater On or Off If your remote is supplying its own voltage to the heater it will not work with this heater and may damage the digital circuit board For operation of the heater using the onboard thermo static controls with a time clock see the Time Clock Fireman s Switch section ACTIVATING THE REMOTE The digital thermostat heaters have the ability to dis connect from the remote it is wired to ...

Страница 37: ...nt temperature make sure the con trol is in the appropriate mode POOL or SPA and push the UP or DOWN buttons Service Menu and Fault History To access the Service Menu and fault history press the MODE and UP arrow buttons simultaneously for 3 to 5 seconds The heater will continue to operate nor mally while in the Service Menu The first screen dis played is the Flame Strength indicator which indicat...

Страница 38: ...the digital display Press and hold both UP and DOWN buttons for 5 7 seconds until Faults Cleared appears This operation resets the Fault History file to 0 and clears all the stored faults Fahrenheit or Celsius Refer to step one above to access the program screen Press the Mode button until Fahrenheit or Celsius appears on the digital display The digital dis play is capable of displaying Celsius as...

Страница 39: ...d fault replace board EEPROM Fault Memory fault reset set points replace board if fault does not clear Clock Fireman Sw Time clock fireman switch circuit is open Low Temp Lockout Water temperature below 36 F The following heat status messages are displayed in Pool Spa and Remote modes when there are no active fault conditions The following conditions are displayed only while there is a demand for ...

Страница 40: ...he circuit created by the remote wiring Typically a remote does not supply power to the heater it only provides a switching function to turn the heater On or Off If your remote is supplying its own voltage to the heater it will not work with this heater and may damage the digital circuit board For operation of the heater using the onboard thermo static controls with a time clock see the Time Clock...

Страница 41: ...om the heater 5 On the Remote Interface Harness connect the BLUE wire to one side of the REMOTE switch and con nect the other side to either the ORANGE BLACK wire for SPA operation or the BLACK ORANGE wire for POOL operation 6 Attach wire nut on unused wire to the Remote Interface Harness 7 Install the 7 Pin Remote Interface Harness to the P8 connector and turn power On to the heater To activate t...

Страница 42: ...l of the spa or pool it may be necessary to adjust the pressure switch to compensate for the no flow static head If it is necessary to adjust the water pressure switch uti lize the following procedure WATER PRESSURE SWITCH ADJUSTMENT Adjustment Knob TIME CLOCK FIREMAN S SWITCH 4 Turn the heater ON 5 Manually turn the pressure adjustment knob clock wise until the heater shuts off A flat screwdriver...

Страница 43: ...alve 5 Reverse above procedure to reinstall HIGH LIMIT REMOVAL 1 Shut off main electrical power switch to heater 2 Remove inlet outlet inspection panel 3 Remove defective high limit and replace with a new high limit 4 Replace inspection panel PILOT SAFETY Millivolt Models Heaters equipped with the standing pilot millivolt sys tem have pilot generators which act as a safety device to shut off the f...

Страница 44: ...ger straight up using caution not to damage refractory 8 Reverse above procedure to reinstall Make sure the insulation strips are properly replaced on top of the refractory retainer TUBE CLEANING PROCEDURE Establish a regular inspection schedule the frequency depending on the local water conditions and the sever ity of service Do not let the tubes clog up solidly Clean out deposits over 1 16 in th...

Страница 45: ...be made of the burners ELECTRICAL Be sure that electrical service to the heater has prop er overload fuse or circuit breaker protection wire size and connections which comply with all applicable codes FLAME ROLL OUT SAFETY SWITCH Lo NOx heaters are equipped with a thermal cut off device to prevent flame roll out in the event the heat exchanger becomes blocked It is a manual reset type roll out swi...

Страница 46: ...3 Remove 2 screws that mount the pilot assembly to the burner tray 4 Pull the pilot assembly downwards and outwards 5 Reverse above procedure to reinstall COMBUSTION BLOWER REMOVAL 1 Remove the 2 screws that secure the blower box to the burner tray 2 Remove 2 screws that mount the blower box to the base of the heater 3 Disconnect wire connector from the combustion blower 4 Carefully remove blower ...

Страница 47: ...ement replace Air starvation Refer to installation instructions Improper venting Follow recommended installation instructions Insects or debris clogging burner intake ports Clean burners Pilot outage or Low gas pressure Adjust gas pressure Weak Flame signal Restricted dirty pilot Clean pilot and or electrode Weak pilot generator Replace pilot Yellow lazy flame Low gas pressure Adjust gas pressure ...

Страница 48: ...pilot burner does not light Light pilot If pilot burner goes out when main burner lights or when gas valve knob is released If burner does not remain lit attach millivolt meter and read pilot output If below 500mV check gas pressure Also check for insects or debris in the pilot burner If main burner fires remove jumper Replace gas valve If main burner does not fire remove jumper Remove both TH wir...

Страница 49: ...nd pilot operator on gas control Check for 24 VAC across PV MV PV terminals on PC board If voltage is okay replace gas control if not replace PC board NOTE If PC board goes into lockout reset system Lockout is used on L P G models Check for 24 VAC across MV MV PV terminals If no voltage replace module Check electrical connections between PC board and gas control If okay replace gas valve or gas co...

Страница 50: ... P1 Check resistance value of the thermister Reference to chart below Replace thermister if not within 10 of values shown below If okay replace Circuit Board Temp Degrees F 40 50 60 70 80 90 100 106 Resistance k 261 1 199 0 153 1 118 8 93 0 73 3 58 3 51 0 If okay replace Circuit Board Sensor resistance at various temperatures PRS or Water Sw Open Pressure switch Verify water flow and pressure CLEA...

Страница 51: ...lacement under standard company warranties must be properly tagged with a return parts tag completely filled in with the heater serial number model number etc and shipped to the Company freight prepaid If determined defective by the Company and within warranty a like part or equal substitution will be returned freight collect Credit will not be issued MANUFACTURER 2151 EASTMAN AVENUE OXNARD CA 930...

Страница 52: ... C 11 S 4 S 5 S 3 B 4 B 5 B 1 B 6 S 7 S 4 S 2 R 1 R 1 J 16 M 3 R 2 V 4 V 1 V 3 V 1 S 13 S 2 S 12 S 4 HP 5 HP 7 HP 6 HP 6 HP 3 HP 12 HM 17 HM 14 M 8 S 2 J 2 B 1 G 4 M 2 M 5 M 12 M 11 M 13 M 3 S 10 S 16 M 7 HP ATMOSPHERIC HEATERS ...

Страница 53: ...53 LO NOx HEATERS ...

Страница 54: ... HM OPTIONAL POLYMER IN OUT HEADER AND ACCESSORIES 1 M 3 C 6 C 5 HM 17 HM 14 HM 13 HM 2 HM 4 HM 7 HM 3 HM 6 HM 2 S 9 S 4 S HONEYWELL IID ATMOSPHERIC PILOT 2 P 7 P 9 P 8 P 1 P 5 P 6 P 3 P 9 P HONEYWELL MILLIVOLT PILOT 1 P 2 P 4 P IID LO NOx PILOT 6 P ...

Страница 55: ... e p p o C y s s A e g n a h c x E t a e H P H 1 F 9 5 3 0 1 0 F 8 5 3 0 1 0 F 7 5 3 0 1 0 F 6 5 3 0 1 0 l e k c i N o r p u C y s s A e g n a h c x E t a e H F 7 2 8 6 0 0 F 7 2 8 6 0 0 F 7 2 8 6 0 0 F 7 2 8 6 0 0 e t e l p m o C r e d a e H t e l t u O t e l n I P H 2 F 6 0 7 6 0 0 F 6 0 7 6 0 0 F 6 0 7 6 0 0 F 6 0 7 6 0 0 P H 6 s e d u l c n I r e d a e H t e l t u O t e l n I F 7 0 7 6 0 0 F 7...

Страница 56: ...F 1 7 8 2 5 0 F 1 7 8 2 5 0 t i K g n i m i l e D M 7 F 6 8 3 0 1 0 F 6 8 3 0 1 0 F 6 8 3 0 1 0 F 6 8 3 0 1 0 t l o v i l l i M s s e n r a H e r i W M 8 F 0 9 4 9 0 0 F 0 9 4 9 0 0 F 0 9 4 9 0 0 F 0 9 4 9 0 0 D I I s s e n r a H e r i W F 9 8 4 9 0 0 F 9 8 4 9 0 0 F 9 8 4 9 0 0 F 9 8 4 9 0 0 l a c e D l a i D s e d u l c n I V M l e z e B l o r t n o C M 9 F 8 5 8 9 0 0 F 8 5 8 9 0 0 F 8 5 8 9 0 ...

Страница 57: ...9 1 3 0 1 0 r e v o C t i m i L h g i H S 9 F 0 2 3 0 1 0 F 0 2 3 0 1 0 F 0 2 3 0 1 0 F 0 2 3 0 1 0 d l e i h S t a e H e s a B S 0 1 F 4 2 3 0 1 0 F 3 2 3 0 1 0 F 2 2 3 0 1 0 F 1 2 3 0 1 0 l e n a P l o r t n o C t n o r F p U S 1 1 F 2 4 3 0 1 0 F 2 4 3 0 1 0 F 2 4 3 0 1 0 F 2 4 3 0 1 0 d l e i h S t i m i L h g i H S 2 1 F 8 2 3 0 1 0 F 7 2 3 0 1 0 F 6 2 3 0 1 0 F 5 2 3 0 1 0 d l e i h S r e h ...

Страница 58: ...6 11 HP Bypass Dam Shaft 006717F 006717F 006717F 006717 12 HP Bypass Spring All Sizes Included 006718F 006718F 006718F 006718 13 HP Unitherm Governor 006719F 006719F 006719F 006719 14 HP Unitherm Governor Plug 006720F 006720F 006720F 006720 15 HP Drain Plug 006721F 006721F 006721F 00672 16 HP Inlet Outlet Header Dam N A Use 19 HP N A Use 19 HP N A Use 19 HP N A Use 1 17 HP 2 PVC Connector Nut 2 00...

Страница 59: ...F 2 P Pilot Electrode N A N A N A N A 3 P Pilot Mounting Bracket 010233F 010234F 010235F 010236F 4 P Pilot Tube 011926F 011926F 011926F 011926F 5 P Hi Tension Wire IID 010349F 010349F 010349F 010349F 6 P Adapter Nut Metric 011927F 011927F 011927F 011927F R REFRACTORY 1 R Refractory Common Left Right 010079F 010079F 010079F 010079F 2 R Refractory Uncommon Front and Rear 010080F 010081F 010082F 0100...

Страница 60: ......

Отзывы: