6.1 Post installation procedures
Before using the product, carry out the following:
• Mechanical checks.
• Switch on and initial setup.
Mechanical checks
Before switching on the product:
• Ensure that:
– All securing bolts are fully tightened and the
appropriate mechanical locking washers are in
place.
– All connections are securely made.
– All connecting cables and wires are secured and
protected as necessary.
• Ask your local Raymarine authorized installer to
check the installation.
Switch on and initial setup
Use the information given here in conjunction with
the detailed information in your multifunction display
(MFD) documentation, to switch on and connect to
the Quantum™ scanner, and to carry out the initial
checks and setup tasks.
1. Power on your multifunction display (MFD) unit.
2. If you intend to make a wireless connection to
the Quantum™ scanner, ensure that your MFD
unit supports Wi-Fi, and that Wi-Fi connectivity
is enabled on the unit.
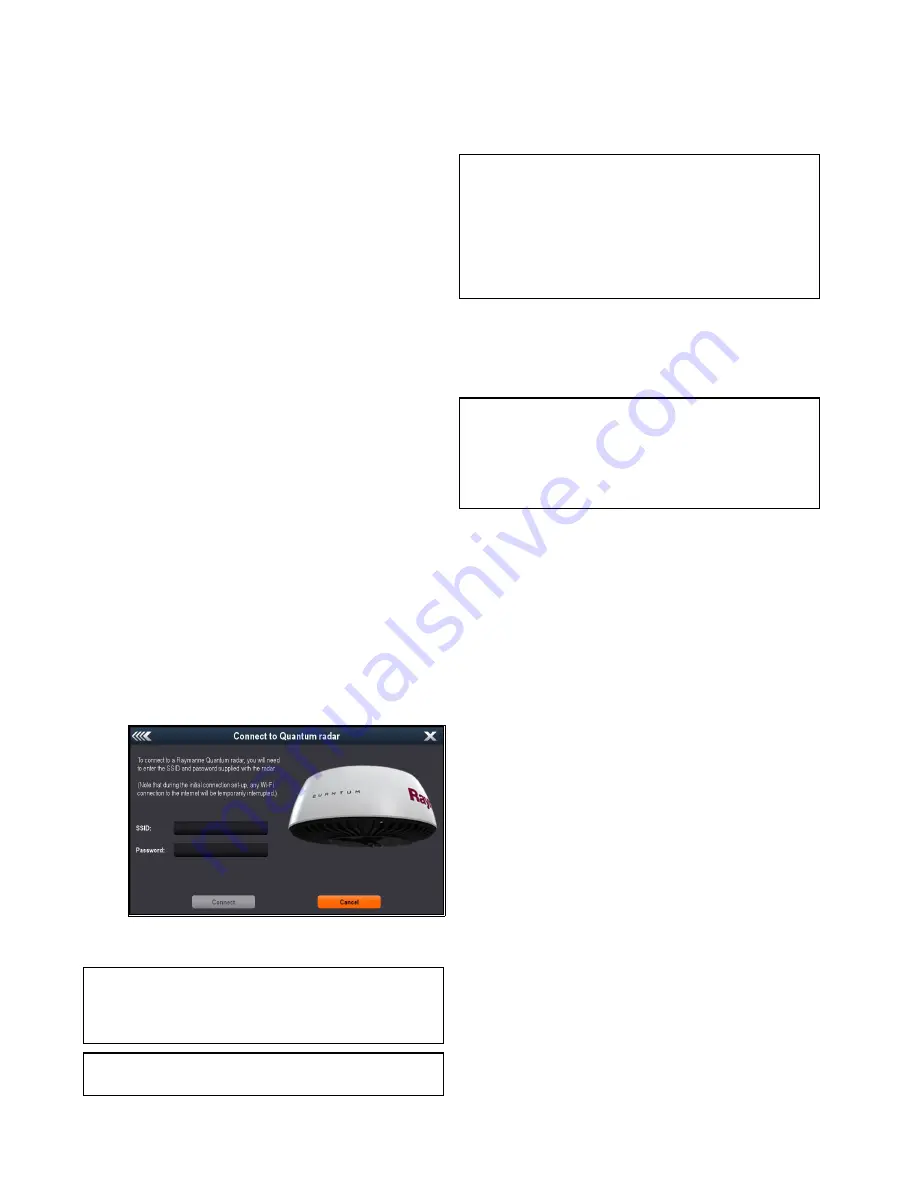
3. To connect your MFD unit to the Quantum™
scanner:
i.
To make a Wi-Fi connection, open the
Connect to Quantum Radar screen on your
MFD:
Menu > Set-up > System settings >
External Devices > Quantum Radar > Pair
with Quantum Radar
.
Enter the SSID and Password for your
scanner, then select
Connect
.
Note:
The SSID and Wi-Fi passcode are provided
on the box that the scanner was packed in,
and also on the serial number-label fixed to the
underside of the scanner.
Note:
It can take up to 2 minutes to make the
Wi-Fi connection to the scanner.
ii. For a wired connection, open the Radar
application on your MFD unit. If the Radar
scanner is not in standby, a dialog will be
displayed. You will then need to select the
Power
On
option to place the scanner into
Standby. The display will then indicate when
the connection to the Quantum™ scanner has
been made. The
Power up Radar
option is
also accessible by momentarily pressing the
MFD’s Power button.
Note:
If the connection to the MFD is lost while
the scanner is in Standby mode, the scanner will
switch to Sleep mode within 30 minutes. When
the connection to the MFD is restored, return
the scanner to Standby mode using the
Power
up Radar
option on the MFD’s Shortcut screen,
accessible by momentarily pressing the MFD’s
Power button.
4. Ensure that all personnel are clear of the scanner,
then switch the scanner to Transmit mode using
the
Radar: Tx
option on the Shortcut screen,
accessible on your MFD by momentarily pressing
the MFD’s power key.
Note:
If the connection to the MFD is lost while
the scanner is in Transmit mode, the scanner will
switch to Standby mode within 5 seconds. When
the connection to the MFD is restored, return the
scanner to Transmit mode using the
Radar: Tx
option on the MFD’s Shortcut screen.
5. Carry out the Radar operations described in the
relevant MFD Operation handbook and check
that all functions appear to be satisfactory.
6. Check the bearing alignment (as described in the
MFD Operation handbook) to ensure that targets
appear at their correct bearing relative to the
boat’s bow. Adjust the alignment as necessary.
Retain your Wi-Fi passcode
To connect to the Radar using Wi-Fi (wireless), you
will need to know the unit’s
SSID
, and
Passcode
(password).
Both the SSID and Passcode are provided on the
Radar scanner packaging, on the serial number label
on the underside of the unit, on a label attached
to the power cable and on spare serial number
labels supplied in the box. You may wish to make a
separate note of this information (kept in a secure
location). You should also keep the Radar scanner
packaging in a safe place for future reference.
Operation instructions
For detailed operation instructions for your product,
refer to the documentation that accompanies your
display.
34
Quantum Radome
Содержание Quantum
Страница 2: ......
Страница 4: ......
Страница 6: ...6 Quantum Radome...
Страница 10: ...10 Quantum Radome...
Страница 14: ...14 Quantum Radome...
Страница 42: ...42 Quantum Radome...
Страница 50: ...50 Quantum Radome...
Страница 51: ......


