


3.8.4
Drag and Drop
A single file drag and drop is supported by our
Interface, simply click and hold on the file inside the main window and drag it to
any folders available inside the Folders tree.
3.8.5
Information
Provides detail information regarding the hardware condition, network status
and storage information.
3.8.5.1
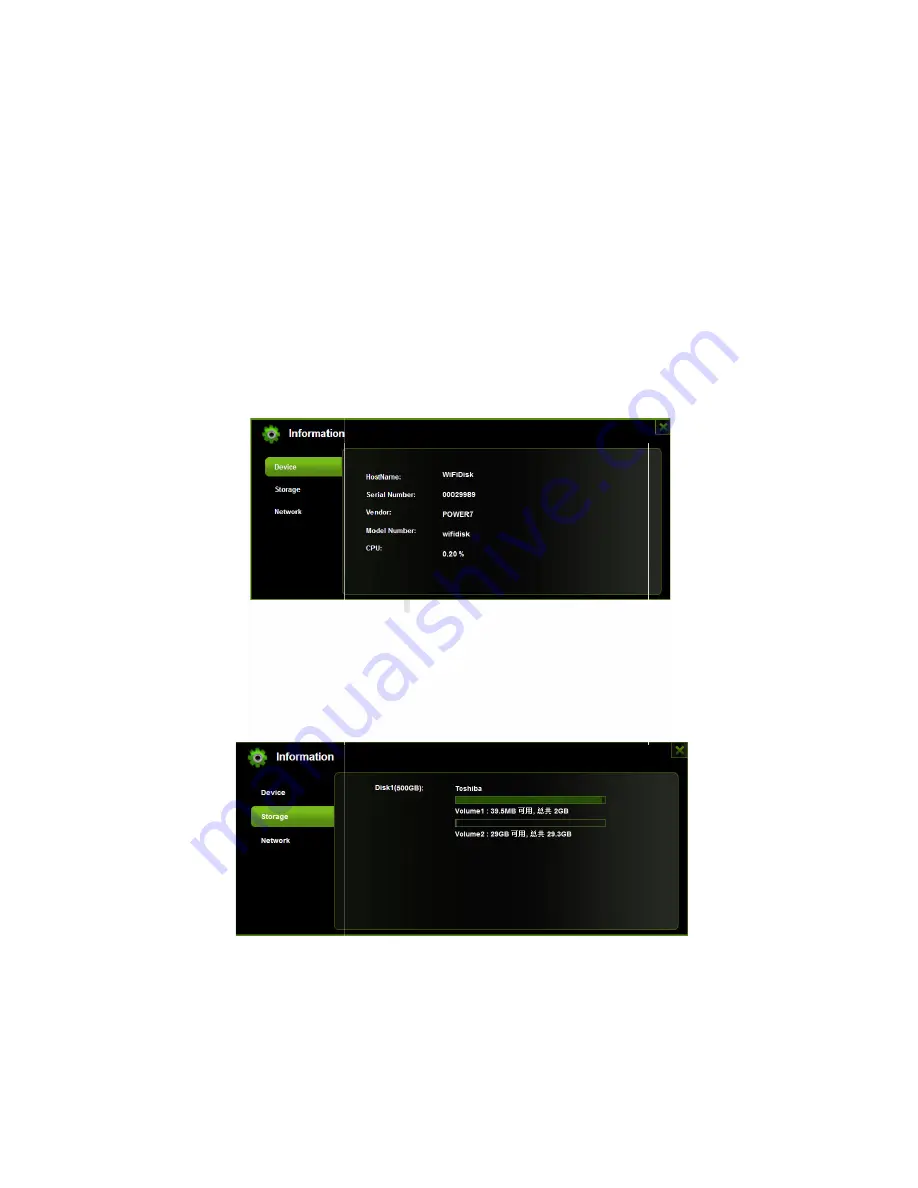
Device Information
Provides information such as the Host Name, Device Serial Number,
Manufacturer Name, Model Number and CPU utilization as seen on the
screenshot below.
3.8.5.2
Storage Information
Provides information regarding the inter
capacity, hard drive manufacturer and available storage as seen on the
screenshot below.
3.8.5.3
Network Information
Provides detailed information regarding the current network settings such
as the connection to access the interne
the screenshot below.
49
Drag and Drop
A single file drag and drop is supported by our built-in Web Management
Interface, simply click and hold on the file inside the main window and drag it to
any folders available inside the Folders tree.
Provides detail information regarding the hardware condition, network status
e information.
Device Information
Provides information such as the Host Name, Device Serial Number,
Manufacturer Name, Model Number and CPU utilization as seen on the
screenshot below.
Storage Information
Provides information regarding the internal storage such as the total
capacity, hard drive manufacturer and available storage as seen on the
Network Information
Provides detailed information regarding the current network settings such
as the connection to access the internet, WiFi SSID and IP Address as seen on
the screenshot below.
in Web Management
Interface, simply click and hold on the file inside the main window and drag it to
Provides detail information regarding the hardware condition, network status
Provides information such as the Host Name, Device Serial Number,
Manufacturer Name, Model Number and CPU utilization as seen on the
nal storage such as the total
capacity, hard drive manufacturer and available storage as seen on the
Provides detailed information regarding the current network settings such
t, WiFi SSID and IP Address as seen on
Содержание RP-WD01
Страница 2: ...2 6 Notice 60 7 Contact Us 60...
Страница 46: ...44 4 Click on the Uninstall button...