background image

IP Deskset 47816A-700/710 Manual 

V A.1.0 


10 | 

P a g e


IP Deskset Controls 

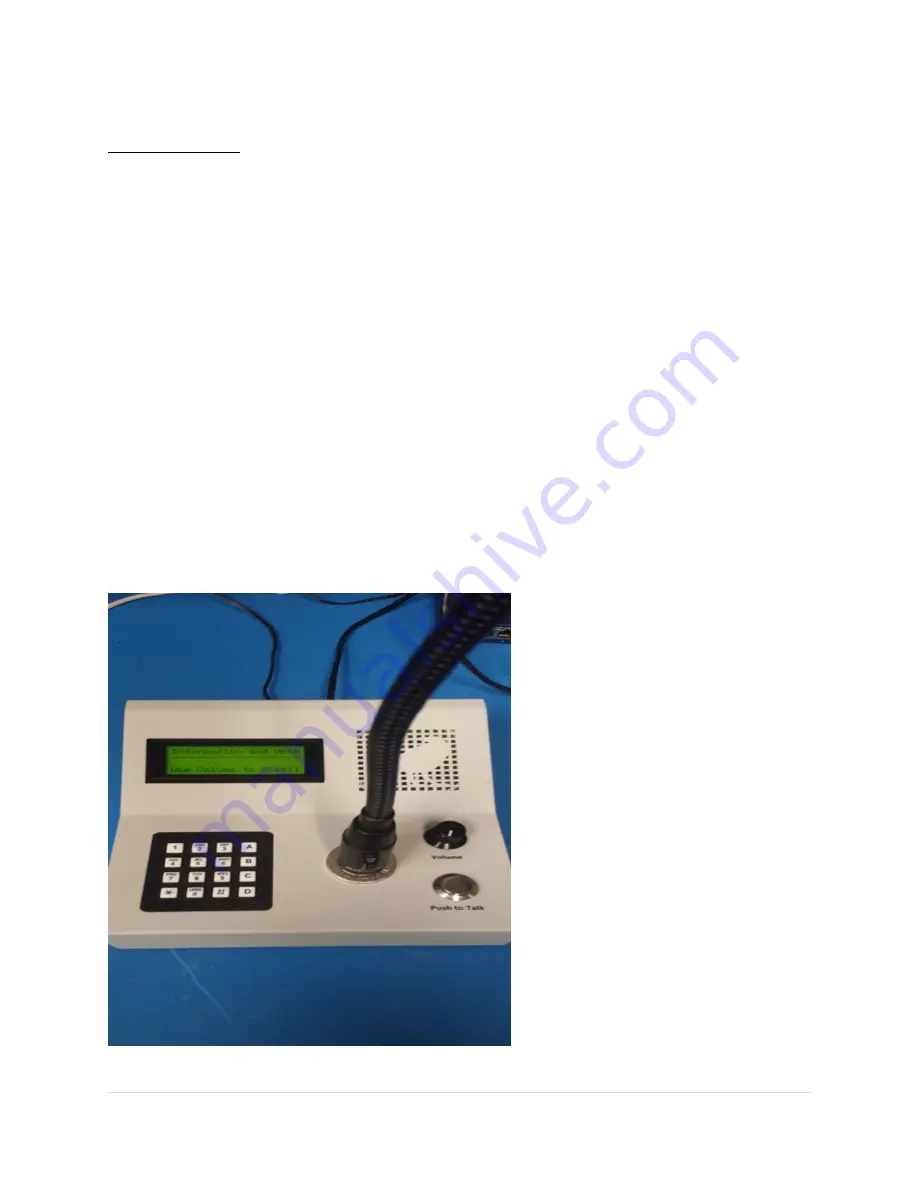
10.1 The IP Deskset comes with an AC adapter that plugs into the rear of the unit. 
10.2 Also located on the rear of the unit is a network port. 
10.3 The dash 700 model comes with a supplied Gooseneck style microphone that plugs into the XLR 
connector on the top of the unit. The dash 710 unit comes with a built-in microphone and does not need 
installation. 
10.4 The volume knob is used to select the level of the audio output and when in menu mode it is used 
to scroll through the menu. 
10.5 The A button is used to make calls. Press the A button once and use the keypad to enter the desired 
number (note that * and # can create different characters each time they are pressed). After the 
number, has been entered press the A button again to make the call. 
10.6 The A button can also be used to make calls using the directory. Select the A button and scroll 
through the directory by turning the volume knob. Once you have selected a number press the A button 
again to make the call. 
10.7 By pressing the B button it will bring up the users help guide. 
10.8 Pressing C will cancel the call. 
10.9 The D button will disconnect the current call. 
10.1.0 When in call use the push and hold the Push to Talk button to talk to the person on the other 
end. 


Figure 9. IP Deskset 

Содержание 47816A-700

Страница 1: ... or directly into the NIC port of a computer 1 4 The computer that is being used to program must be on the same subnet as the IP Deskset To change a computers network settings will vary depending on the version of the OS Below are links for both Microsoft and Apple computers to assist in changing network settings The IP Deskset comes from the factory with the address of 10 1 1 253 and a subnet of ...

Страница 2: ...t below the navigation bars is the tab directory The tab directory will be used to make changes to all settings within the IP Deskset 2 2 The renew button on the right hand side of the screen is used to restart the auto logout timer for the web page 2 3 The logout button is used to logout of the webpage See figure 2 On page 3 ...

Страница 3: ... default to 5 The number of rings can be adjusted from 1 6 or set for no limit 3 5 For an inbound call the auto answer feature is checked as a default 3 6 The local correct address is used to set 3 7 The local all call number is used to place an all call between all IP Deskset units on the network 3 8 Correct address hold off is defaulted at 0 ms 3 9 Digit clear down is set as This feature is used...

Страница 4: ...4 2 First a description of the device to be called must be entered 4 3 A URI for the device to be called must also be entered 4 4 This directory will be accessed from the IP Deskset by pressing the A button and then scrolling through the directory 4 5 After changes are made make sure to select the save setting button located at the top right side of the page Figure 3 Directory Tab ...

Страница 5: ... 5 The password must match with what was assigned within the SIP server 5 6 Under the topology tab the SIP transport mode is selectable from automatic to TCP 5 7 The local port may be assigned 5 8 The unit has a checkbox selectable stun feature 5 9 Under the QoS tab the SIP and RTP audio can be assigned 5 1 0 Under the advanced tab the Authorized Username can be assigned 5 1 1 The proxy and the pr...

Страница 6: ... to the microphone 6 4 Echo Canceller will eliminate the possability of an audio feedback loop 6 5 Noise Reduction will eliminate any backround noise in the same room as the IP Deskset 6 6 AGC or automatic gain control will automatically control the microphone gain based on the level that the person using it is talking 6 7 Disable Diconnect can be activated from the checkbox 6 8 Jitter Critical an...

Страница 7: ... need to be assigned to it 7 3 If the unit needs to reach outside of a local network a Default Router address and a DNS will need to be assigned to it also 7 4 The MTU Size or Maximum Transmission Unit can be entered here This will determine the largest data size permitted on the connection 7 5 The Global Stun Server and Port number can be entered 7 6 The RTP port range can be entered to give a ra...

Страница 8: ...nt to a Syslog Server To send these logs check the Report to Server box and then enter the Server IP address and the desired Port number 8 3 The Date and Time settings can be enabled to sync with an NTP server First check the enabled checkbox 8 4 Next type in the address of the NTP server 8 5 Check the Daylight Savings box if desired 8 6 The Time can also be set accordingly Figure 7 System Tab ...

Страница 9: ...and then select restore configuration 9 4 Note that the firmware version is located here This may need to be provided to Raven tech support in the case of an inquiry for assistance 9 5 To update the firmware on the unit a newer version of firmware will need to be provided by Raven and saved to a local computer 9 6 Select the browse button and find the version of firmware to be loaded and select it...

Страница 10: ...5 The A button is used to make calls Press the A button once and use the keypad to enter the desired number note that and can create different characters each time they are pressed After the number has been entered press the A button again to make the call 10 6 The A button can also be used to make calls using the directory Select the A button and scroll through the directory by turning the volume...

Отзывы: