


14
6 Blade-Link
6.1 How to Connect Blades with Blade-Link Using Pyra Firmware
In this example we are connecting an 8-port Blade to a 2-port mini blade. The IP Address of the 8-port
Blade is 192.168.50.64 and the IP Address of the 2-port Blade is 192.168.50.80. The 8-port Blade will be
the dedicated server for the Blade-Link. The same steps can be followed when connecting an 8-port to
another 8-port or a 2-port to another 2-port.
1.
Navigate to the “
Blade Setup
” page on the left side panel
on the dedicated Blade-Link Server
webpage (in this example it is 192.168.50.64).
2.
Under “Blade Configuration”
and “Enter Remote Gateway Address”
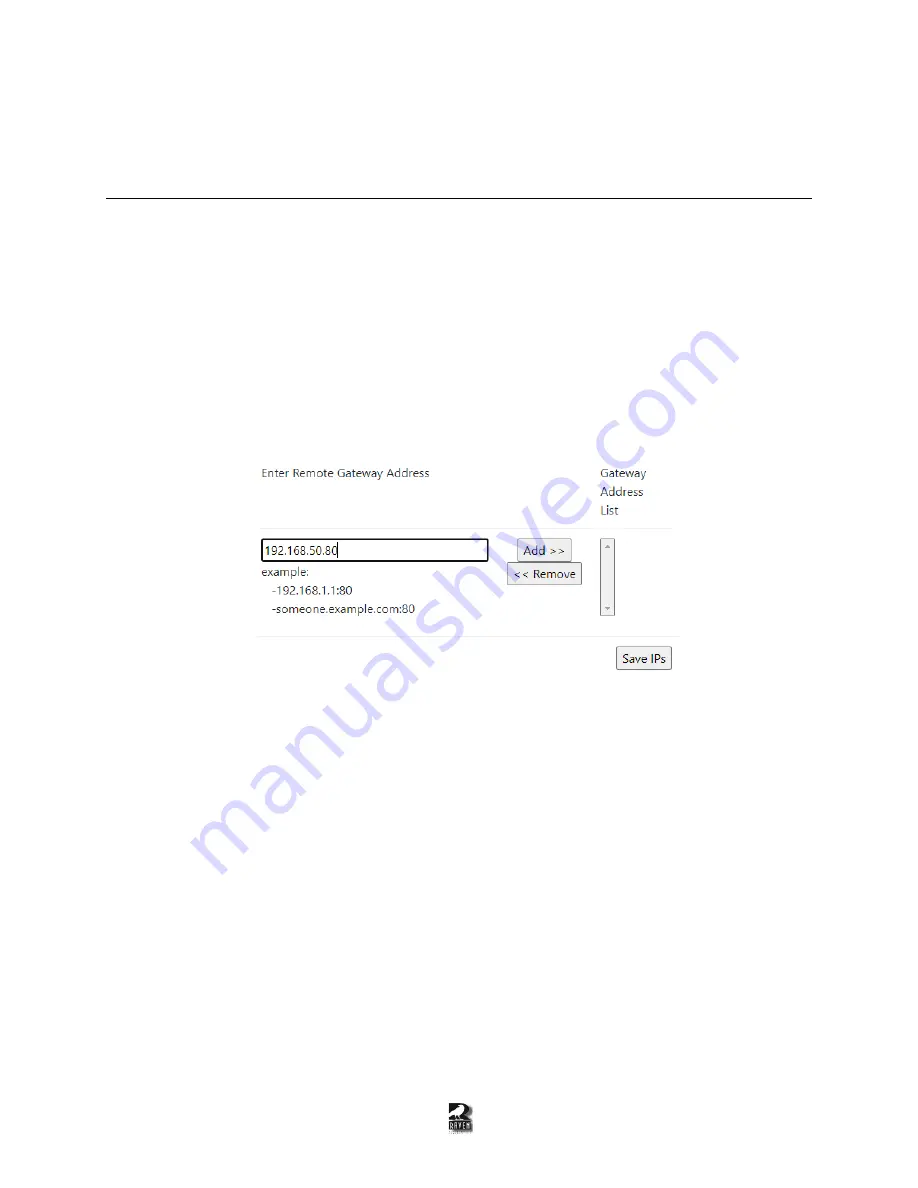
, there is a spot to enter an
IP Address followed by a Port number. This is shown in Figure 6-1. If there is no Port number
entered, it will automatically be defaulted to Port 8676.
Figure 6-1: Example of entering the non-server IP address on the
3.
Enter the IP Address/Port of the
non-server
Blade. In our example, the 8-port Blade is our
dedicated Blade-Link Server so we will enter 192.168.50.80 for the Mini-Blade.
**Do not go
onto the non-
server “Blade Setup”
webpage and enter the IP Address/Port for the Dedicated
Server. This will not make Blade-Link work. Once the IP Address is entered for a Blade-Link,
you do not need to do it on the other side.**
4.
Click the “Add >>” button and it will be populated under “Gateway Address List”.
5.
Click “Save IPs” and
it will restart the Blade.
*The non-server blade does not need to be
restarted*
6.
Once rebooted, log back in and navigate to “Blade Setup” again.
7.
At the bottom of the page, the information from the non-server Blade will be populated. In our
example, it would be the 2-port mini-Blade. This is shown in Figure 6-2.


