Rato RG3.6-75Q-D-II Скачать руководство пользователя страница 22

8.4 ADDING FUEL 

8.2.1 Remove the fuel tank cap. 
8.2.2 Add fuel to the bottom of the fuel level limit in the neck of the fuel tank. Do 
not overfill. Wipe up spilled fuel before starting the engine. 


Fuel limit


8.5 ENGINE OIL LEVEL CHECK 

8.5.1 Check the oil level when engine is stopped. 
8.5.2 Remove the oil filler cap/dipstick and wipe it clean. 
8.5.3 Insert the oil filler cap/dipstick into the oil filler neck as shown, but do not 
screw it in, then remove it to check the oil level. 


(1) Oil filler cap/dipstick 
(2) Upper limit 
(3) Lower limit 

8.5.4 If the oil level is near or below the lower limit mark on the dipstick, remove 
the oil filler cap/dipstick, and fill with the recommended oil to the upper limit mark 
(bottom edge of the oil fill hole). Do not overfill. 
8.5.5 Reinstall the oil filler cap/dipstick. 
 

8.6


ENGINE OIL 

RECOMMENDATIONS 

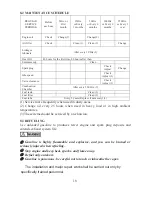
Oil is a major factor affecting 
performance and service life. Use 
4-stroke automotive detergent oil SAE 
10W-30 is recommended for general 
use.  

19 


Содержание RG3.6-75Q-D-II

Страница 1: ...RG3 6 75Q D II GASOLINE TILLER Owner s Manual Original instruction...

Страница 2: ......

Страница 3: ...o pump water spray water and pesticide reap the crops generate electricity fertilizer implant seeds threshing cut tendrils grind something etc The machine has a simple structure can be easily repaired...

Страница 4: ...1 CONTENTS 1 SAFETY LABELS 2 2 SAFETY INSTRUCTION 3 3 COMPONENTS 5 4 ASSEMBLY 6 5 CONTROLS 8 6 BEFORE OPERATION 10 7 OPERATION 11 8 SERVICING 17 9 STORAGE 23 10 TRANSPORTING 24 11 SPECIFICATIONS 25...

Страница 5: ...h the cylinder the muffler enclosure and its adjacent frame during usage and with 20min after stopping the engine c 0 2 n a h t r e h g i h s i t n e m n o r i v n e e h t f i d e d e e n s i d o i r...

Страница 6: ...hile the engine is running or when the engine is hot if petrol is spilled do not attempt to start the engine but move the machine away from the area of spillage and avoid creating any source of igniti...

Страница 7: ...screws tight to ensure the equipment is in safe working condition b Never store the equipment with petrol in the tank inside a building where fumes can reach an open flame or spark c Allow the engine...

Страница 8: ...4 Front wheel 5 Belt cover 6 Shift handle 7 Throttle lever 8 Clutch handle 9 Handrail height adjustor 10 Depth regulator 11 Dipstick 12 Starter 13 Fuel valve 14 Choke 15 Air cleaner 16 Nameplate 5 4 2...

Страница 9: ...onnel 4 1 UNPACKING 4 1 1 Remove all loose items from the carton 4 1 2 Remove the plastic bag and it s ready for assembly 4 2 Assemble the connection tube with gear box by four M8 16 bolts 4 3 Handrai...

Страница 10: ...ve passive belt wheel 4 4 3 Assemble shift lever with pin 4 4 4 Assemble the passive belt wheel and belt box cover 4 5 Blade 4 5 1 Lean the machine left side 4 5 2 Fix the outboard blade at right side...

Страница 11: ...use leave the fuel valve lever in the OFF position to prevent carburetor flooding and to reduce the possibility of fuel leakage Fuel Valve 5 2 THROTTLE LEVER The throttle lever controls engine speed P...

Страница 12: ...nect the worm bar and engine output shaft to drive the hoe blade when the lever is squeezed 5 4 SHIFT HANDLE The machine has two shifts The shift handle should be operated to the suitable position to...

Страница 13: ...t all shields and covers are in place and all nuts bolts and screws are tightened 6 2 CHECK THE ENGINE Check the oil level see 8 5 For convenience to transporting there is no fuel and oil in the engin...

Страница 14: ...in the neutral position to prevent sudden uncontrolled movement when the engine stars see 7 2 7 1 STARTING THE ENGINE 7 1 1 Move the fuel valve lever to the ON position 1 Fuel valve 2 ON 3 Drain bolt...

Страница 15: ...12 7 1 4 Move the throttle lever to the left...

Страница 16: ...arm before use 7 2 2 Move the shift handle to the desired position forward backward Engine Model Shift Gear R210 RG3 6 7 5Q D 2 and 1 forward position 0 neutral position R backward position 7 2 3 Sque...

Страница 17: ...ys release the clutch lever on the STOP position before operate with the shift handle If the soil fastened on the hoe blade do not try to remove it before Releasing the clutch lever Stopping the engin...

Страница 18: ...Normally you should stop the engine as followed steps after use 7 3 1 Move the throttle lever fully to the right 7 3 2 Move the engine switch to the OFF position 15 Clutch handle OFF ON OFF ON...

Страница 19: ...an both hoe blades Note Waiting up to 30 minutes after use to allow the engine to cool 7 3 5 Tighten loose screws and nuts 7 3 6 Check for loose or damaged parts If required change damaged parts 7 3 7...

Страница 20: ...in carbon monoxide a very toxic gas Burns from hot parts Let the engine cool and up to 30 minutes after use before touching Injury from moving parts Read the instructions before you begin and make sur...

Страница 21: ...Check Adjust 3 Valve clearance Check Adjust 3 Combustion Chamber After every 300 Hrs 3 Fuel tank Clean 3 Fuel filter Clean 3 Fuel tube Every 2 years Replace if necessary 3 1 Service more frequently wh...

Страница 22: ...o the oil filler neck as shown but do not screw it in then remove it to check the oil level 1 Oil filler cap dipstick 2 Upper limit 3 Lower limit 8 5 4 If the oil level is near or below the lower limi...

Страница 23: ...hrow it in the trash pour it on the ground or down a drain 8 8 LUBRICATION No service must be carried out before The engine has stopped The cable has been disconnected from the spark plug Lubricate th...

Страница 24: ...g will force dirt into the fibers 4 Foam air filter element Clean in warm soapy water rinse and dry thoroughly Dip the filter element in clean engine oil then squeeze out all excess oil 5 Excess oil w...

Страница 25: ...spark plug tighten 1 8 1 4 turn after the spark plug seats If installing a new spark plug tighten 1 2 turn after the spark plug seats NOTICE A loose spark plug can overhand and damage the engine Over...

Страница 26: ...ine and let it run until it stops due to lack of fuel 3 Change the engine oil if it has not been done for 3 months 4 Remove the spark plug and empty a little engine oil about 30 ml in the hole Crank t...

Страница 27: ...least 15 minutes before loading the machine on the transport vehicle A hot engine and exhaust system can burn you and can ignite some materials Keep the engine machine when transporting to reduce the...

Страница 28: ...System Transistorized Magneto Fuel Consumption g kw h 395 Fuel Tank Capacity L 3 6 Engine Engine Oil Capacity L 0 6 1650 1100 860 Tilling Width mm Tilling Depth mm 110 Start mode Recoil starter Trans...

Страница 29: ......

Страница 30: ......

Страница 31: ......

Страница 32: ...93004 U070720 0000...

Отзывы: