1
ATTENTIONS
● The guardian of child(ren) should read and understand the contents of this manual before using the
product, and guide child(ren) to use the product properly.
● In order to avoid personal injury, using tools including knives to do assembly should be done by an
adult.
● This product should be stored properly to prevent children from accidentally eating it.
● Properly dispose of the scrap materials when removing the parts, and keep them out of the reach of
children.
● Plastic bags are not toys, which may cause choking hazard. Please dispose of them properly after
disassembly.
● The plastic pieces contain pointed parts. Be careful when assembling and when moving the model
after assembly to avoid personal injury.
● Only alkaline or rechargeable batteries are applicable for the product.
● Different types of batteries or new and old batteries are not to be mixed, exhausted batteries should
be removed from the model.
● The battery should be replaced under adult supervision and be put inside the model with correct polar-
ity. Power terminals must not be short-circuited.
● Non-rechargeable batteries should not be recharged. Rechargeable batteries should be removed
from the model before charging and be recharged under the supervision of adult. Damaged or leaked
batteries are not to be charged.
● Only batteries of the same or equivalent type are recommended to be used.
● Wires and components must not be plugged into output sockets, and the toy must not be connected
to the power sources which are more than the recommended quantity.
● Do not expose battery to sun, or drop it. Keep the battery away from fire, heat and water.
● Skin and clothing to be washed immediately if you make contact with leaked liquid from the battery.
● For better preservation of rechargeable batteries, please regularly recharge it. Only a charger of the
same or equivalent type is recommended to be used.
ATTENTIONS
Содержание Ferrari SF1000
Страница 1: ...60 5 16 97000 Ferrari SF1000 2 4GHz ...
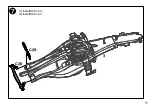
Страница 12: ...7 11 C29 3 C26 1 Install C29 on 3 2 Install C26 on 3 ...
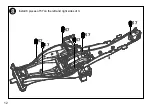
Страница 13: ...8 Install 6 pieces of 57 on the left and right sides of 3 12 57 57 57 57 57 57 3 ...
Страница 15: ...10 14 C38 C30 C31 4 1 Install C38 on 4 2 Install C30 and C31 on 4 ...
Страница 16: ...11 15 C28 C27 4 Install C27 and C28 on 4 ...
Страница 17: ...12 16 4 B14 B15 Install B14 and B15 on 4 ...
Страница 18: ...17 13 4 B13 59 1 Install 59 on 4 2 Install B13 on 59 ...
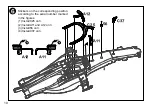
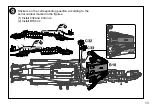
Страница 21: ...20 16 61 62 4 1 Install 61 on 4 as shown in the figure 2 Install 62 on 4 as shown in the figure ...
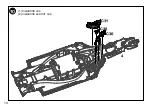
Страница 23: ...17 18 22 60 B16 4 1 Install 60 on 4 as shown in the figure 2 Install B16 on 4 as shown in the figure ...
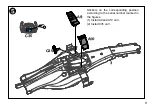
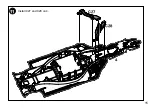
Страница 24: ...19 23 A5 C39 4 1 Install C39 on A5 2 Install A5 on 4 ...
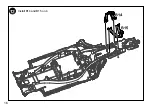
Страница 25: ...20 24 4 B21 B22 Install B21 and B22 on 4 ...
Страница 27: ...22 26 Please press the wire into the gap Plug in respectively while matching by same colours and same shapes ...
Страница 28: ...17 23 27 Combine the assembled models as shown in the figure ...
Страница 35: ...34 7 65 55 59 39 35 31 33 43 41 45 63 47 49 13 21 37 ...
Страница 36: ...35 6 51 55 25 30 29 23 13 54 12 5 4 ...
Страница 37: ...36 4 52 22 23 14 15 24 11 28 42 40 44 62 6 10 2 1 5 53 9 26 25 39 43 41 63 3 ...


