


5
Features
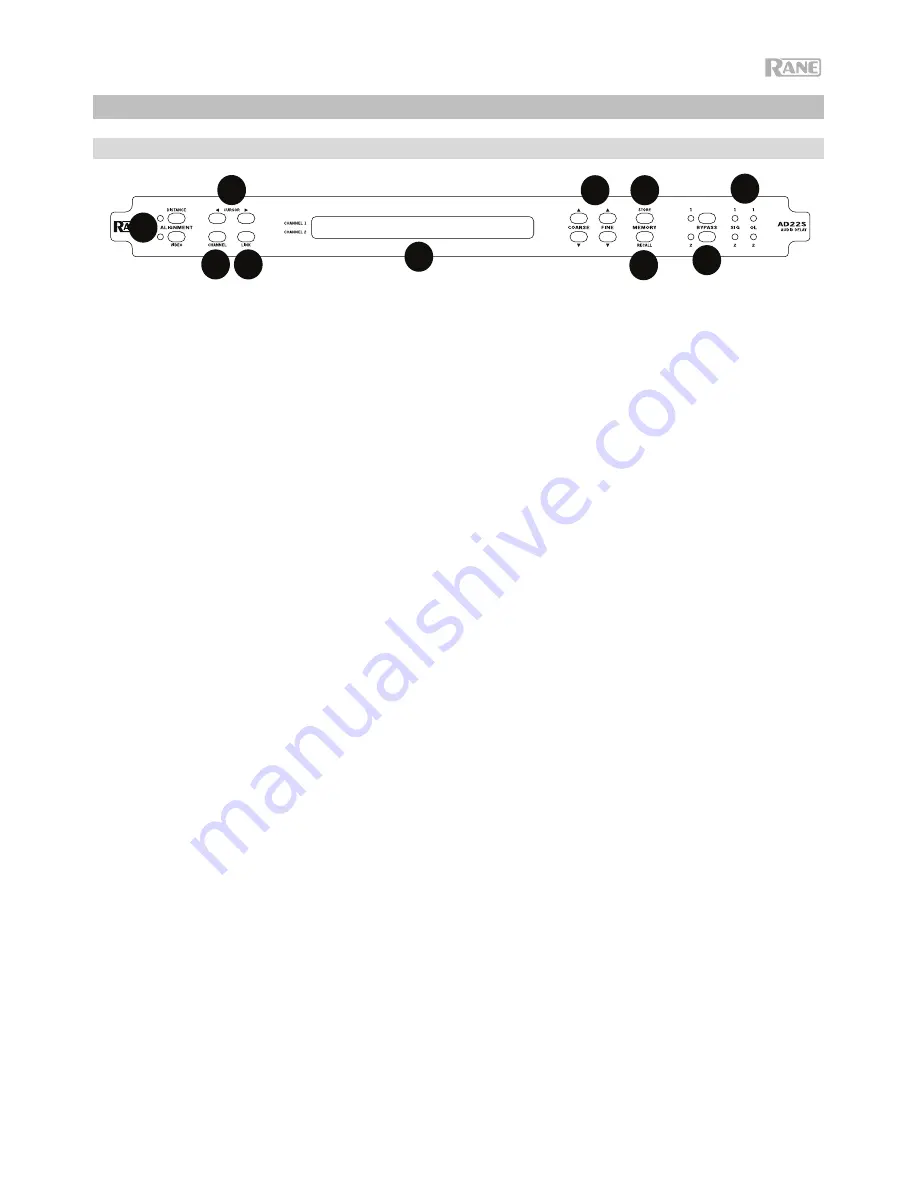
Front Panel
1.
Alignment Mode Buttons:
Press Distance for delay in feet, meters, or milliseconds. Press Video for alignment
by frames or milliseconds.
2.
Channel Button:
Press this to switch the cursor location between channels. This button has no effect if the
channels are linked.
3.
Link Button:
Links channels together so changes made affect both channels at once. To treat the channels as
a stereo pair, make sure settings for each channel are identical before pressing the Link button. Press the Link
button again to unlink.
4.
Cursor Buttons:
Press
◄
or
►
cursor to select the value for editing.
5.
Coarse and Fine Controls:
These buttons affect the setting that is currently highlighted to change settings or
delay values. Coarse increments or decrements delay by 1 ms/feet/meters or 1.0 frames. Fine increments or
decrements delay by 0.1 ms/feet/meters or 0.5 frames.
6.
LCD Display:
Shows the current readout of settings for each channel. Fields may be selected using the
Cursor buttons and changed using the Coarse / Fine controls.
7.
Store Button:
Stores the Delay configuration into current memory for the selected channel. If the asterisk
*
character is shown to the right of the display, the current value does not match the memory location.
8.
Recall Button:
Copies the stored delay setting into the active channel. If channels are linked, then both are
recalled.
9.
Bypass Buttons:
Toggle relays for each channel. If the LED is on, bypass is enabled and the device functions
like a wire. If bypass LED is off, the channel is active.
10.
Signal / Overload LEDs:
SIG LEDs indicate signal presence on the input. OL LEDs light red when an input
signal is near the maximum level and may clip.
1
2 3
4
5
6
7
8
9
10
Содержание AD22S
Страница 1: ...AD22S User Guide English 3 9 Appendix English 10...
Страница 2: ...2...
Страница 9: ...9 Appendix English Block Diagram both channels identical...
Страница 11: ...11...
Страница 12: ...rane com Manual Version 1 0...


