Note:
These adjustments are normally made only
when related parts have been installed or the
machine is knocked out of alignment. Inspect all
other adjustments before resorting to realigning
the needle and awl.
Alignment of the Needle - R
IghT
TO
L
eFT
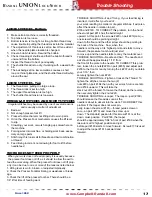
• Remove the bottom cover UL-300/UL-301. This is on the bottom left side of the machine. You will see 3 nuts (UL-10),
once you take off the cover. The two center nuts will adjust the needle left or right.
• First, on the bottom left of the machine open the screw (UL-13) on the needle disk (UL-214). You, then need to open the
screw (UL-161) on the back of the machine (see the instruction section, “Adjusting The Needle Front To Back”). You do
this so when you perform the following adjustments, the machine will not bind. First, you need to open the two nuts (UL-
10), both on the front end of the casting and on the back end of the casting.
• NOTE: You will need only a slight adjustment here. If you want to move the needle to the left, just open the right bolt
(Ul-11) (of the three on the front of the casting) counter-clockwise 1/8 turn and then turn the left screw equally. You need
to move the bolts on the back end of the casting equally clockwise. Also, once adjusted, tighten all the nuts (UL-10), both
front and back ends.
• NOTE: when you move the needle left or right, you need to re-adjust the alignment of the shuttle point (UL-276) to the
needle. If the thread breaks and jumps inside of the bobbin, there are 2 reasons for this: A) You do not have enough
R
andall
UnIOn
l
Ock
-S
tItch
Alignment
Since 1858
technical Support
1-800-327-9420
12
Inspecting the Alignment
Note:
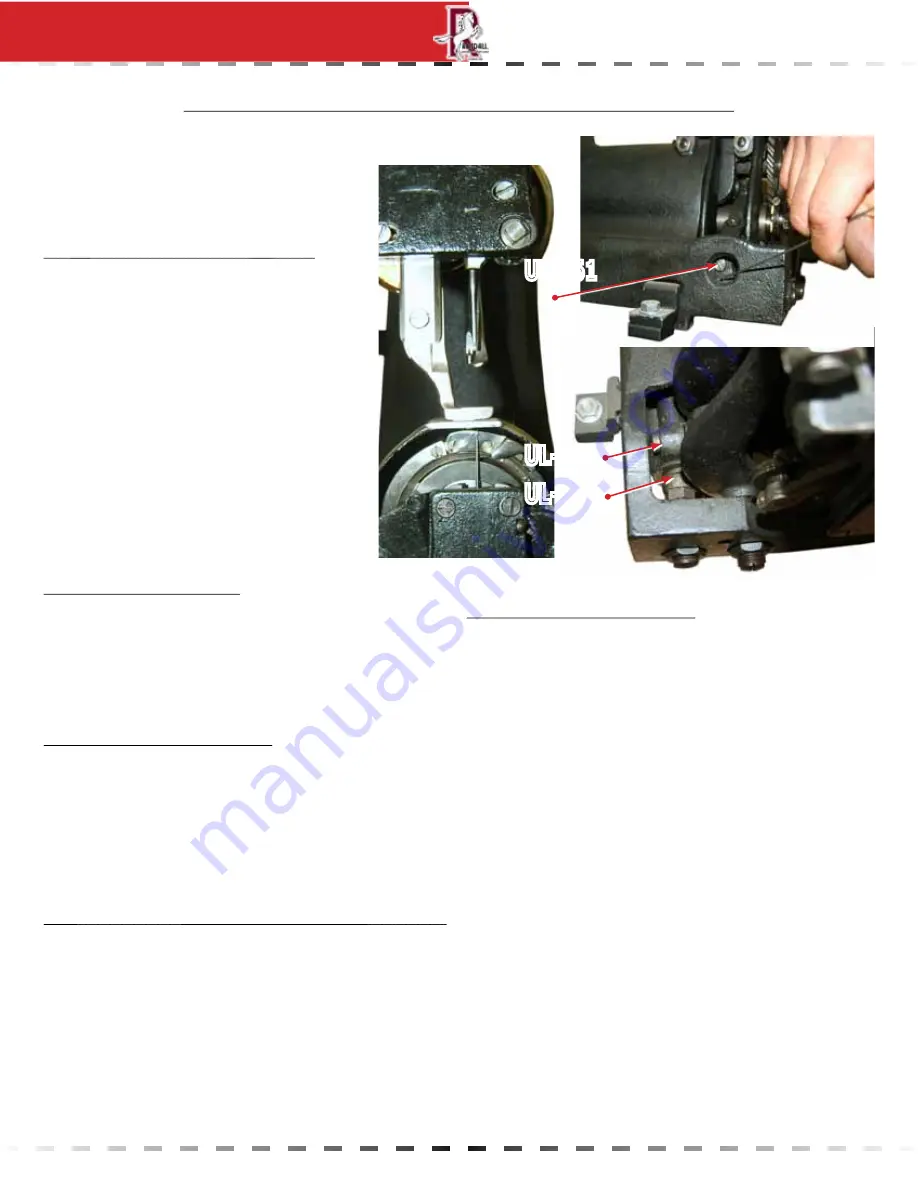
Before inspecting or changing the
alignment, insure that the needle or awl are not
bent.
•
when the needle and awl are perfectly
aligned, the needle should comes up
through the material without flexing or
hitting the sides of the awl hole.
•
To see the alignment, set a piece of paper
under the foot. Turn the hand wheel
toward you until the awl makes a hole
in the paper. Again turn the hand wheel
and watch the position of the needle as it
ascends through the awl hole.
•
If the needle appears to rip the paper
either in front or back of the awl hole,
adjust the alignment with the procedure
below.
Needle - F
RONT
TO
B
ACk
Before changing this alignment, make sure the awl is ad-
justed properly.
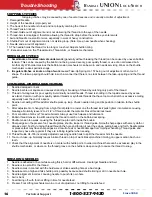
• Turn the hand wheel until the needle starts to ascend.
• Locate the cutout, on the bottom rear corner, left side of
the machine.
• Insert a screwdriver through the cut out and loosen screw
Ul-161.
• Apply a wrench to the end of the nut, located to the left of
the bracket.
• This nut is part of the rocking shaft (UL-223). If you turn
the wrench away from you, the needle will move forward.
If you move the wrench towards you, the needle will move
back.
• After setting, tighten screw UL-161.
A
LIgNMeNT
OF
The
N
eedLe
ANd
A
wL
UL-161
UL-223
UL-161
Awl - F
RONT
TO
B
ACk
Both the needle and awl should be approximately 1/16” from
the front edge of the hole in the needle plate.
•
The awl bar can be aligned by adjusting the gibs (UL-
77/78) with the slotted screws on the front face of the
head.
•
There should be no play awl bar, but do not over tighten
the gibs which will cause the action to bind
Needle - F
RONT
TO
B
ACk
•
If there is play in the needle bar adjust the gibs (UL-
197r/l). Do not over tighten the gibs.
•
Adjust the position of the shuttle housing (UL-235), by
loosening the four nuts (Ul-229) and move the housing
forward or back by turning the screws Ul-237.
•
once the needle and awl is approximately 1/16” from the
front edge of the hole in the needle plate, secure the nuts
(Ul-229).


