manualshive.com logo in svg
background image

QAMP20 • 6  

REQUIRED, NOT SUPPLIED: 


ˆ

       Ramsey case, knob and panel set, Ramsey part no. CQRP 

ˆ

       Matching input and output cables to existing QRP transmitter  

ˆ

       12 volt DC power supply 3 amp rating  

ˆ

       Proper dummy load or resonant antenna 


"THE RAMSEY LEARN-AS-YOU-BUILD ASSEMBLY STRATEGY"


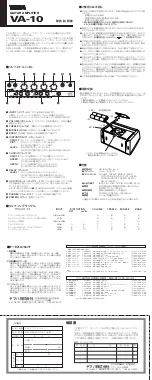
Take a look at the parts layout diagram. There is quite a lot to the construction 
of the QAMP20. It's easier than it seems once you get going, especially after 
you have installed a few of the "landmark" components. Once these "landmark" 
components are placed, other parts’ positions are referenced to them, and 
construction goes quite smoothly. This will help in relating from one part to 
another what specific holes it may require on the board, and that part's 
orientation. In addition, we will discuss the purpose of most components or 
groups of components as we go along. This is the Ramsey Learn-As-You-Build 
kit assembly philosophy.  Be sure to read through all the steps, and check the 
boxes as you go to be sure you didn't miss any important steps. Most of the 
problems we find here at the factory are due to faulty assembly, no matter how 
experienced the builder may be: it’s especially tough to tell a 30 year 
experienced ham that he goofed! Before you run the circuit, check all diodes 
and polarized capacitors for proper orientation.    
 

TIPS AND NOTES: 


Use a good soldering technique - let your soldering iron tip gently heat the 
traces to which you are soldering. Heat both wires and pads simultaneously. 
Apply the solder on the iron, lead, and the pad when pad and wire is hot enough 
to melt the solder. The actual joint should look like a drop of water on paper 
(somewhat soaked in).   
 
Parts are mounted on the top side of the board. This is the side that has no 
traces or pads on it.   
 
Part orientation - All parts in this kit are mounted at 90 degree angles, meaning 
parts are either parallel or perpendicular to the sides of the board.   
 
Part installation - When parts are installed, the part is placed flat to the board, 
and the leads are bent on the backside of the board to prevent the part from 
falling out before soldering. The part is then soldered into place, and the spare 
leads are removed. Make sure lead lengths are as short as possible when 
dealing with the RF section of this kit. 


Содержание QAMP20

Страница 1: ...elay automatically switches between receive and transmit Runs on 12 volts DC at 2 to 4 amps ideal for field day or battery operation Multistage low pass filter for a clean signal Operates all modes CW...

Страница 2: ...r HR Series HF All Mode Receivers QRP Series HF CW Transmitters CW7 CW Keyer CPO3 Code Practice Oscillator QRP Power Amplifiers RAMSEY MINI KITS Many other kits are available for hobby school Scouts a...

Страница 3: ...ctions 7 Initial tests 12 Verifying RF output power 13 Troubleshooting tips 15 Using the QAMP20 16 Parts layout diagram 17 Schematic diagram 18 Ramsey kit warranty 19 KIT ASSEMBLY AND INSTRUCTION MANU...

Страница 4: ...P amplifier is very simple with most of the magic being done by just a few parts the pair of MOSFET transistors and the ferrite wideband transformers Transformer T2 matches the 50 ohm amplifier input...

Страница 5: ...70 ohm resistors red violet brown R8 9 1 51 ohm resistor green brown black R10 1 2 2 K ohm resistor red red red R11 1 5 K potentiometer marked 502M R4 SEMICONDUCTOR DEVICES 1 Zener diode 6 2 volt gray...

Страница 6: ...the problems we find here at the factory are due to faulty assembly no matter how experienced the builder may be it s especially tough to tell a 30 year experienced ham that he goofed Before you run...

Страница 7: ...RCA phono jacks Solder all 4 pins on each securely as these connectors will be subjected to some stress when coax cables are connected to them 3 Install J3 PC mount DC power jack 4 Install relay K1 N...

Страница 8: ...or proper operation Generally capacitors have their lead marked with a black stripe while PC boards have the hole indicated 22 Install D1 6 2 volt Zener diode gray body with a black band This diode pr...

Страница 9: ...nother 180 f disc capacitor marked 180 or 181 38 Install wire jumper JMP1 Use a scrap piece of component lead wire 39 Locate the MOSFET power transistors and prepare the leads for insertion into the P...

Страница 10: ...t or a magic marker We don t want to confuse it with the other two toroid coils wound just before 43 Winding T2 Locate the smaller of the two 2 hole ferrite cores Cut off one 11 inch length of enamele...

Страница 11: ...le or too much then you have not wound the core correctly Tin each end with solder as before Tin all the way up to the core body 46 Cut off another length of wire 9 inches long Wind 1 turn through the...

Страница 12: ...for testing you ll need the following 1 Multimeter capable of measuring voltage and current 2 12 volt DC power source of at least 3 amp capacity 3 Suitable dummy load and resonant antenna 4 QRP trans...

Страница 13: ...r transmitter with good amateur practice YOUR POWER SUPPLY AND RF OUTPUT POWER For optimum performance one or two volts of extra DC supply power can make quite a difference in any RF power amplifier F...

Страница 14: ...m 2 to 25 volts RMS depending on various factors Typically 1 watt power levels are achieved in the 5 to 7 volts RMS range 5 watts at 12 to 15 volts and 10 watts at 20 to 25 volts A good test bulb for...

Страница 15: ...e for this occurring Any prolonged parasitic emissions may also overheat and destroy other components in the amplifier TROUBLESHOOTING HINTS The QRP power amplifier is very straight forward and simple...

Страница 16: ...r QRP operation and an amplifier is not a band aid for a poor antenna system For maximum performance a QRP station must include the following 1 A resonant antenna dipole or quarter wave vertical 2 Goo...

Страница 17: ...keyer etc The controls are easily mounted at one end of such a box It may be necessary to cut away the molded posts which secure the tape itself These storage boxes come in several styles so pick one...

Страница 18: ...QAMP20 18...

Страница 19: ...h be assured that the 1K ohm resistors are actually the missing 10 K parts Hum m m I guess the red band really does look orange Ramsey Electronics project kits are packed with pride in the USA If you...

Страница 20: ...Quality Electronics Kit was designed and packed in the USA REQUIRED TOOLS Soldering Iron Ramsey WLC100 Thin Rosin Core Solder Ramsey RTS12 Needle Nose Pliers Ramsey MPP4 or RTS05 Small Diagonal Cutte...

Отзывы: