iTANK GT1670 User Manual
3
4. Hardware Installation
5. Description of HDD Indicators
Status
HDD Status Light
Data access
Blue light flashing
HDD idle
Blue light always on
Sleep mode
Blue light off
Please follow the instructions below to complete the hardware installation.
1. Place the system on a stable surface. Ensure that it is well ventilated without blockage to the vent
and kept away from areas near water and damage prone areas.
4. Once the hard disk is installed, slide the enclosure into the system and close the handle.
5. Depending on the computer's USB port type, select the corresponding USB cable from the
accessory to connect the computer to the GT1670's USB 3.1 Type-C port.
6. Connect the power cord to the power adapter, connect the connectors at both ends to the GT1670
and the power socket, and then start the GT1670.
7. After the computer is turned on, your operating system will automatically recognize the storage
capacity; after the recognition is successful, format the system according to your desired storage
format and follow the instructions of the operating system. After the hard disk is formatted, the
GT1670 can be used directly.
Lock
Lock
Unlock
Unlock
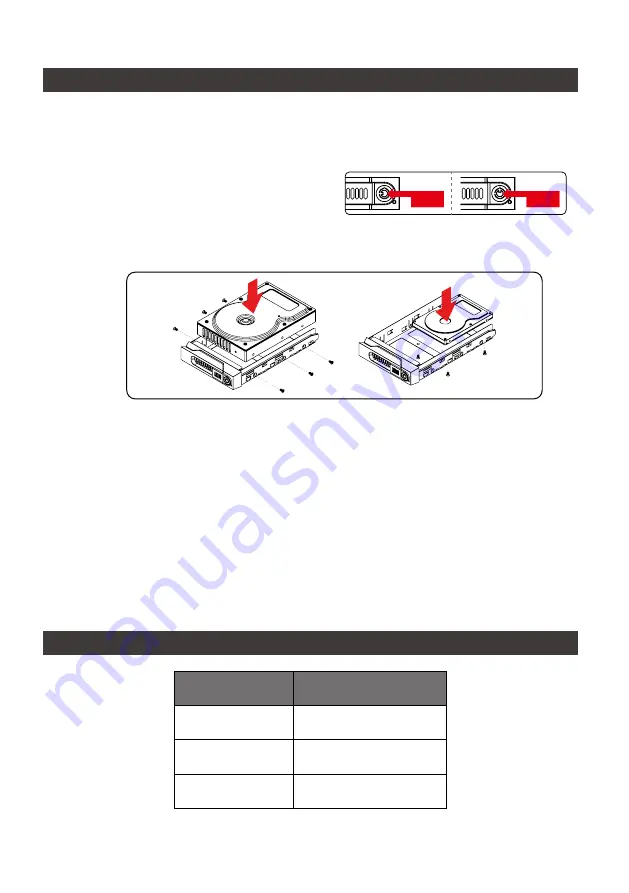
2. Use the key included in the accessory kit to
unlock the HDD tray key lock, and then press the
HDD tray key lock. The removable drive tray will
pop open and extract the removable drive tray.
3. For 3.5" HDD/SSD, please secure it by use six the larger screws included in the accessory kit.
For 2.5" HDD/SSD, please secure it by use four the smaller screws included in the accessory kit.
※
If you are using a USB 3.2 C to A cable, the Type-A on the host side needs to be USB 3.2 Gen2
for best access performance.


