


28
With the given example here:
share0
,
user1
,
user2
, and
user3
; it works like
below.
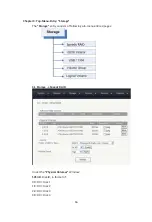
Inside the share folder ‘
share0
’, there are the sub-folders: ‘
user1
’, ‘
user2
’, and
‘
user3
’; the directory looks like this:
When
user1
logins to the share, user1 will see it like this:
In here, the “
\\home
” and “
\\user1
” and “
\\share0\user1
” are actually the same
folder, it is just being displayed by different names at different locations. The
user1
will have the full access permissions to them by default. If
user1
navigates
to
\\share0
, user1 will see all 3 sub-folders:
\\share0\user1
,
\\share0\user2
,
\\share0\user3
; but only has access rights to the
\user1
sub-folder. The access
rights for
user1
to other user’s home folder can be granted by “
Service
→
Access
Control
,” which will be discussed in a later section of this user guide.
When
user2
logs into the share,
user2
will see it like this:
In here, the “
\\home
” and “
\\user2
” and “
\\share0\user2
” are actually the same
folder, it is just being displayed by different names at different locations.
Notice now “
\\user1
” has been replaced by “
\\user2
” when
user2
logins.
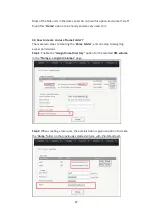
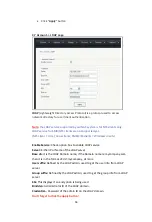
Step 3
: Assign user access permissions to the volume/share in the “
Services
→
SMB/CIFS
” page. Please refer to the
Top-Menu Entry –Services
section for more
details.
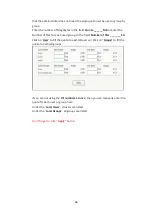
4.4 Account
→
Local Group
Local Group
is used to create a group(s) of local users, so that later on, the
administrator can simplify the process on assigning Access Rights for a group of


