E-19
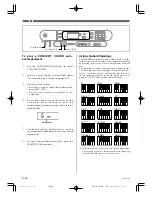
4.
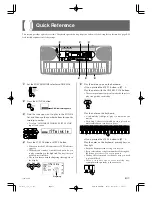
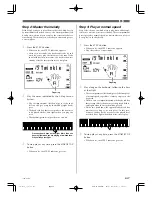
Use the number buttons to input the 2-digit
rhythm number for the rhythm you want to use.
Example:
To select “37 SAMBA”, input 3 and then 7.
• Be sure to always specify a 2-digit number.
• If you discover a mistake before you input the second
digit, press the RHYTHM button to return to the
previously set rhythm number.
• You can change to another rhythm even while the
current rhythm is sounding.
5.
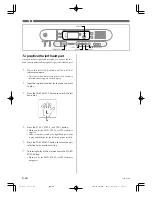
Press the START/STOP button to start play of the
rhythm.
• When you do, the selected rhythm starts to sound.
6.
Use the TEMPO buttons to adjust the tempo of
the rhythm.
• Each time you press one of the TEMPO buttons while
the tempo value is displayed, the tempo setting
changes one step, within the range of 040 to 255.
• The initial default tempo setting when you turn on
power is 120.
• After displaying the current tempo setting by pressing
the TEMPO button in step 6, you can also input the
tempo setting you want by inputting a three-digit
value with the number buttons.
• Holding down either of the TEMPO buttons changes
the tempo setting at high speed.
• To reset the tempo to the standard value of each
rhythm, press both TEMPO buttons.
7.
To stop rhythm play, press the START/STOP
button again.
Using auto-accompaniment
This keyboard features 50 accompaniment patterns that let
you add full accompaniments to your performances
automatically. With auto-accompaniment, part of the
keyboard is reserved as an accompaniment keyboard. As you
play your chords on the accompaniment keyboard, the
accompaniment pattern adjusts automatically to follow the
progression you play.
You get a choice between two different methods for chord
play. FINGERED lets you play chords as you normally do,
while CONCERT CHORD makes it possible to play fully
formed chords with one finger.
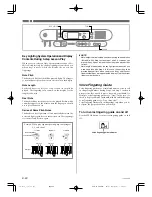
S amb a
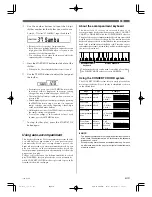
About the accompaniment keyboard
The lower (left) 1.5 octaves are reserved for use as an
accompaniment keyboard whenever you select CONCERT
CHORD or FINGERED with the POWER/MODE selector.
The panel above the accompaniment keyboard keys is marked
with the names of the notes they play. The remainder of the
keyboard (the part that is not included in the accompaniment
keyboard) is called the melody keyboard. Please be sure to
remember these terms, because they will be used throughout
the rest of this manual.
Accompaniment
keyboard
Melody keyboard
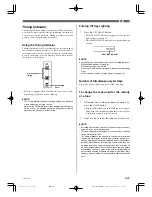
The entire keyboard can be used for melody play while
the POWER/MODE selector is set to NORMAL.
( )
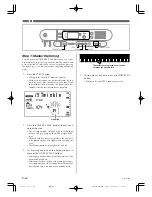
Using the CONCERT CHORD system
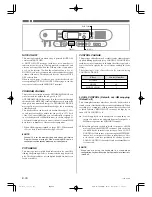
The CONCERT CHORD system lets you easily play the four
main types of chords. Play of chords is simplified as shown
in the chart below.
Example
C
(C Major
Chord)
Cm
(C Minor
Chord)
C7
(C Seventh
Chord)
Cm7
(C Minor
Seventh
Chord)
Keys
Press
one
accompaniment
key
Press
two
accompaniment
keys
Press
three
accompaniment
keys
Press
four
accompaniment
keys
Type
Major
chord
Minor
chord
Seventh
chord
Minor
seventh
chord
CC DE
FF
E
GA
A
B
B
CC DE
F
E
CC DE
FF
E
GA
A
B
B
CC DE
F
E
CC DE
FF
E
GA
A
B
B
CC DE
F
E
CC DE
FF
E
GA
A
B
B
CC DE
F
E
❚
NOTE
• The bottom (leftmost) note that you play determines the name
of the chord. If the bottom note is a C for example, the keyboard
produces a C chord.
• When pressing more than one accompaniment key, it makes
no difference whether the keys to the right of the bottom note
are white or black.
648U-E-021A
LK-1261_e_14-21.p65
04.6.15, 3:33 PM
Page 19
Adobe PageMaker 6.5J/PPC
Содержание 42-4068
Страница 42: ...648U E 042A LK 1261_e_A1 A5 p65 04 6 15 3 34 PM Page 6 Adobe PageMaker 6 5J PPC...
Страница 43: ...648U E 043A LK 1261_e_A1 A5 p65 04 6 15 3 34 PM Page 7 Adobe PageMaker 6 5J PPC...
Страница 44: ...648U E 044A LK 1261_e_A1 A5 p65 04 6 15 3 34 PM Page 8 Adobe PageMaker 6 5J PPC...
Страница 45: ...648U E 045A LK 1261_e_A1 A5 p65 04 6 15 3 34 PM Page 9 Adobe PageMaker 6 5J PPC...

